10 Bathroom Wall Tile Ideas
Discover the amazing ways that you can use bathroom wall tiles to create the luxury feel for your bathroom.
Whether you have a large or small bathroom, one of the most important choices you have to make during your bathroom design is the tile. You need to think about color, size, texture, and material. Get one of these elements wrong, and your bathroom tile could be a nightmare to live with.
These bathroom wall tile ideas will help you choose the perfect tile for not only your bathroom wall tile, but the tile you could use on the bathroom floor, shower enclosure, accent wall, and backsplash.
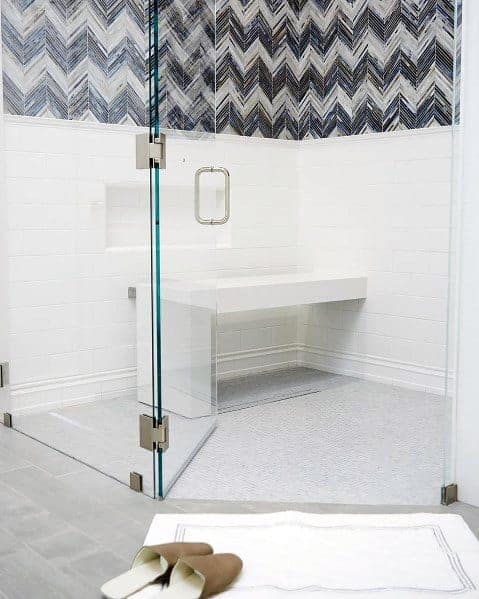
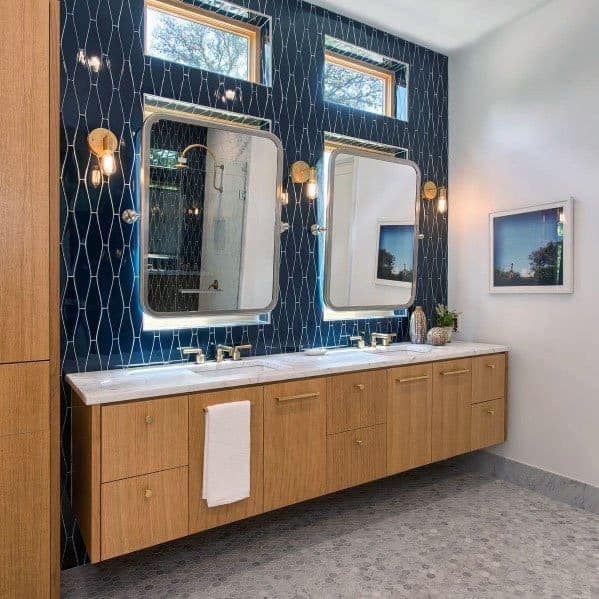
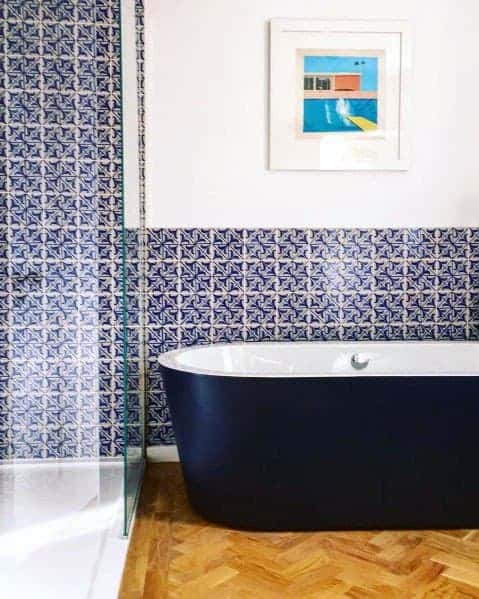
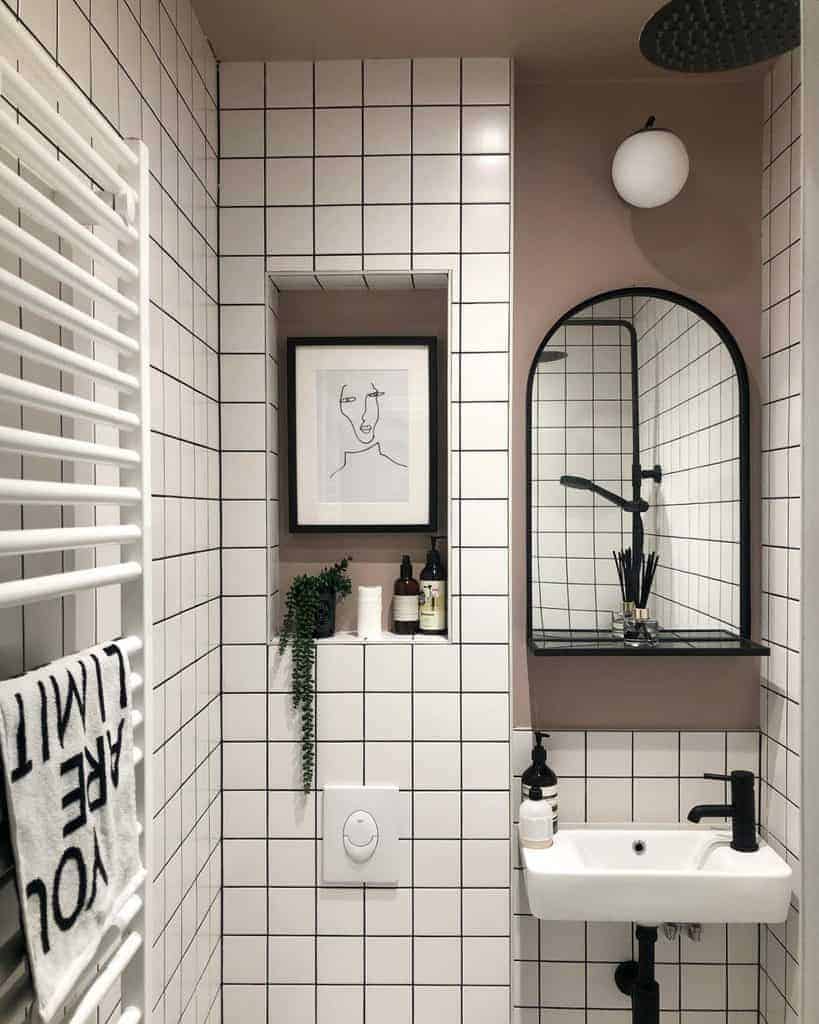
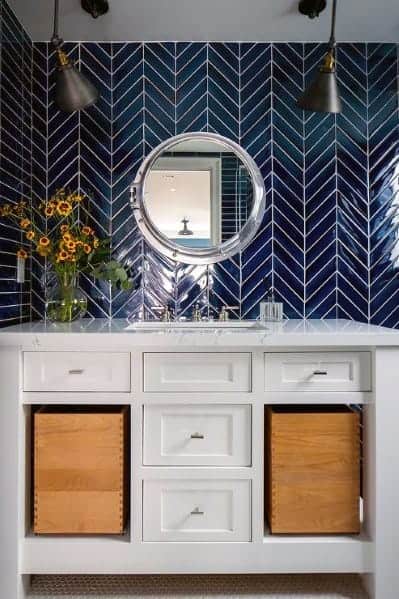
1. Create a Striking Tile Accent Wall
An accent wall is an easy way to add color, texture, and design to your bathroom. While you could paint a wall, the bathroom is a natural place to create an accent wall out of tile. It will also give you a chance to use that statement tile you fell in love with but haven’t found a use for yet. Pick a wall that makes sense to use as an accent wall. This could be the wall behind the vanity or some other wall with two inside corners framing it.


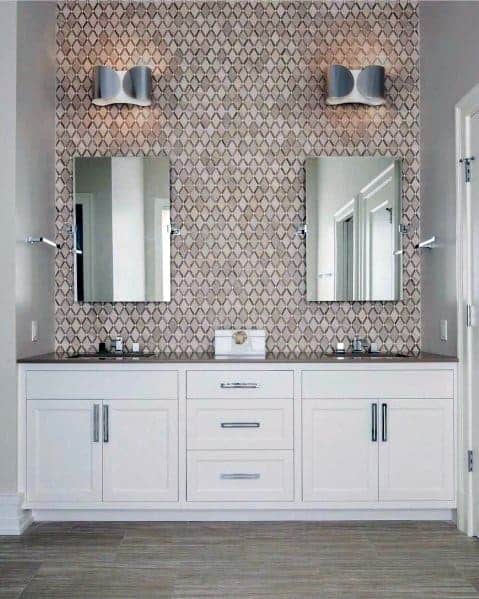
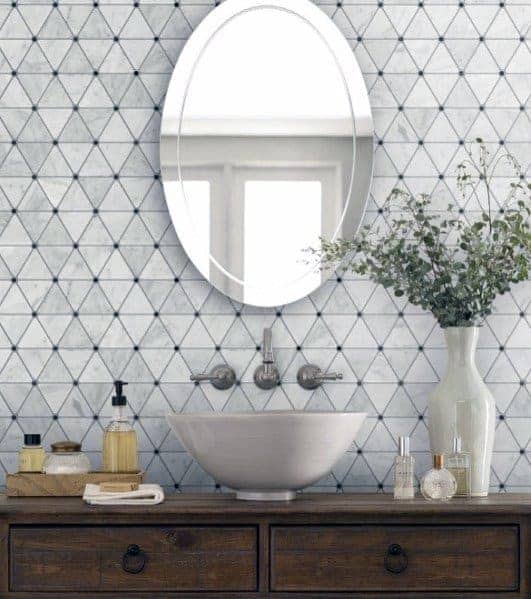
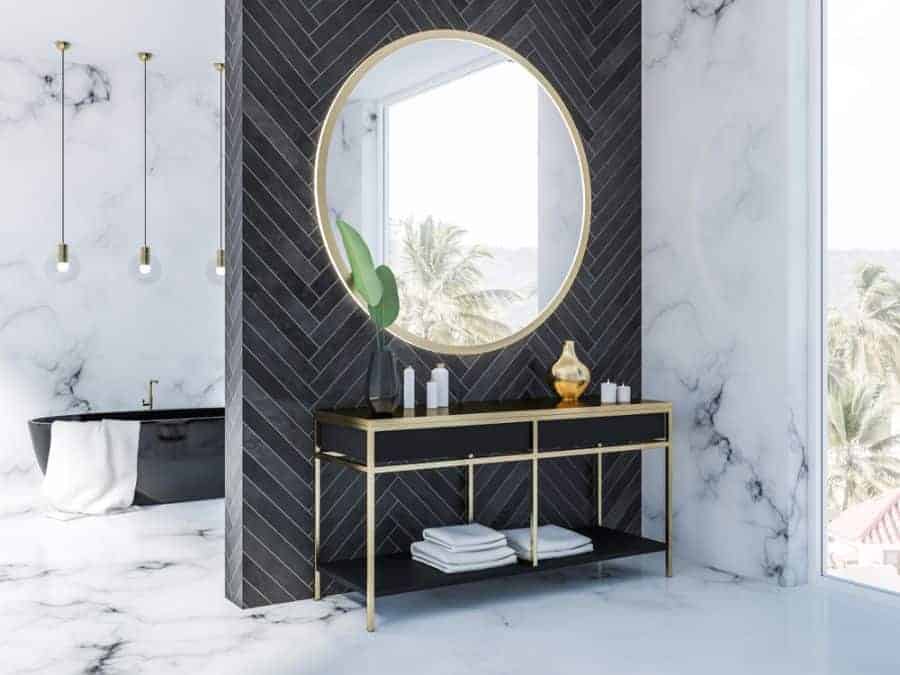
When choosing your accent tile, you have two options. You could pick a more subtle design that’s a neutral color or made of a natural material. This will add elegance and give your bathroom a modern feel. Your other option is to pick a colorful and bold tile. Maybe it’s handmade zellige tiles, scalloped, or hexagon shaped tile.
Scale won’t limit your design when it comes to accent walls, and that’s one of their greatest advantages. You can use a very small or large tile that’s completely out of scale with the rest of the bathroom, and it can look stunning.
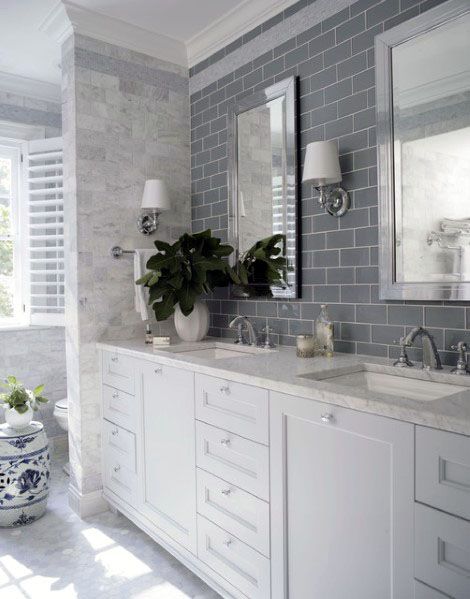
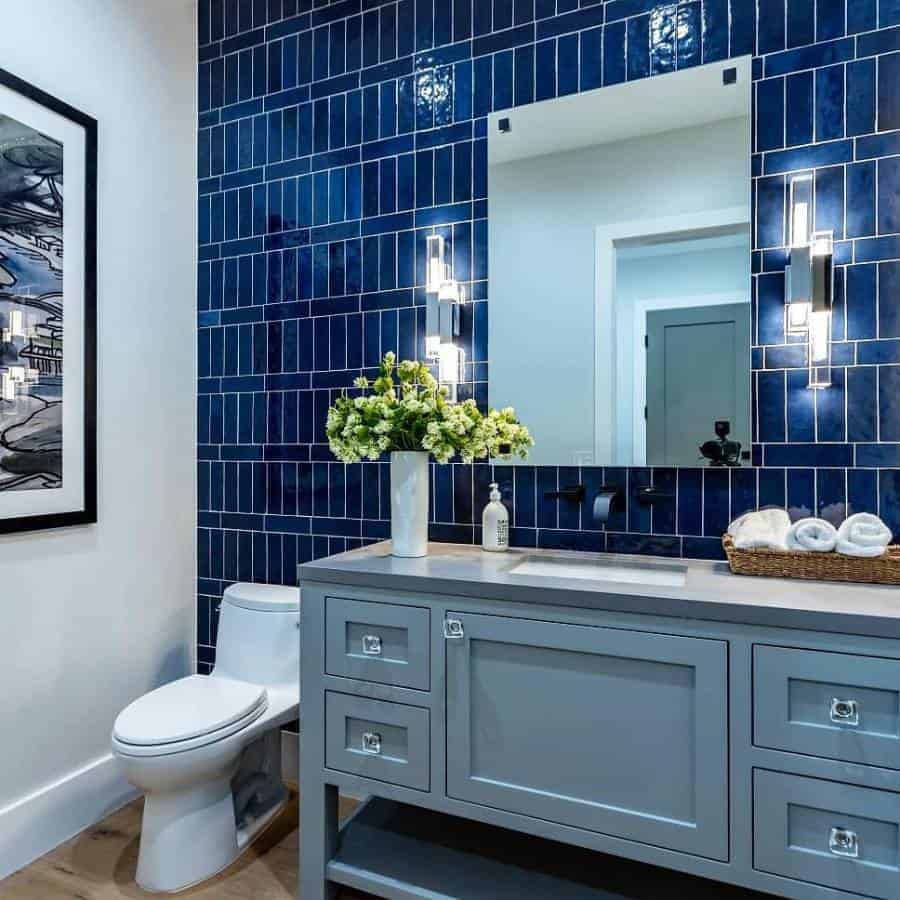
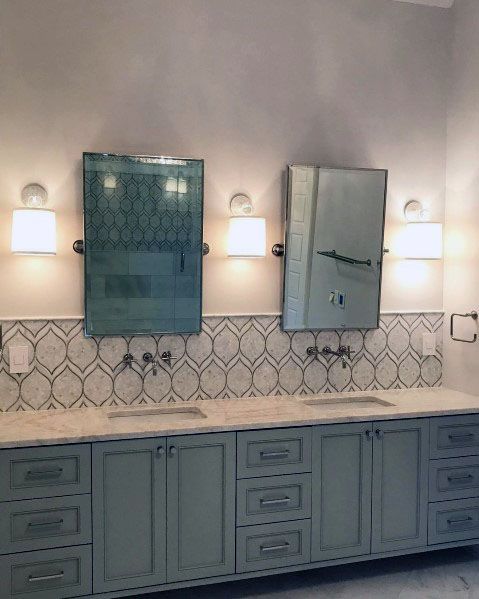
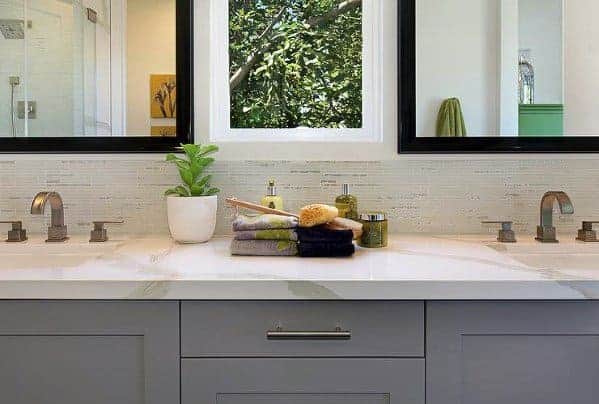
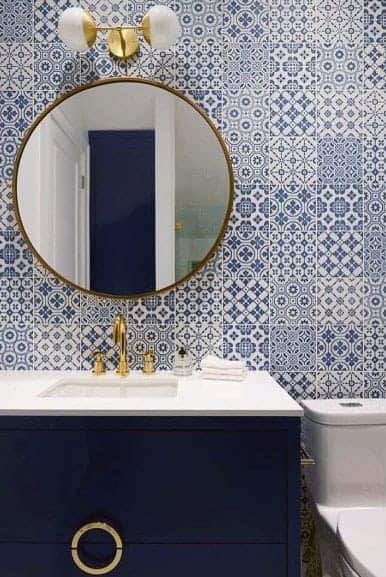
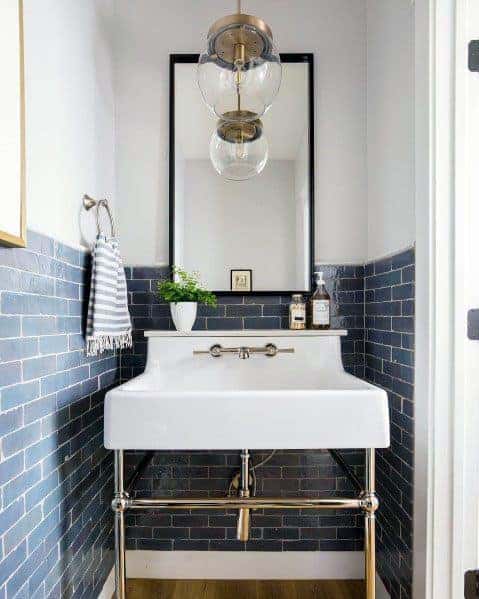
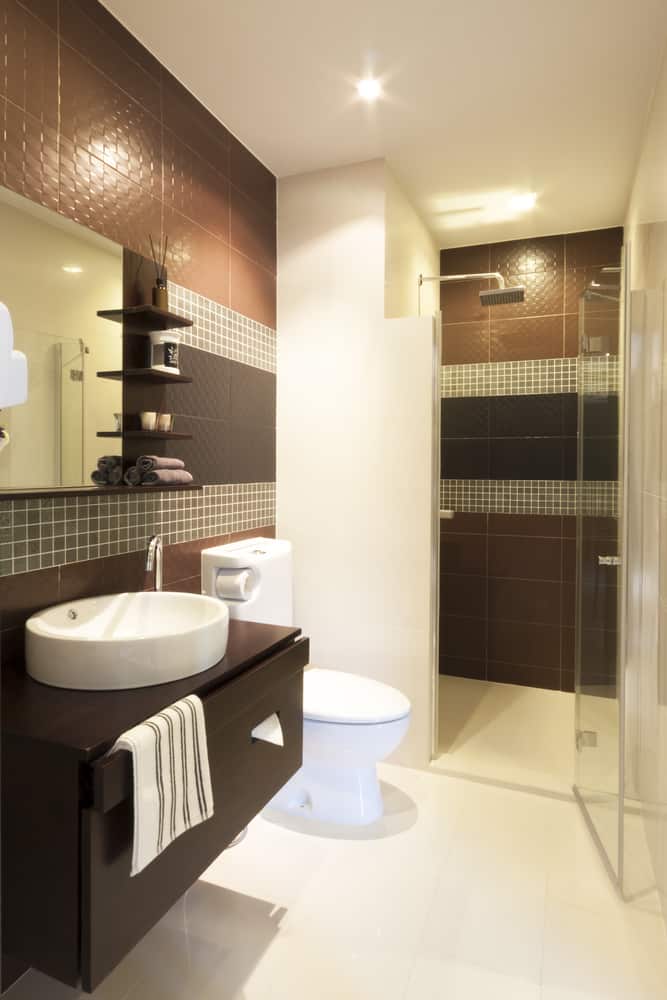
2. Design a Protective and Stylish Tile Backsplash
Using tile for your backsplash protects your bathroom wall while also giving you a chance to create a stunning visual effect. This is why it’s one of the more popular accent wall choices. If you don’t plan to tile the entire wall, you can opt for a more decorative tile. Plan to have your tile come up the wall at least a foot from the countertop. This will give you plenty of splash protection and look visually balanced.


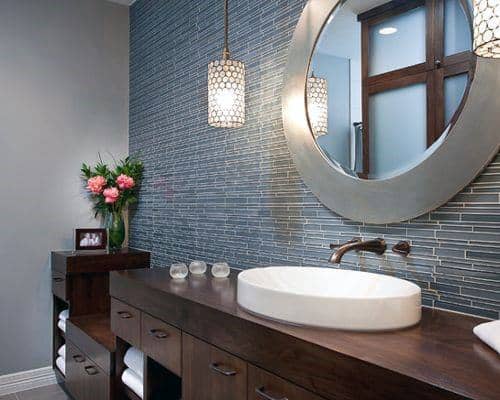
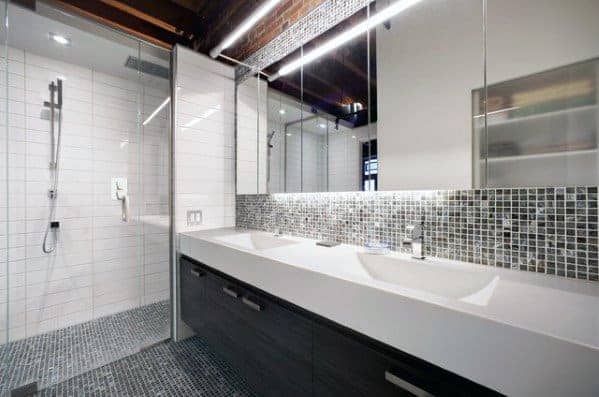
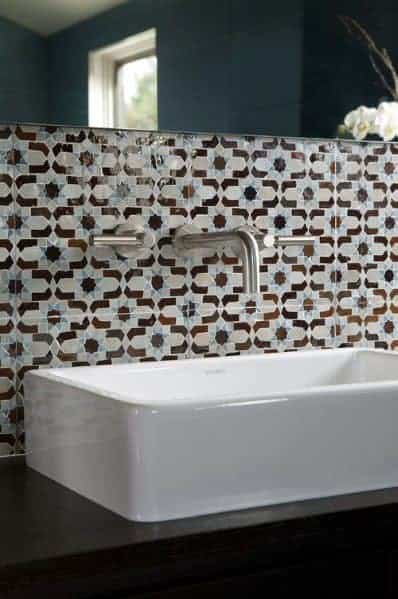
This is your chance to use a patterned tile, penny, mosaic, or natural stone. The tile design is crucial because people will focus on it the entire time they’re washing their hands. So whatever you choose needs to hold up to scrutiny from close up.
When planning your backsplash tile, be sure to think about how you’re going to design the rest of the wall. The tile needs to complement and not compete with the vanity mirror and lights you plan to use. This could mean the tile only comes up to the bottom of your vanity mirror, or perhaps it extends up halfway behind it. If you plan to do the entire wall, remember that you’ll need to drill through the tile to mount anything on it.
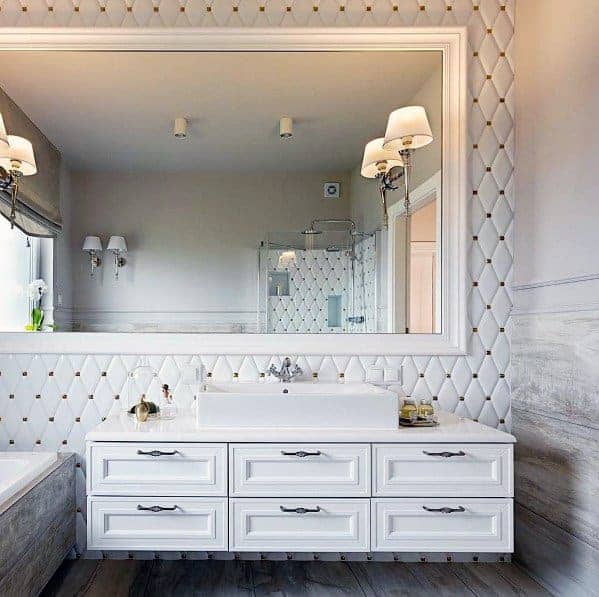
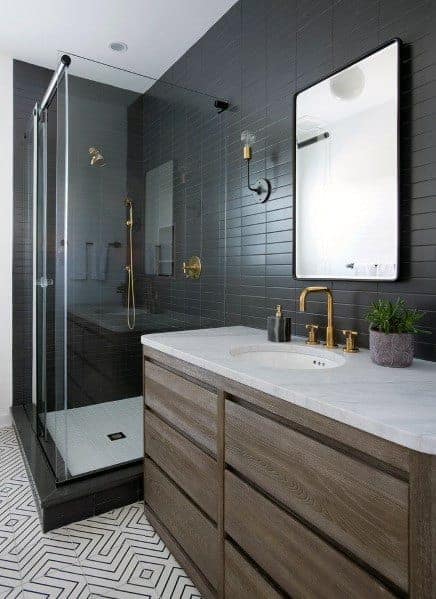
3. Embrace Modern Tile Trends
There was a time when contemporary tile meant glass tile. Those days have passed and now contemporary means using oversized tile in neutral or natural tones. If you have your heart set on glass tile, limit your use to the accent wall or border. When choosing your tile, focus on large rectangle or square options. Then the grout lines between the tiles should be minimal.


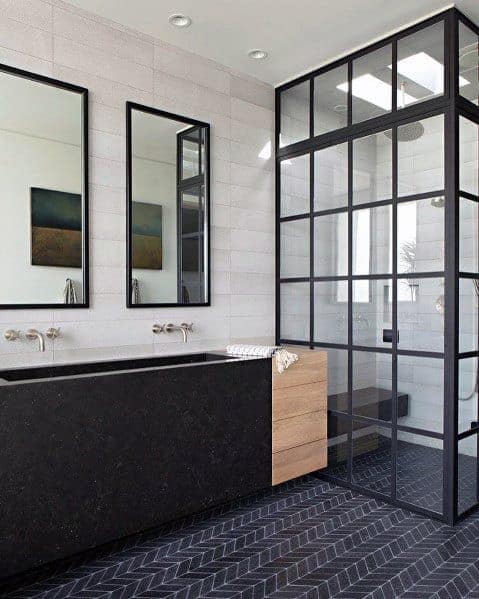
Most modern wall tile design consists of ceramic tile. It’s durable and has a waterproof coating. However, if you prefer porcelain tile, you’ll still be able to find several options.
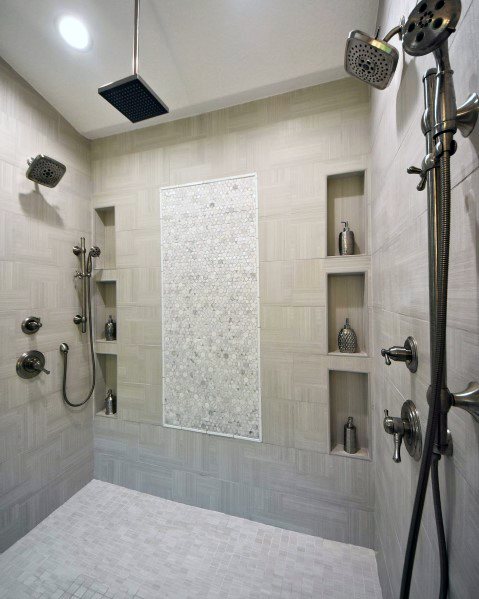
Plan to use your contemporary tile from floor to ceiling in your bathroom tile design. Modern bathrooms will use the same tile throughout the entire bathroom, starting on the wall and continuing throughout the shower area. This is especially important in a small bathroom when breaking up the space can make it feel smaller. However, if you have a large master bathroom with a walk-in shower, you can use your contemporary tile to define the shower stall space from the rest of the room.
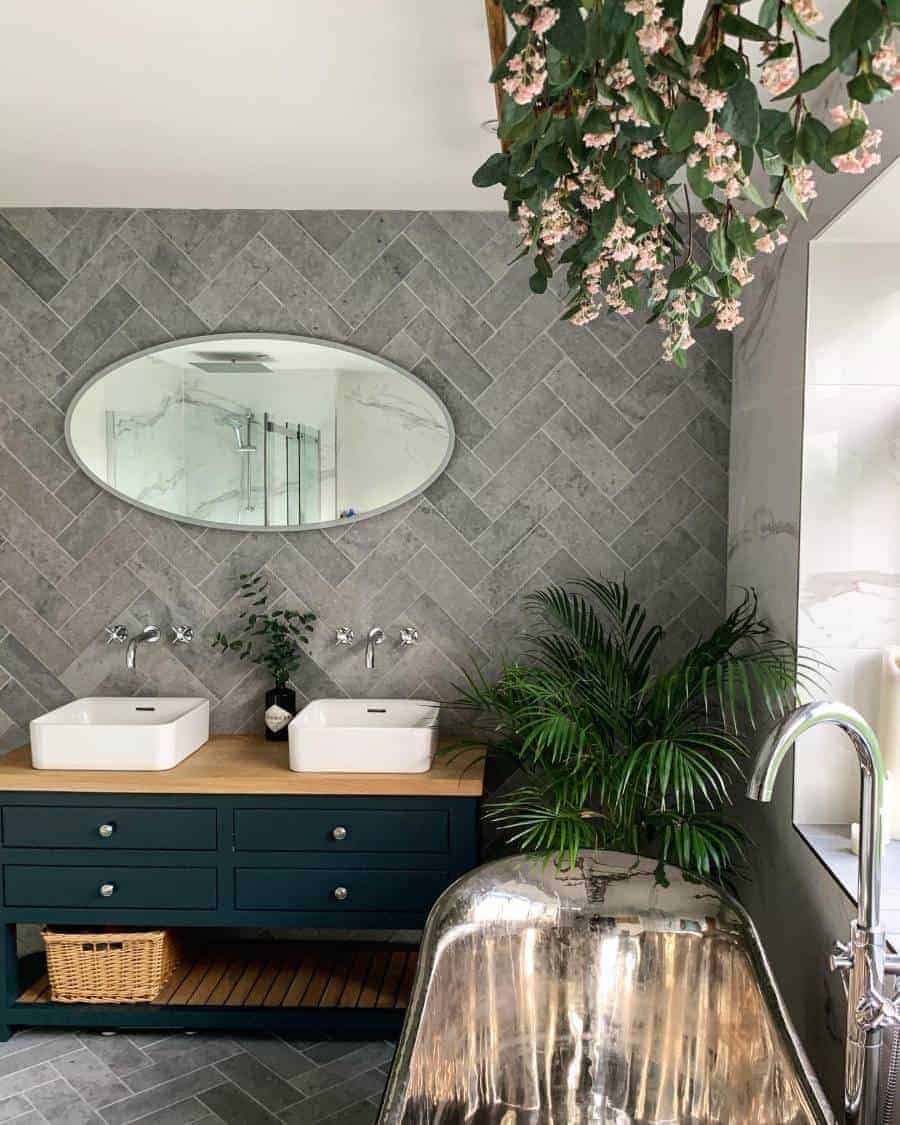
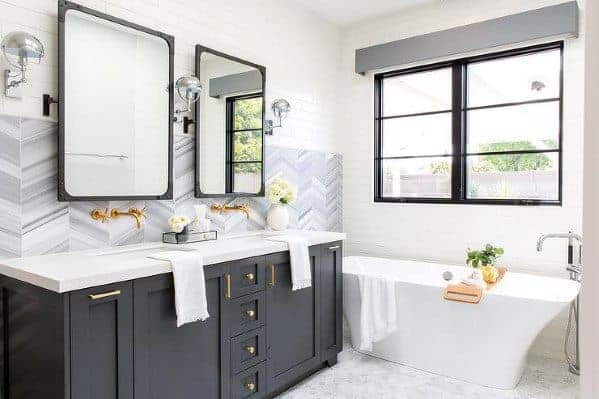
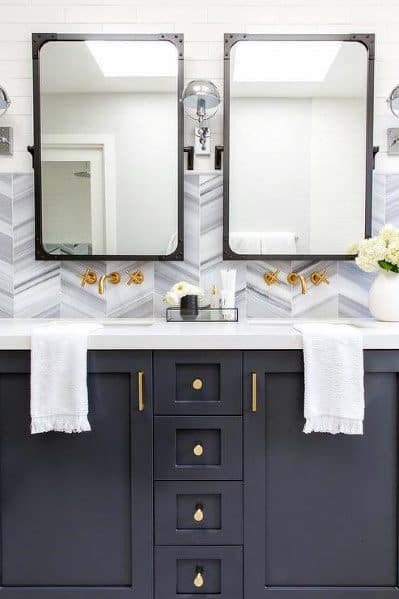
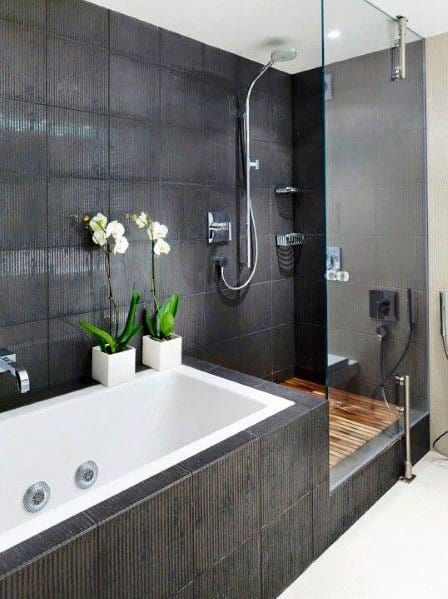
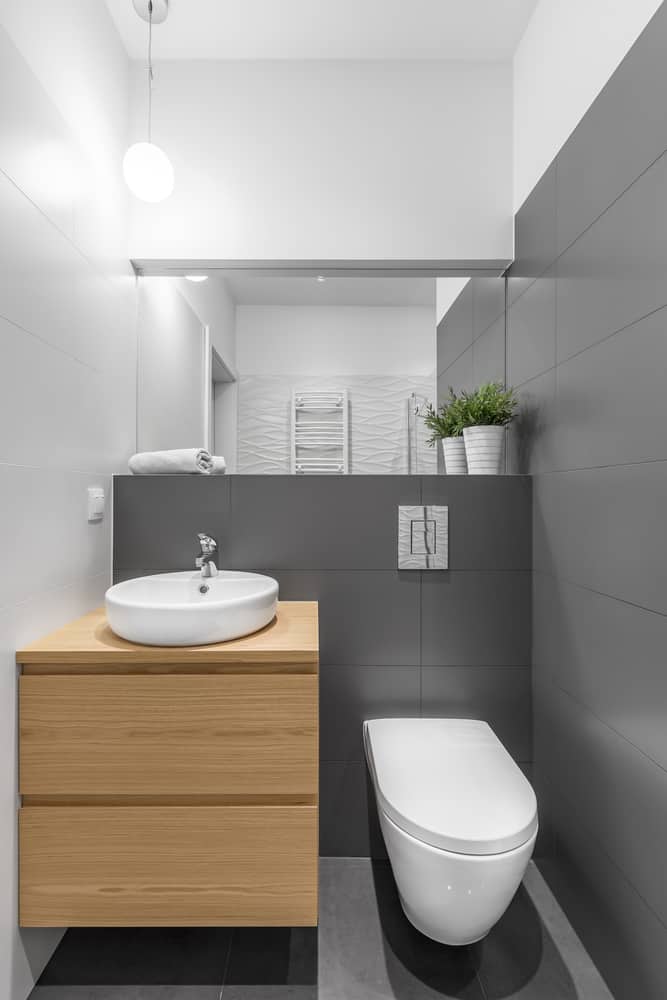
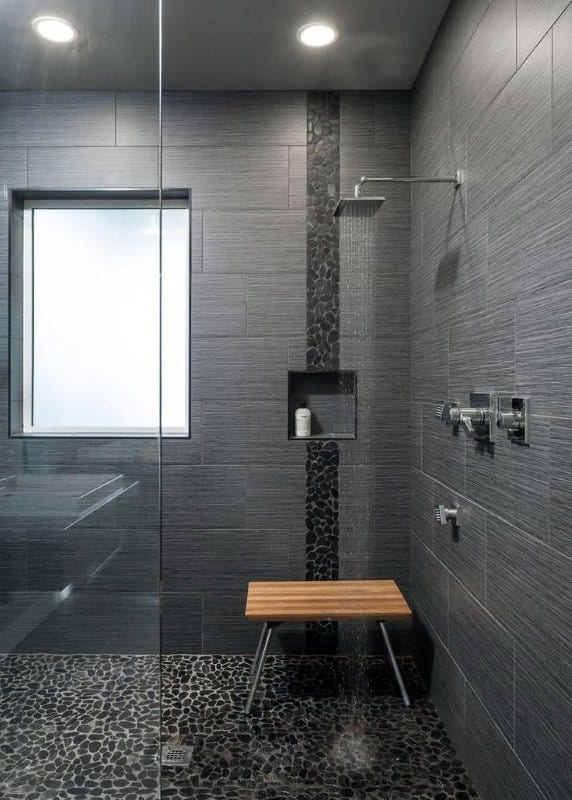
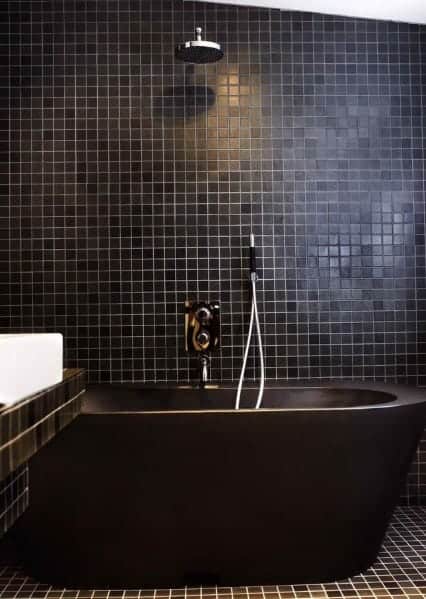
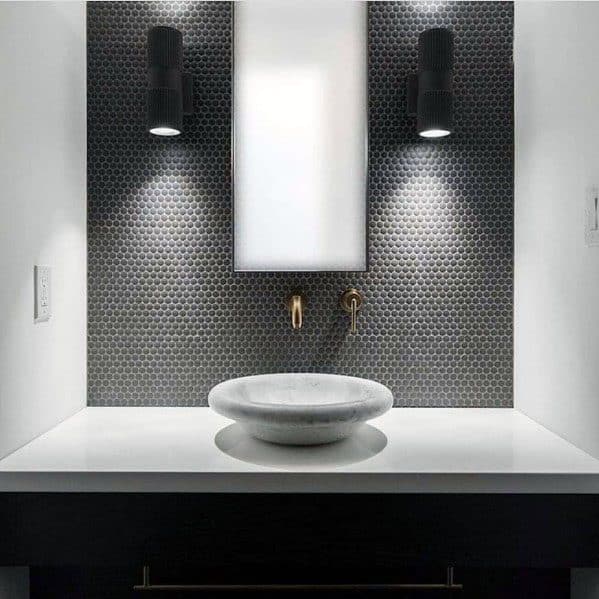
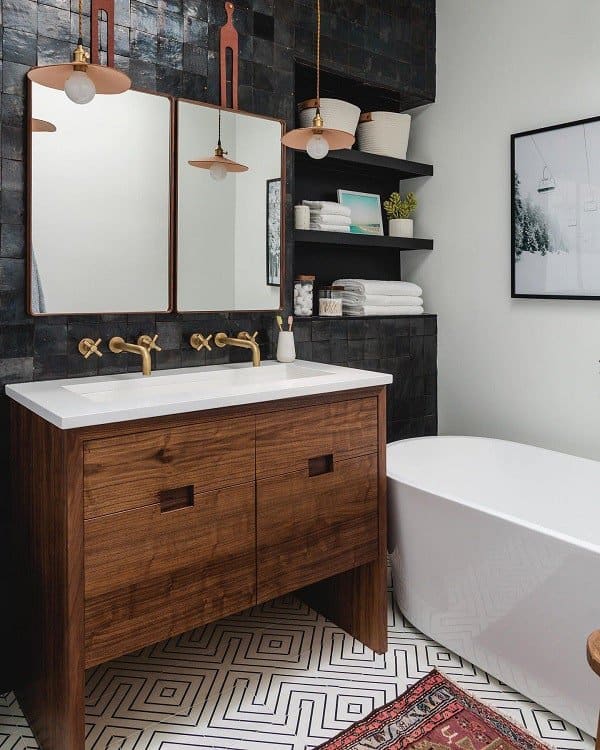
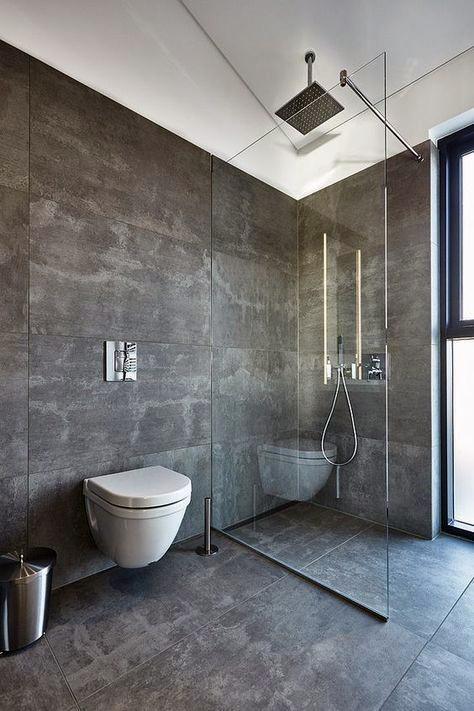
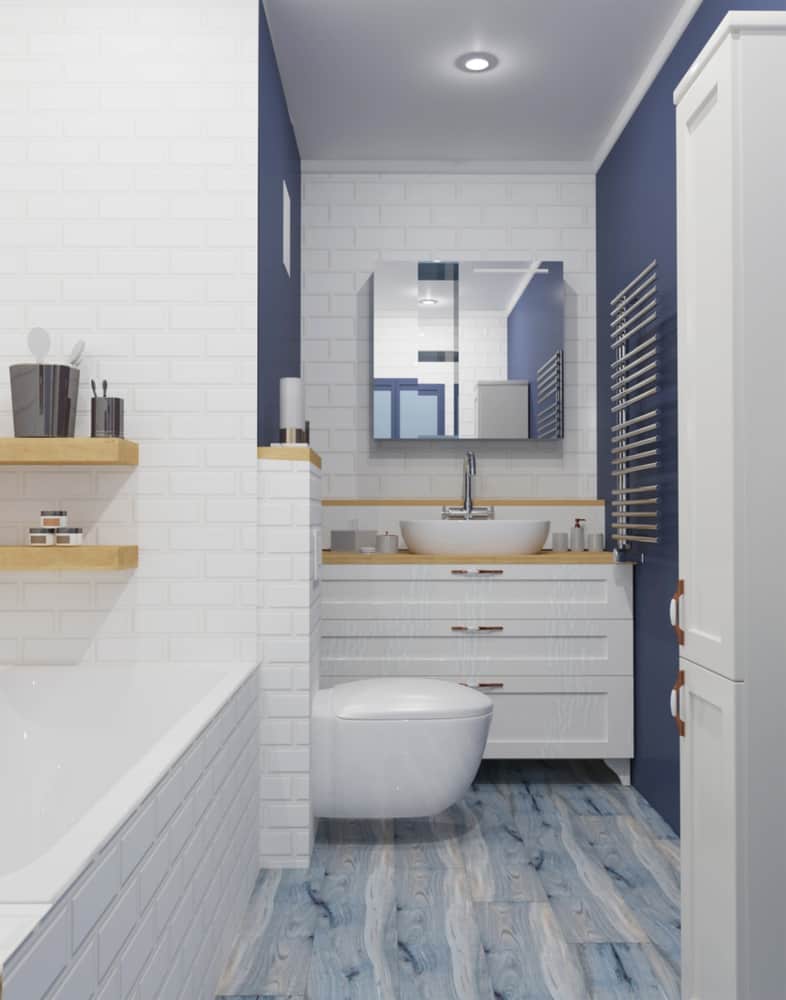
4. Incorporate Versatile Grey Tile Designs
Give grey tile a chance. Don’t discard it as “depressing” or “dull” before considering it for your bathroom renovation. Grey is a modern and beautiful neutral alternative to tans and browns. It’s also softer than using black or white. There are a ton of shades that vary from a near-black charcoal color to a super light and almost white color. Finally, you can pair grey with any metal and accent it with any color shade in the rainbow. This gives you complete freedom in how you decorate your finished bathroom.


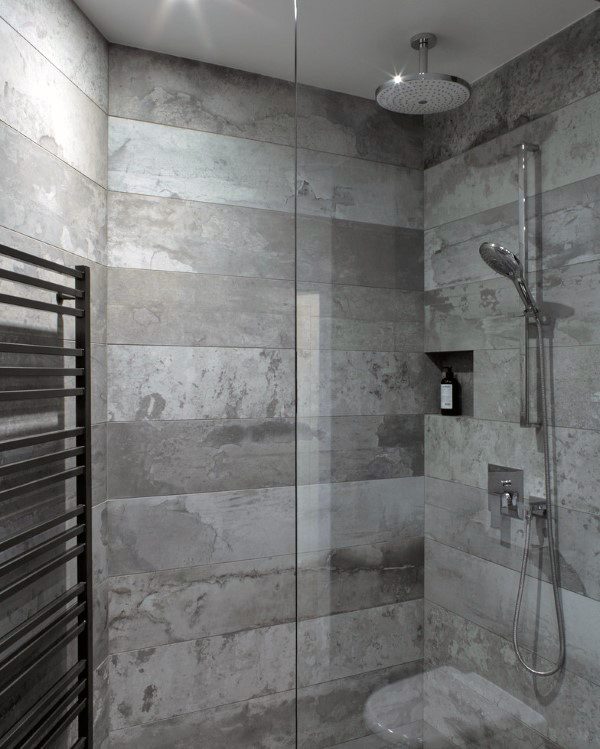
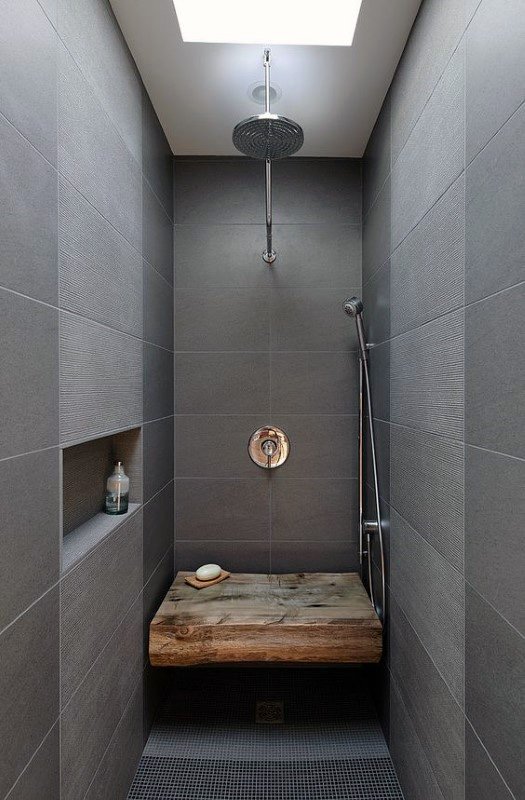
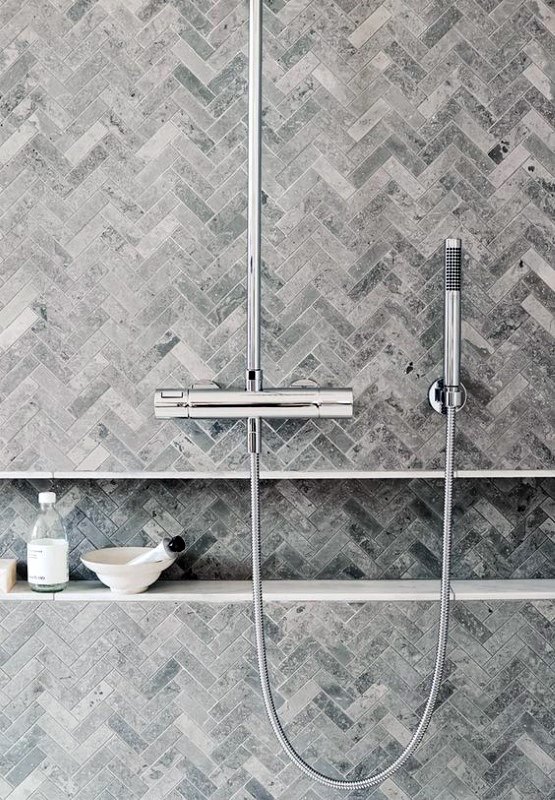
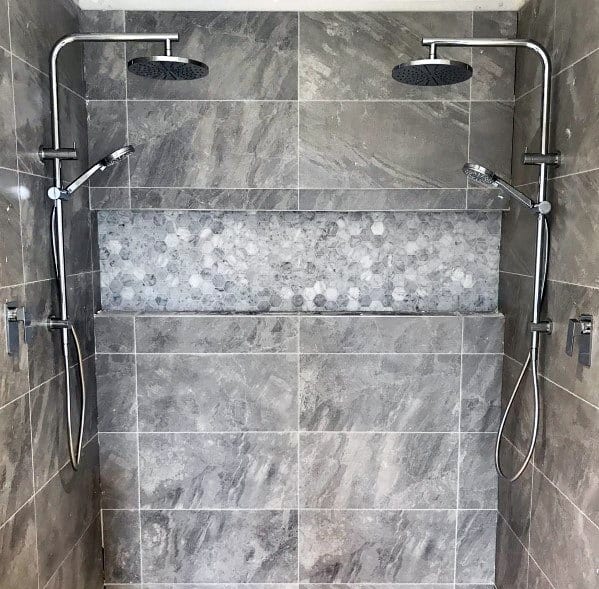
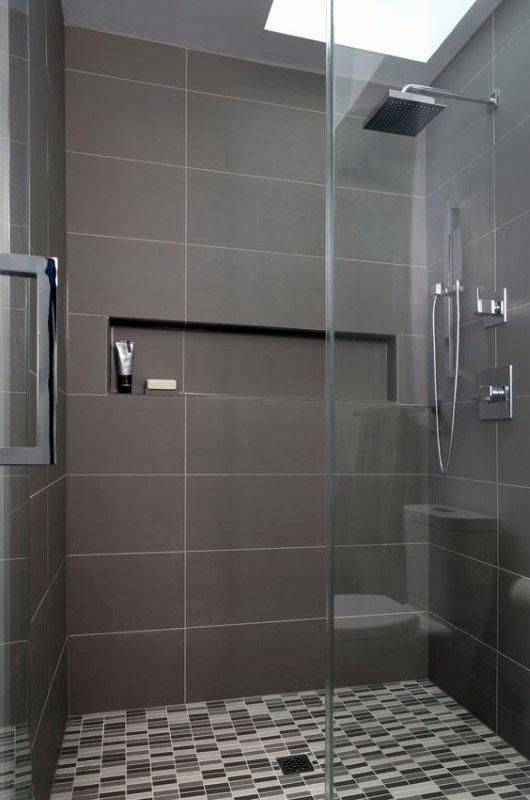
The first step is to choose whether you want a light or dark grey. Dark is going to look more masculine and sleeker. Lighter is going to keep your bathroom feeling bright and fresh.
The next step is to choose the pattern. Natural stone or wood grain are popular because they add life and color variance to the tile.
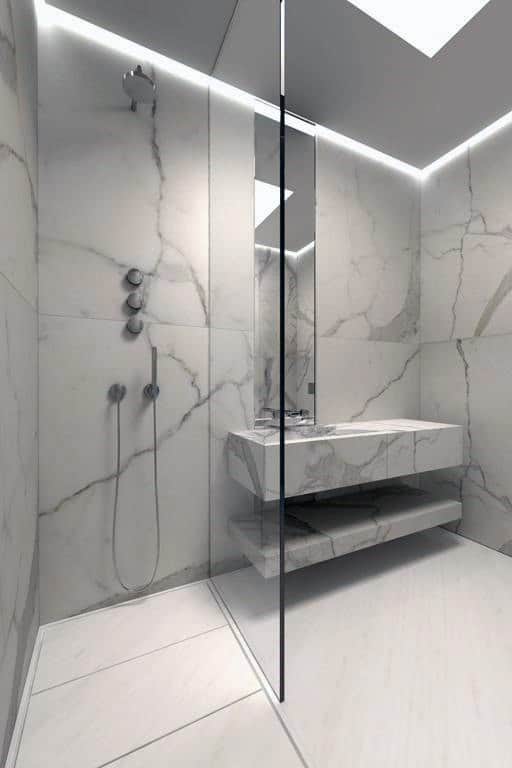
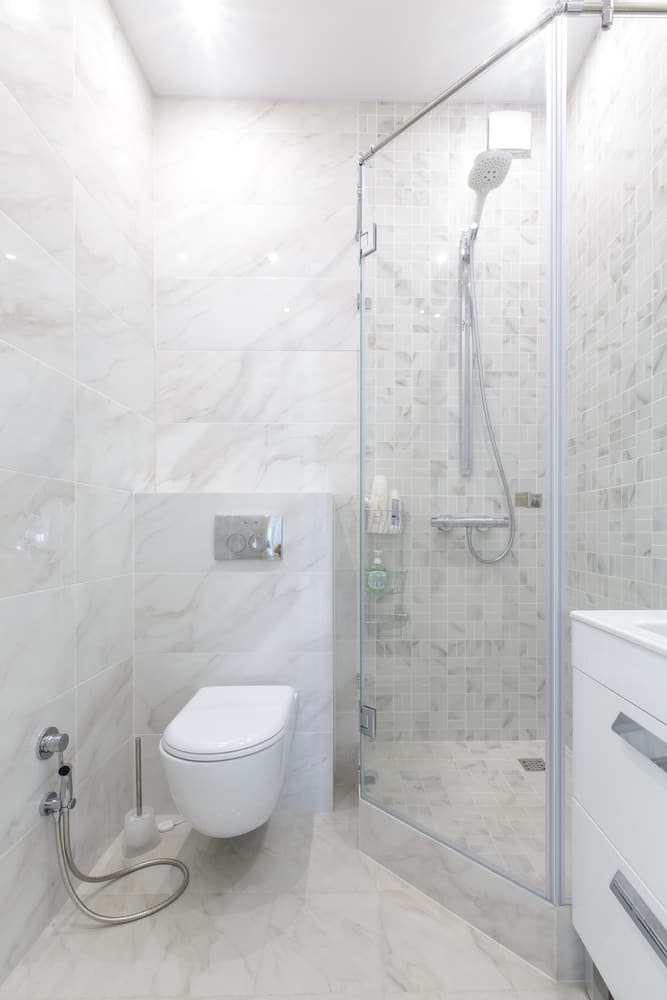
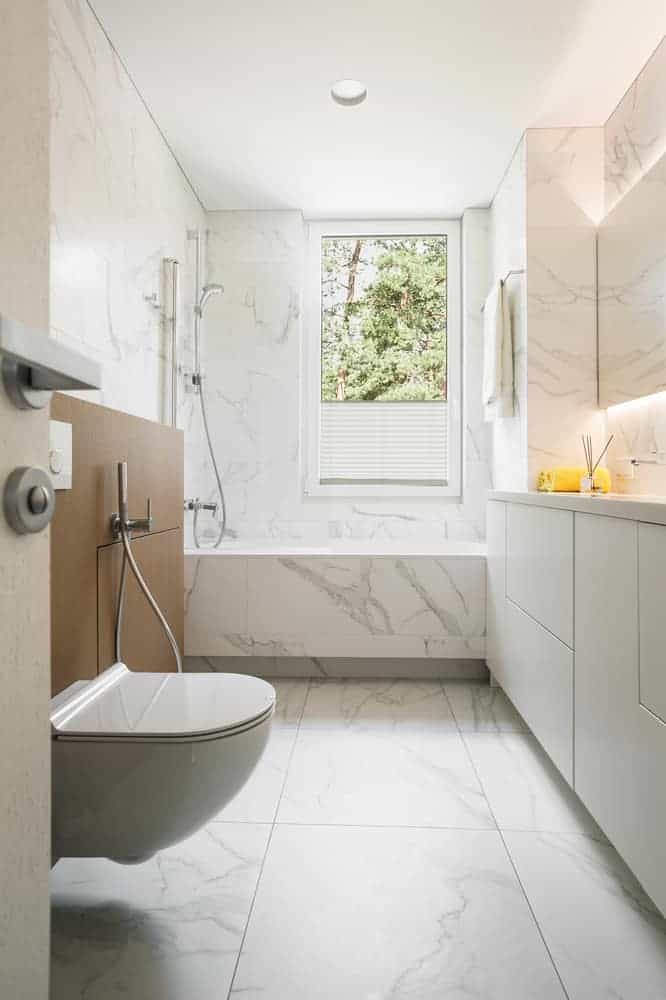
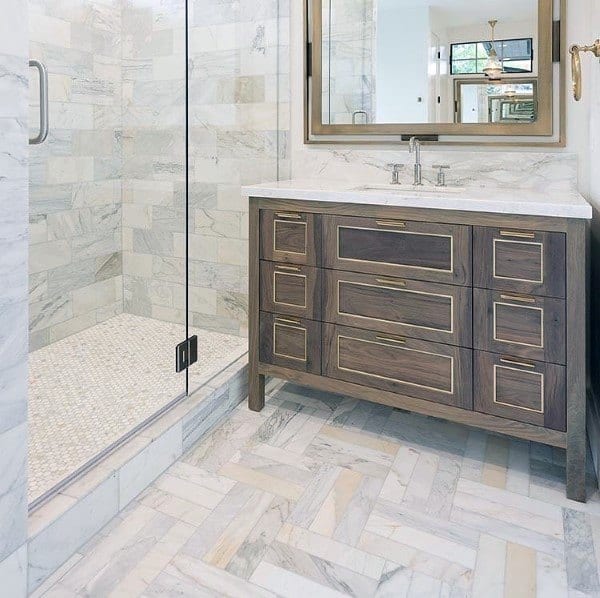
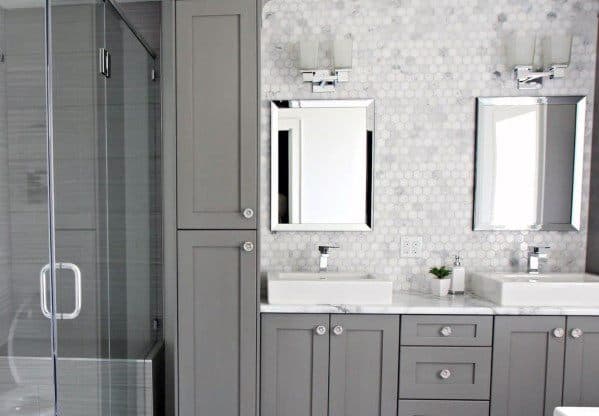
5. Elevate with Elegant Marble Tile
Marble tile is elegant and will immediately add a feeling of luxury to your bathroom. The tiles are typically larger, which means you’ll have fewer grout lines. It’s an ideal choice if you want a black, grey, or neutral-colored bathroom. The natural veining of the marble tile can maintain your chosen color scheme while also breaking up the color to keep it from becoming monochromatic.


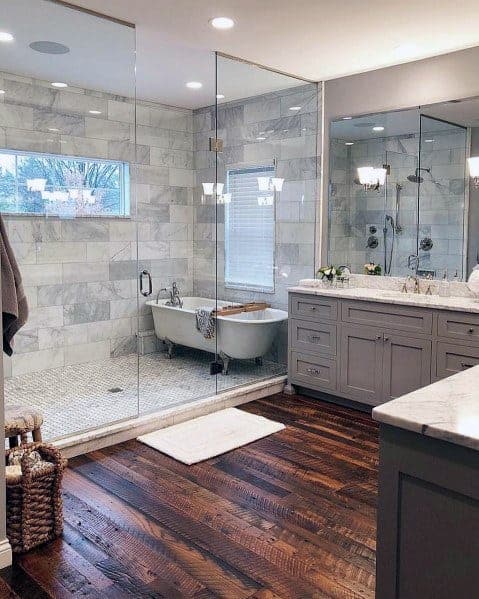
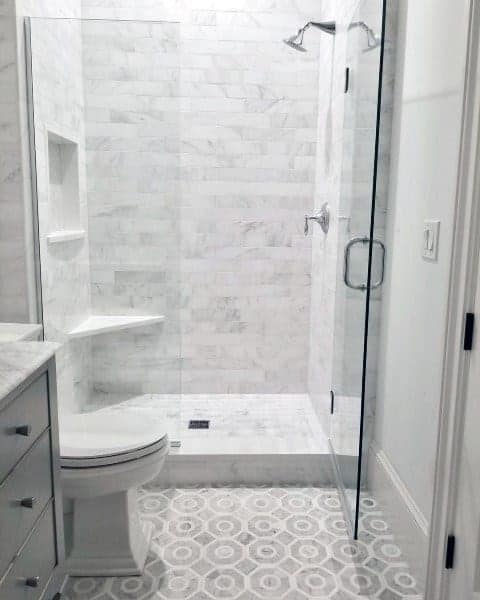
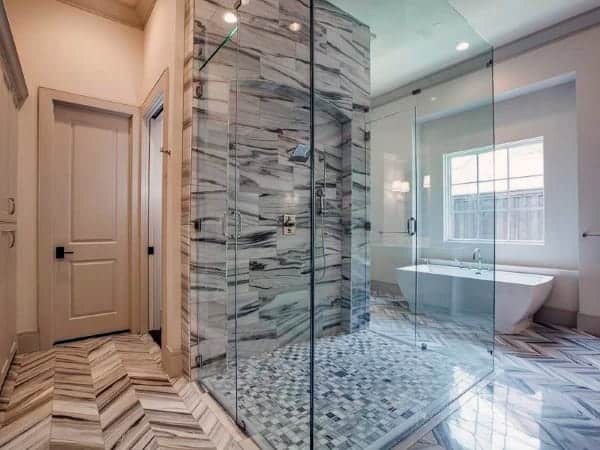
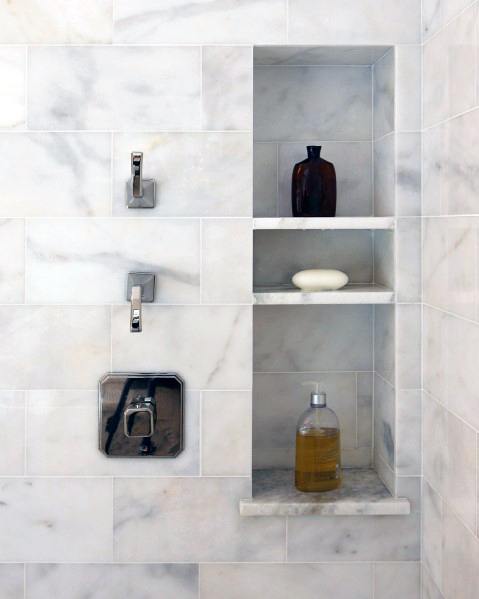
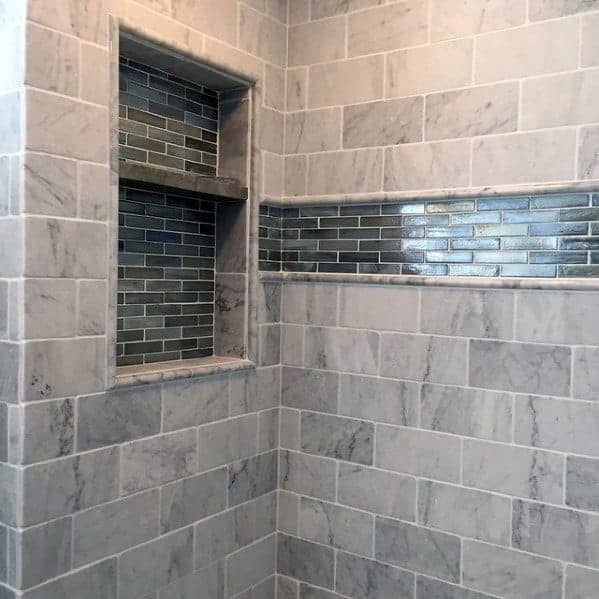
When choosing your marble tile, consider using more than one shade and size. For your main wall tile, you could have a lighter color marble with subtle veining in a large size. Then choose a smaller tile that’s a darker color or one with more aggressive veining as the accent tile. Since they are both marble tiles, they’ll complement each other, but the different colors and sizes will add contrast. Just be sure to place the tiles next to each other when picking them out. The natural stone will bring out detail and color in each other.
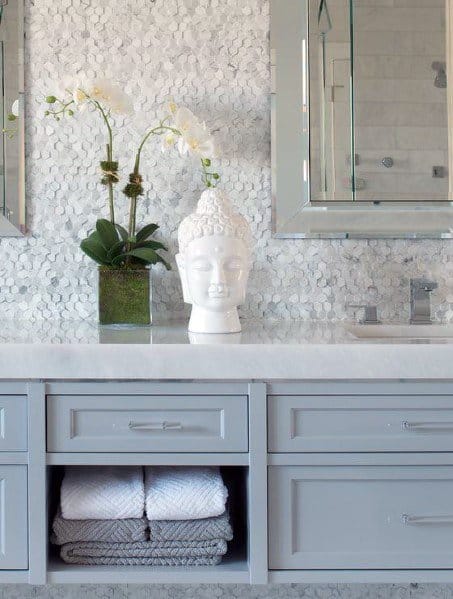
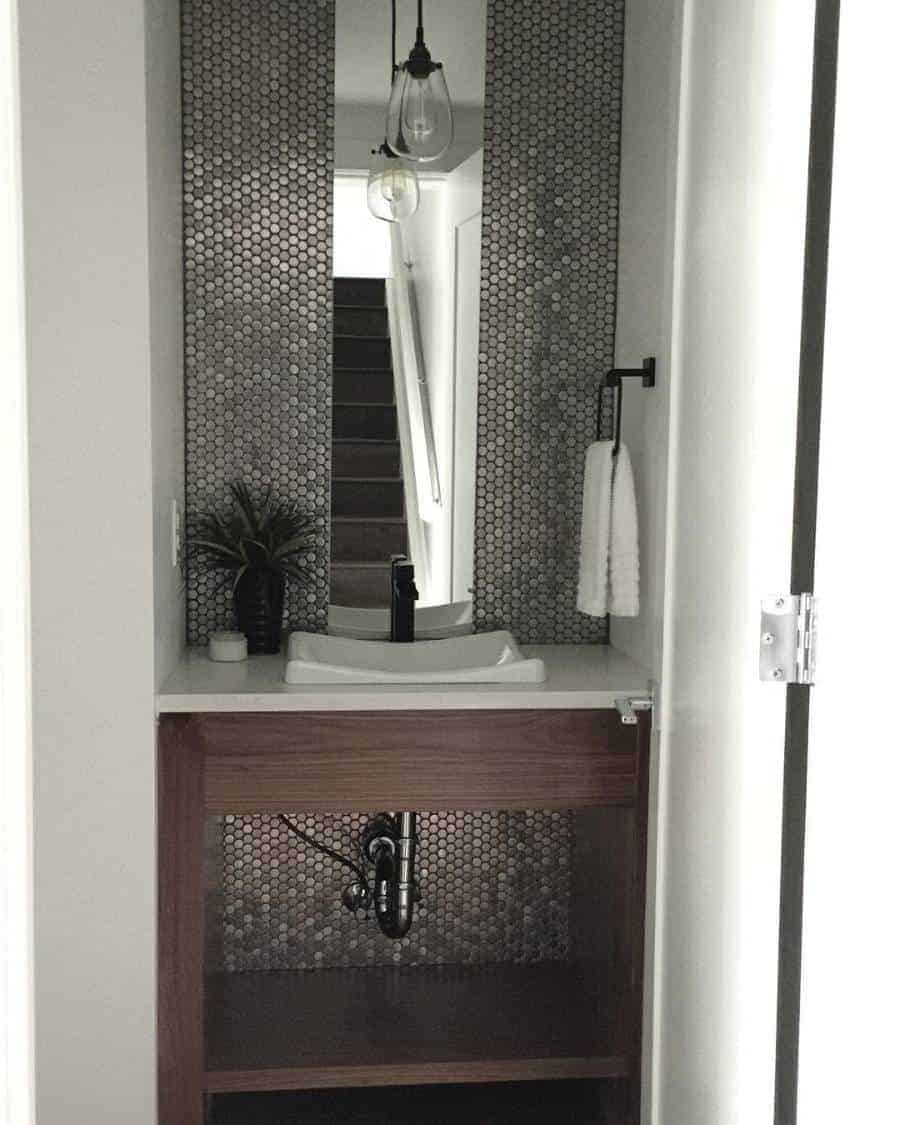
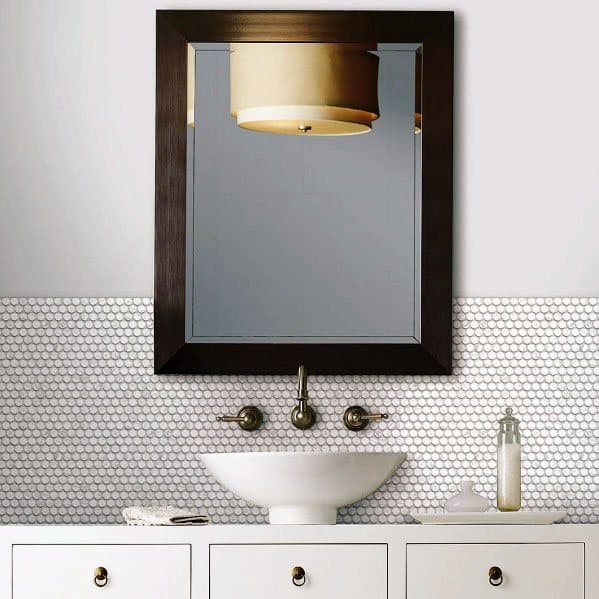
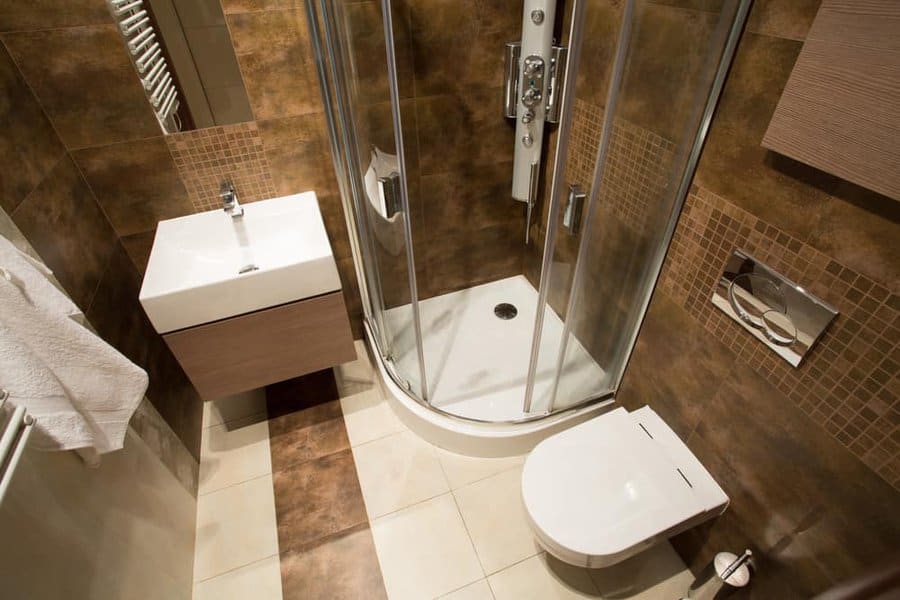
6. Add Flair with Mosaic Tiles
Be careful when opting for this bathroom tile idea. Small tiles can look overwhelming when you use too many of them. The smaller the bathroom, the faster this happens.


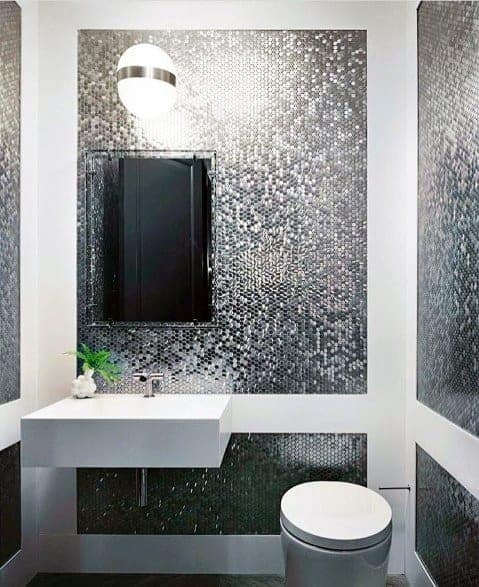
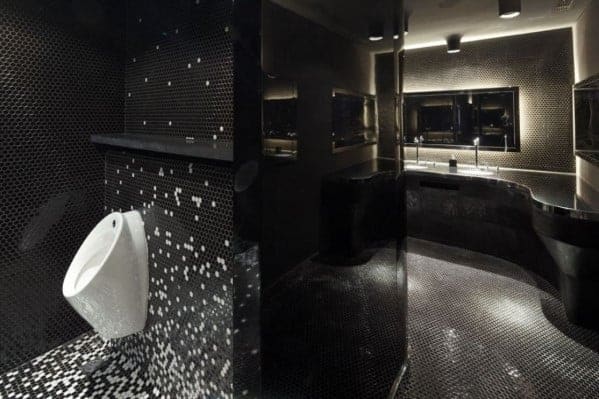
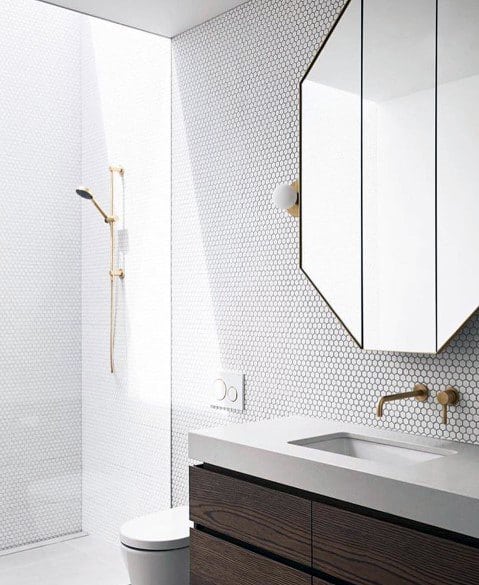
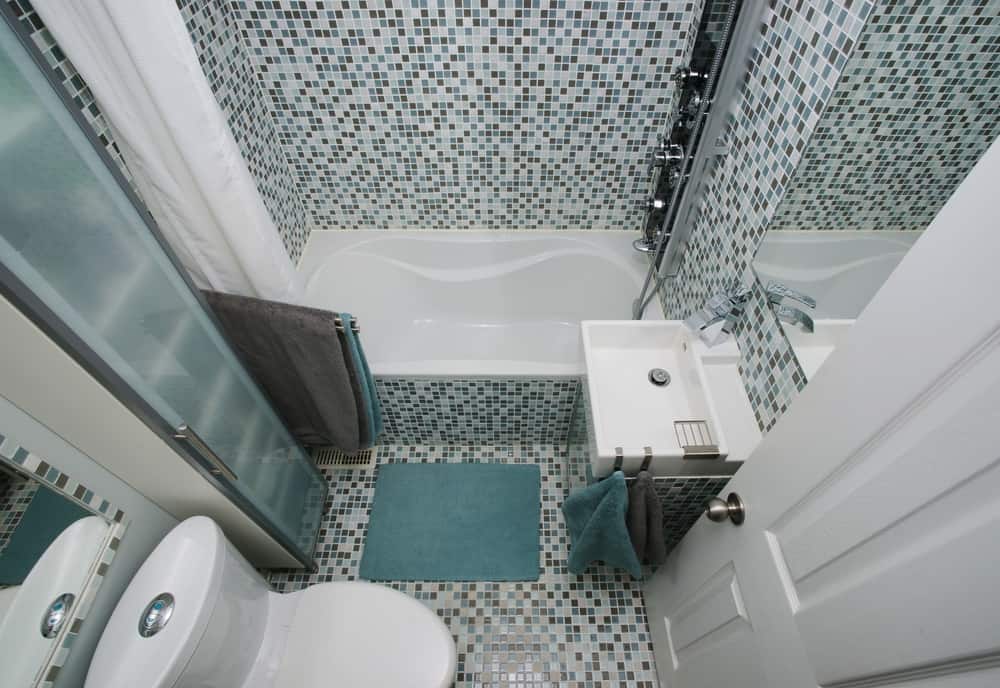
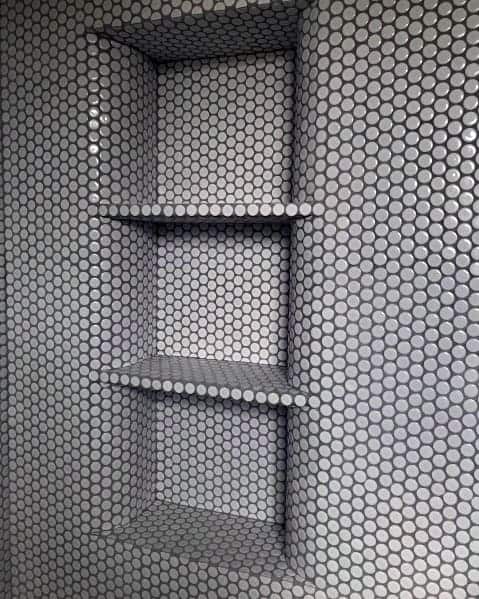
One way to keep your penny tile from becoming overwhelming is to use it as an accent and nothing else. It could be your accent wall, backsplash, or one shower stall wall. This limits the space it takes up in an already small room.
Another way to keep it from becoming too much is to use one color only. This allows the individual tiles to blend together and become a uniform pattern. If you want to use more than one color, try creating a design where you gradually transition from one color to another.
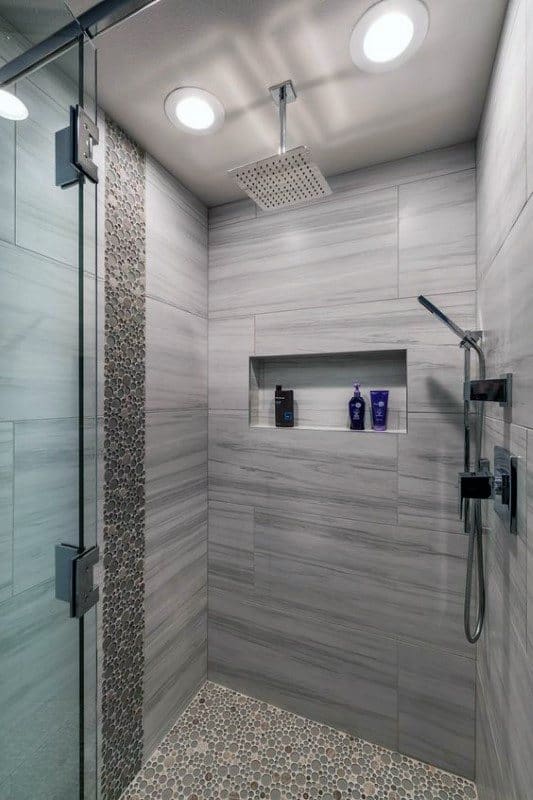
7. Natural Stone Tiles for Organic Elegance
Bring the outdoors inside with natural stone. The beauty of natural stone tile is that you can go as rustic or polished as you want. A farmhouse or country-inspired home could look lovely with rough-cut natural stones stacked to create a wall. An upscale luxury home will look beautiful with perfectly placed stones, aligned to create a solid wall. One thing all homes should skip is using pebble tile on the walls. These little stones are perfect as floor shower tile, and they should stay there.


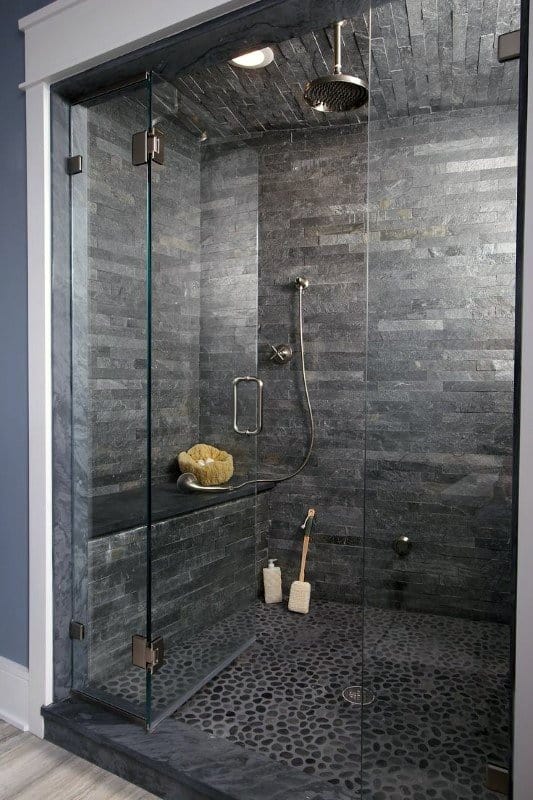
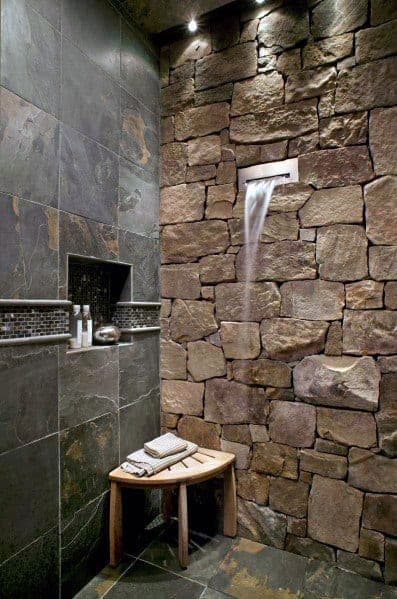
Embrace the lack of uniformity with natural tile. Some will stick out further than others. This variety will give your bathroom walls a natural texture and pattern. There will also be some color variety to the tile. Work with a tile contractor who’s willing to take the time to pay attention to these details. That way, they can arrange the tile to be visually balanced on the wall.
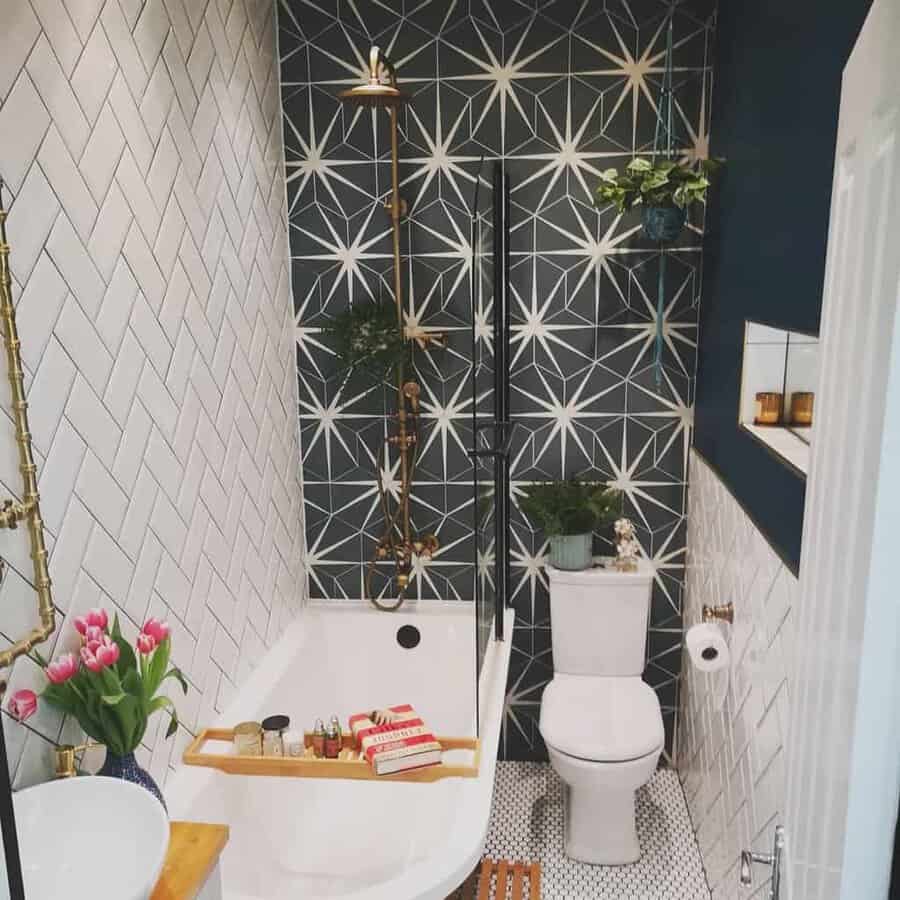
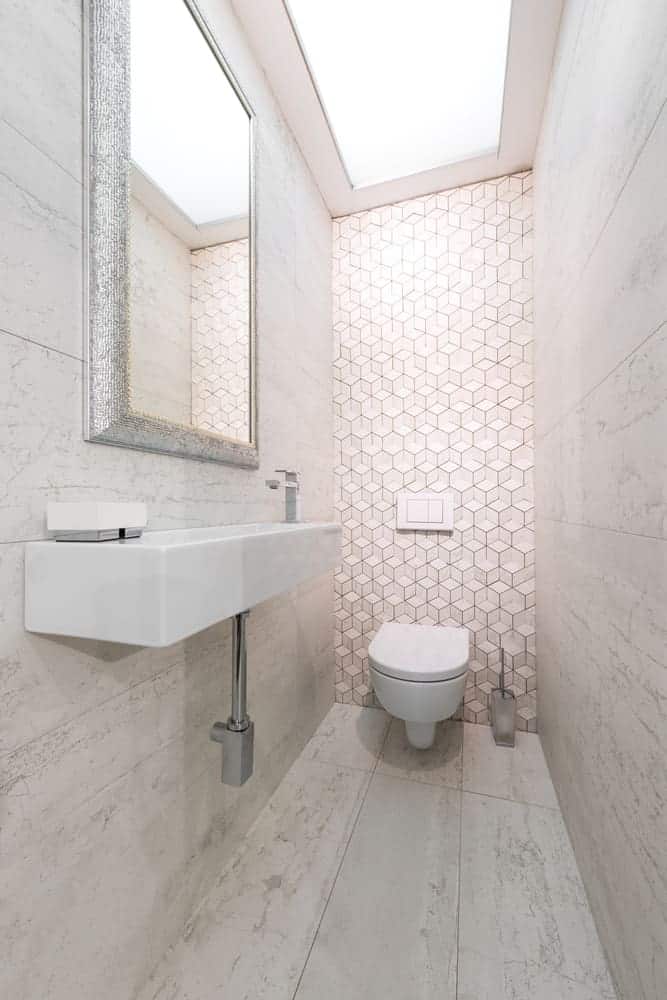
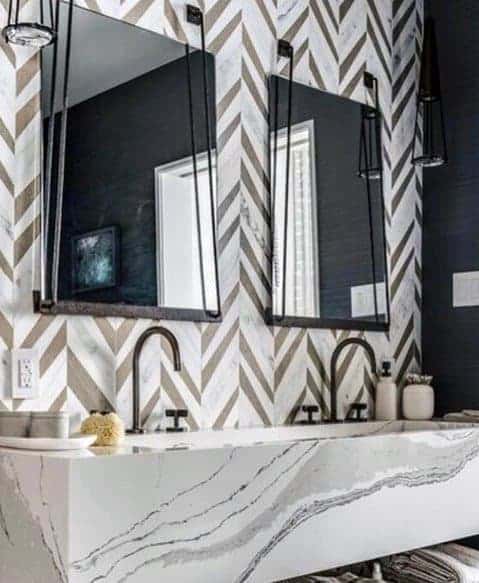
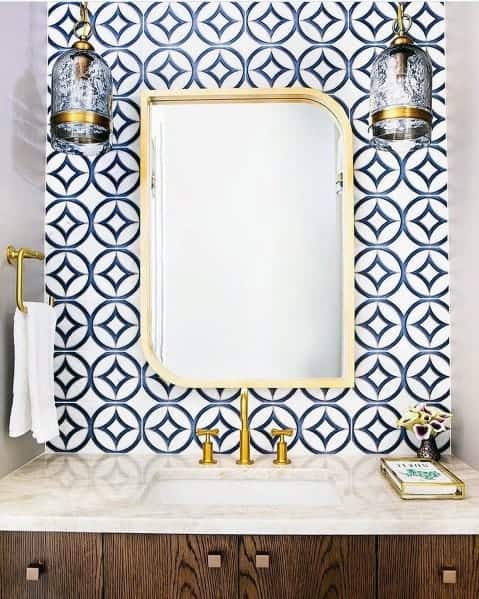
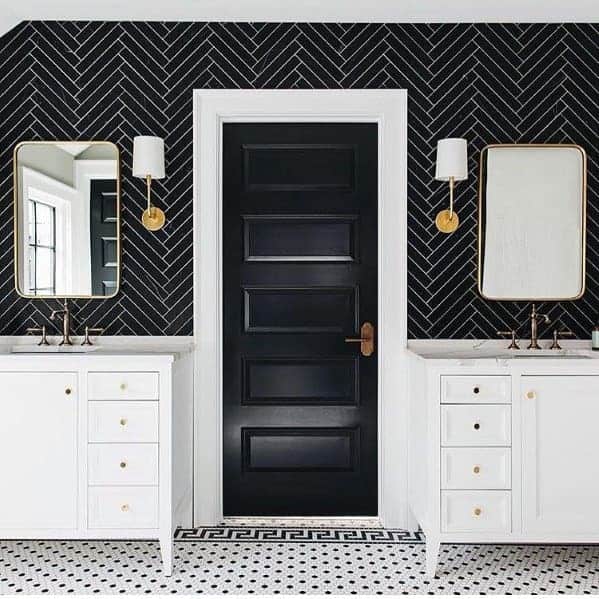
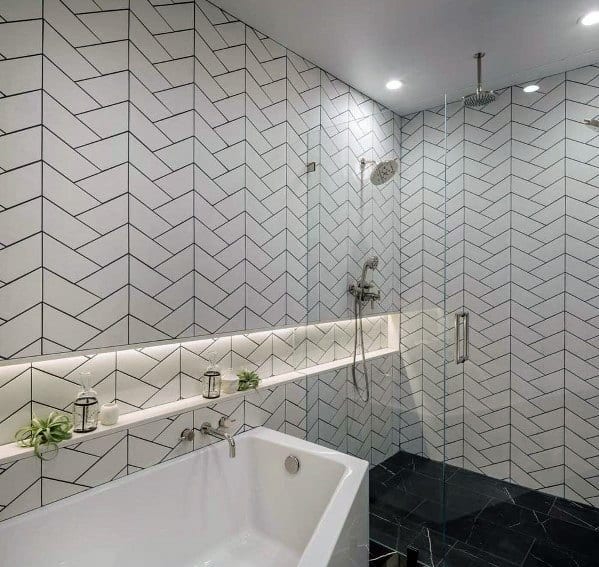
8. Explore Unique Tile Patterns
Plan for your patterned tile to be the focal point of the bathroom. This tile idea doesn’t work in all bathrooms, and you’ll need to be careful with the pattern that you choose. Get this type of tile wrong, and you’ll have an eyesore on your hands.


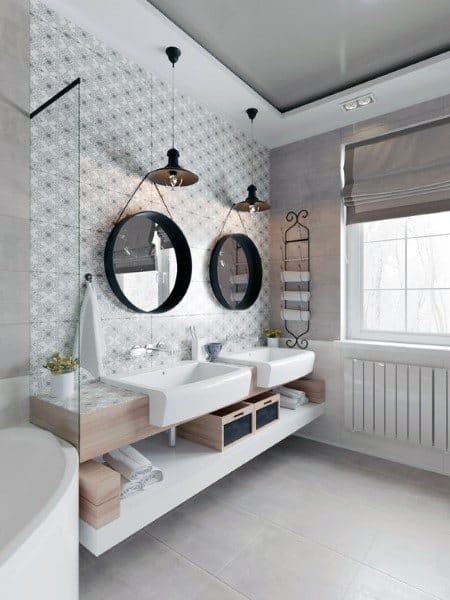
The first and most obvious option is to choose a tile with a pattern on it. These typically come in a set and will sometimes have a single pattern or a variety. If you choose one with a variety, make sure to mix them up for a balanced look.
Your other option is the make a pattern out of plainly colored tile. You could alternate black and white square tiles. Or you could create your own pattern out of a uniquely shaped tile.
9. Revitalize with Classic Subway Tiles
Fashion and interior design trends are cyclical, and subway tile is a perfect example of this. Back in the 1920s and 30s, subway tile was the “it” choice in tile trends. It was everywhere, from subways to home kitchens and hospitals. While it never went away completely, this clean and simple tile design faded from the forefront for decades. Now, a century later, subway tile is at another peak in home design popularity.


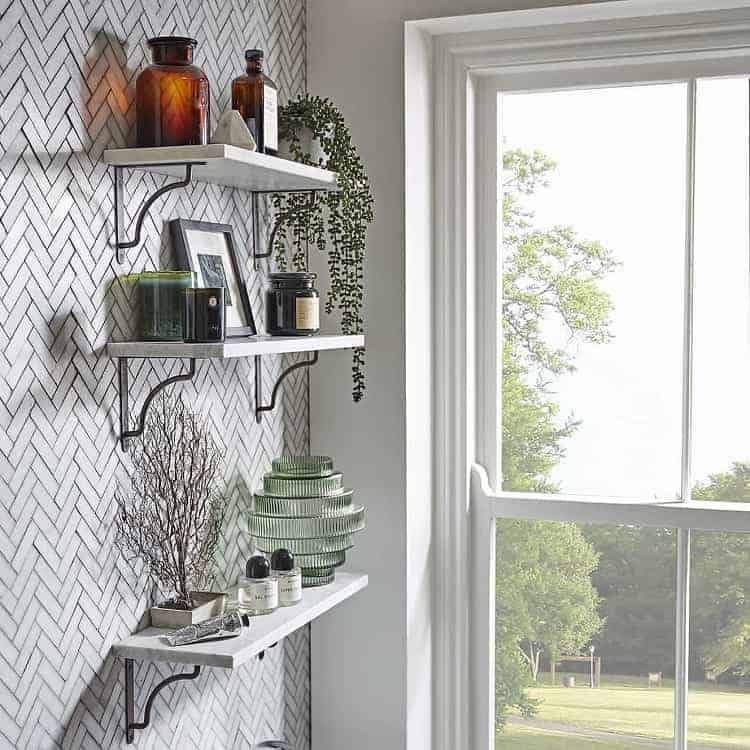
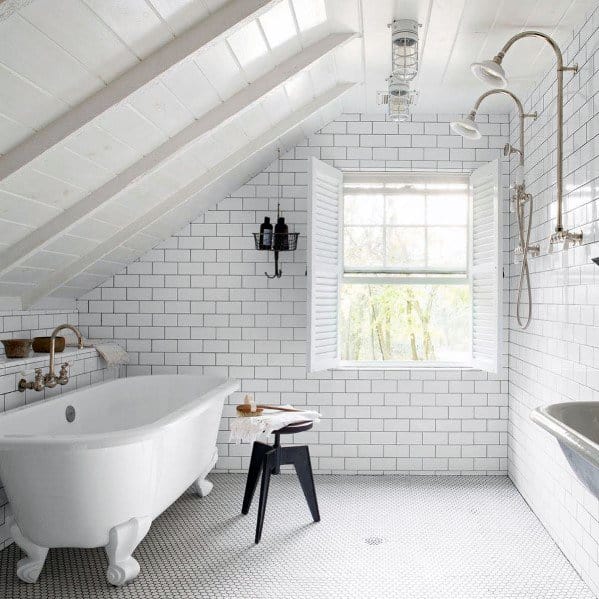
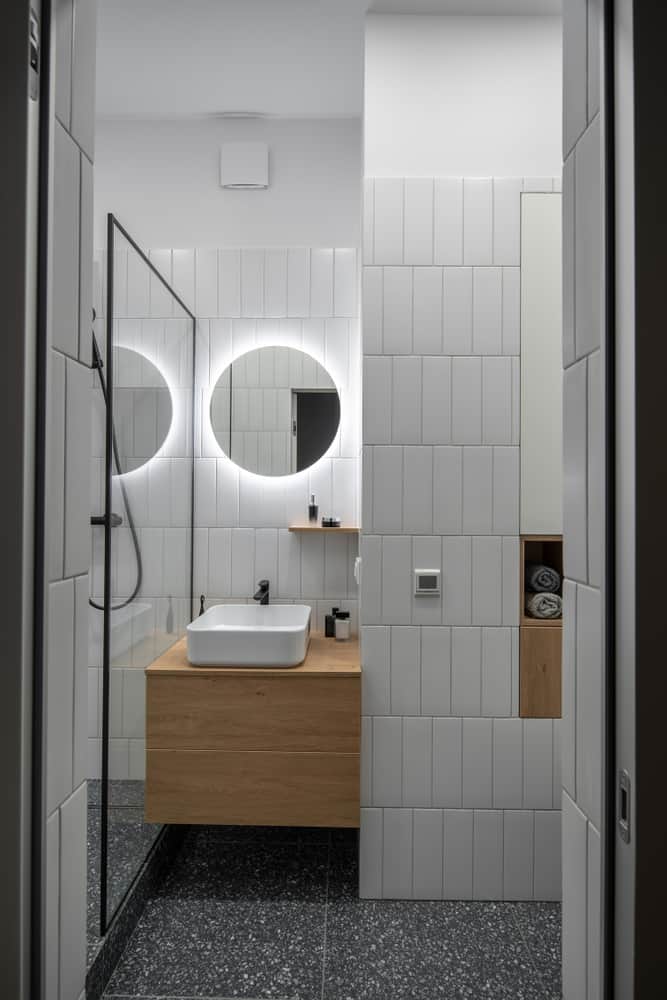
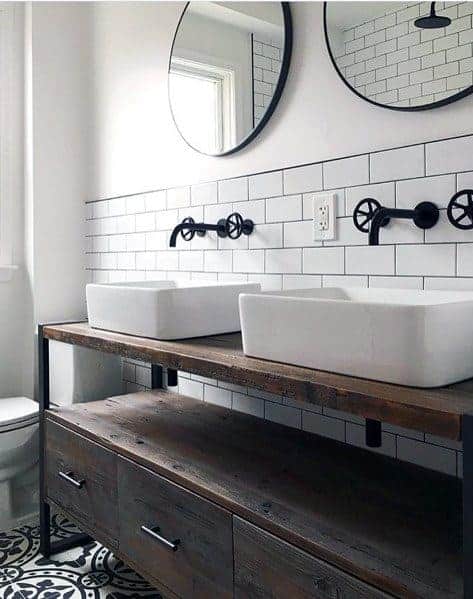
This white tile is a smart choice for your bathroom. It’s easy to care for, looks bright, and can blend into a wide variety of interior design approaches.
To keep it from looking too trendy or dating your bathroom, try using subway tile in an unexpected way. Try placing the tile in a herringbone pattern or turning it to run vertically instead of horizontally. Another popular trend is to find and use a subway tile that comes in a color other than white.
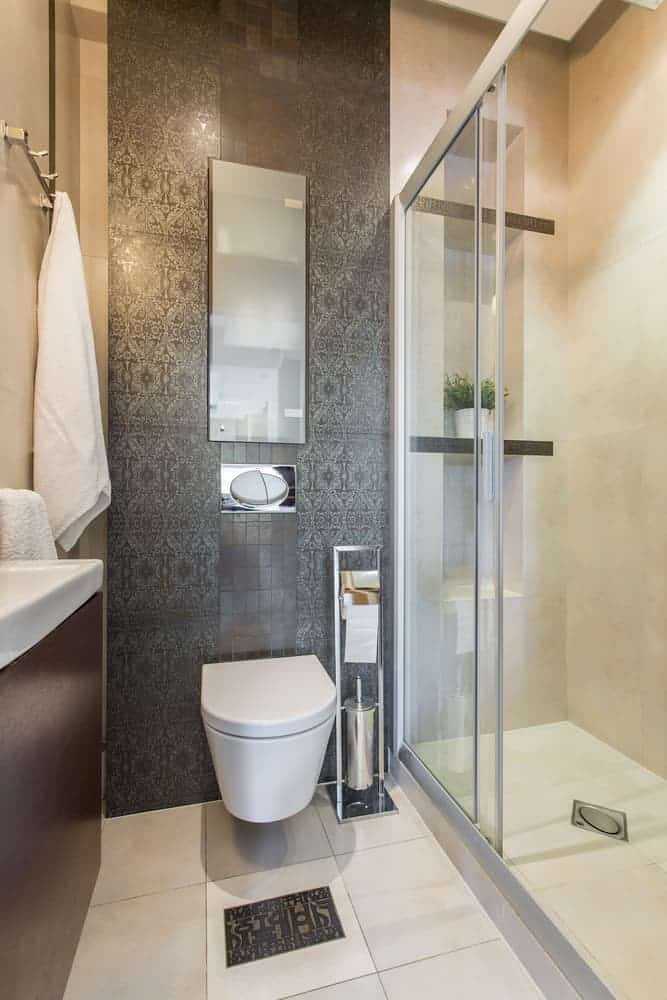
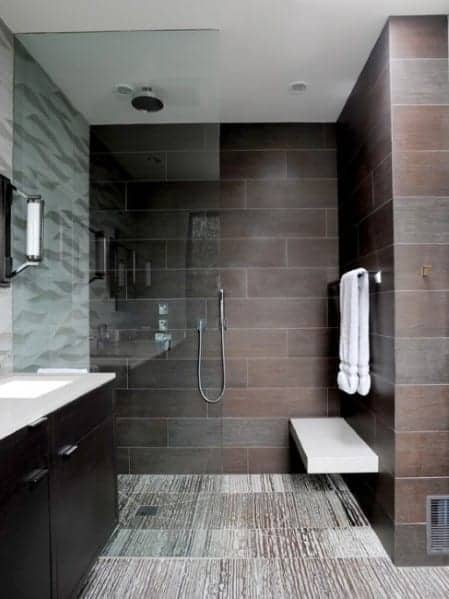
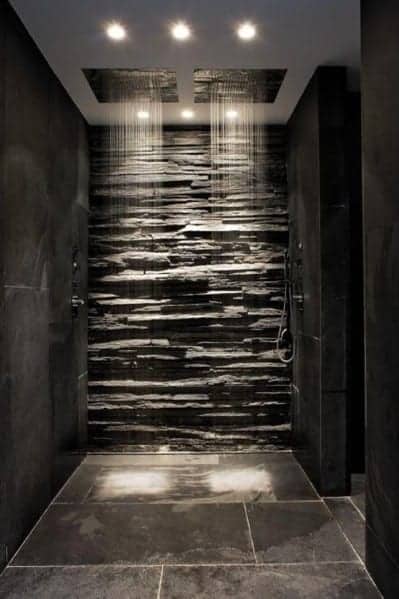
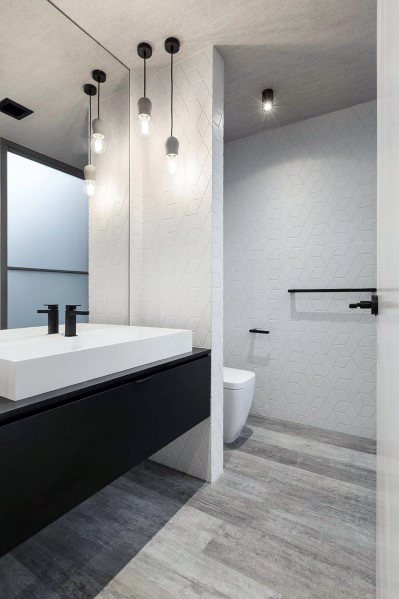
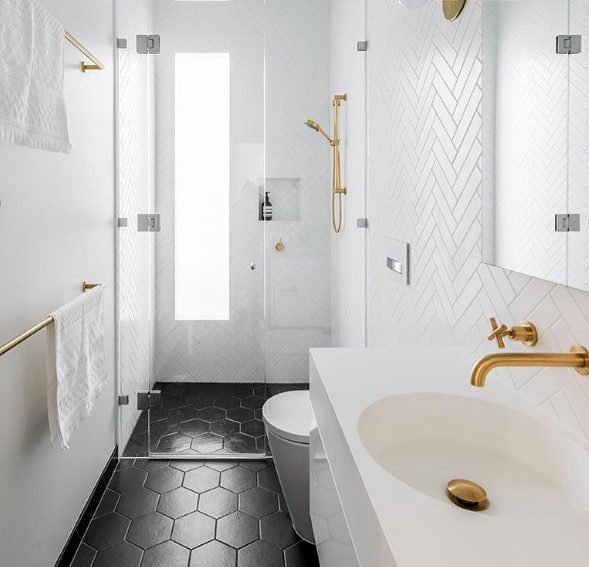
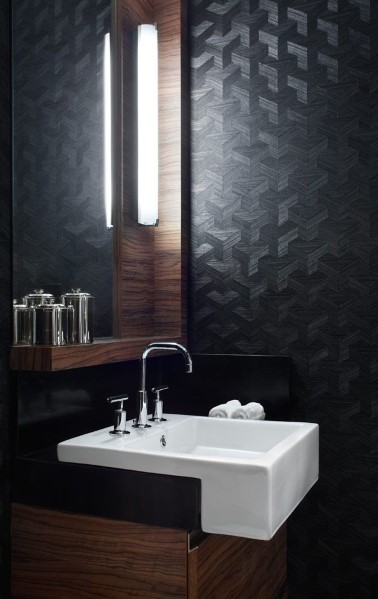
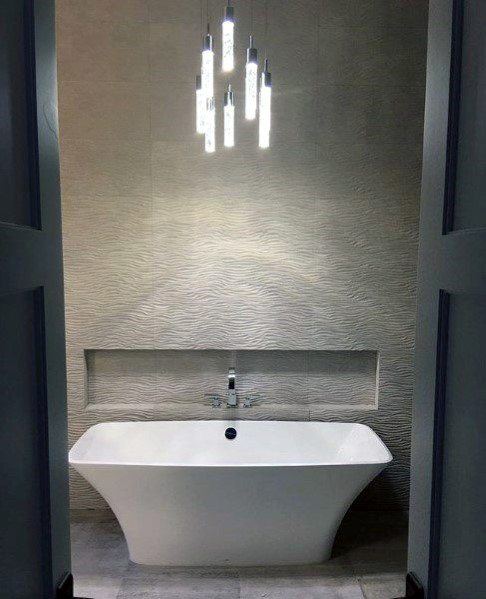
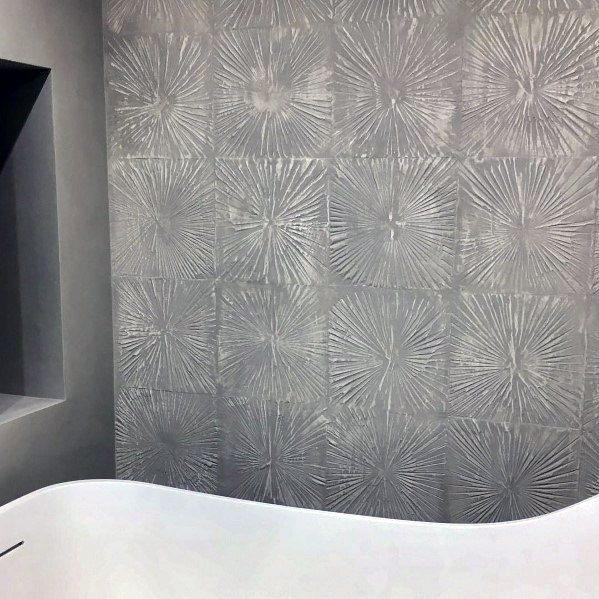
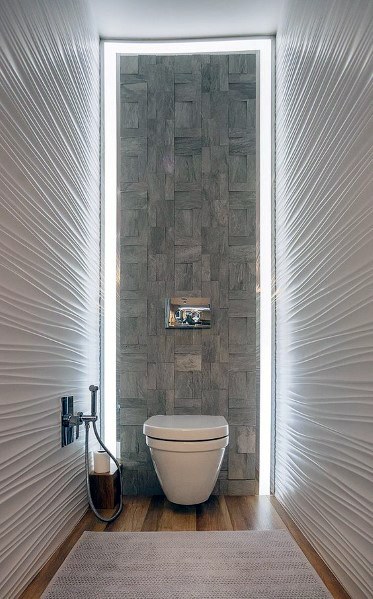
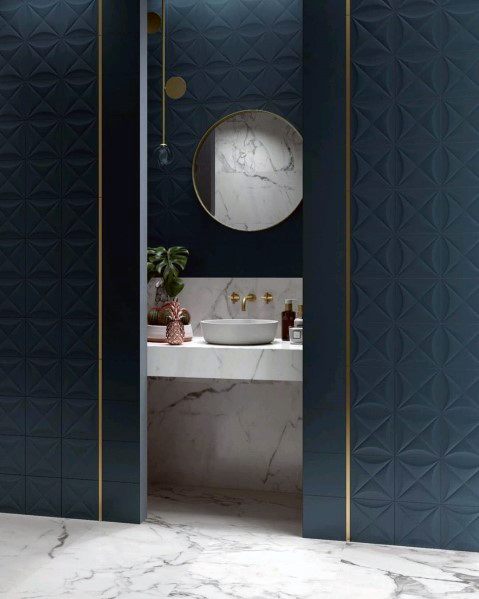
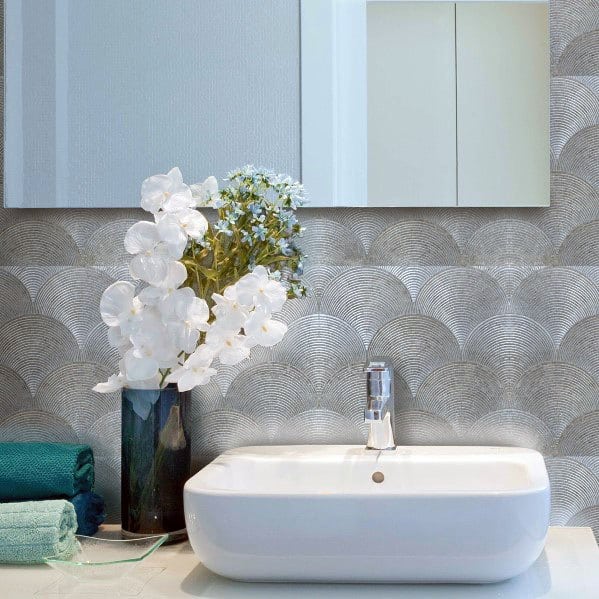
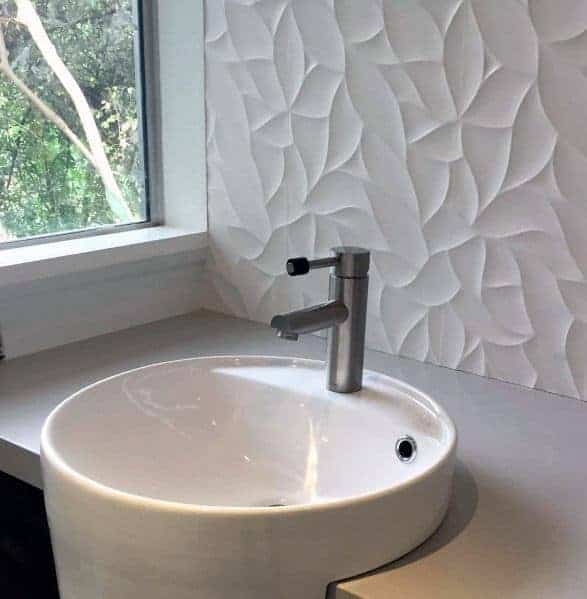
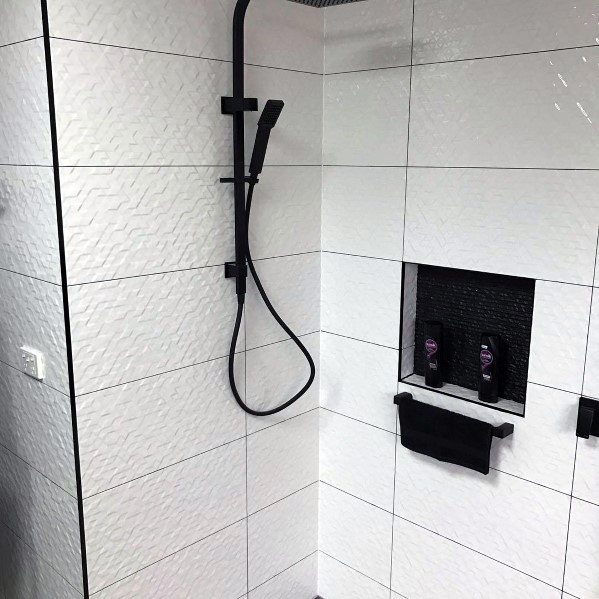
10. Enhance with Textured Tile Varieties
Most people think that textured tile is a new and innovative thing. The truth is that textured tile has been a staple in building for centuries. Take a look at zellige tiles for a traditional and naturally textured tile that would look beautiful in your bathroom.
Choose a handmade tile or one made from stone for a bohemian or earthy feel. These tiles have a random texture that will bring a one of a kind look to your bathroom.


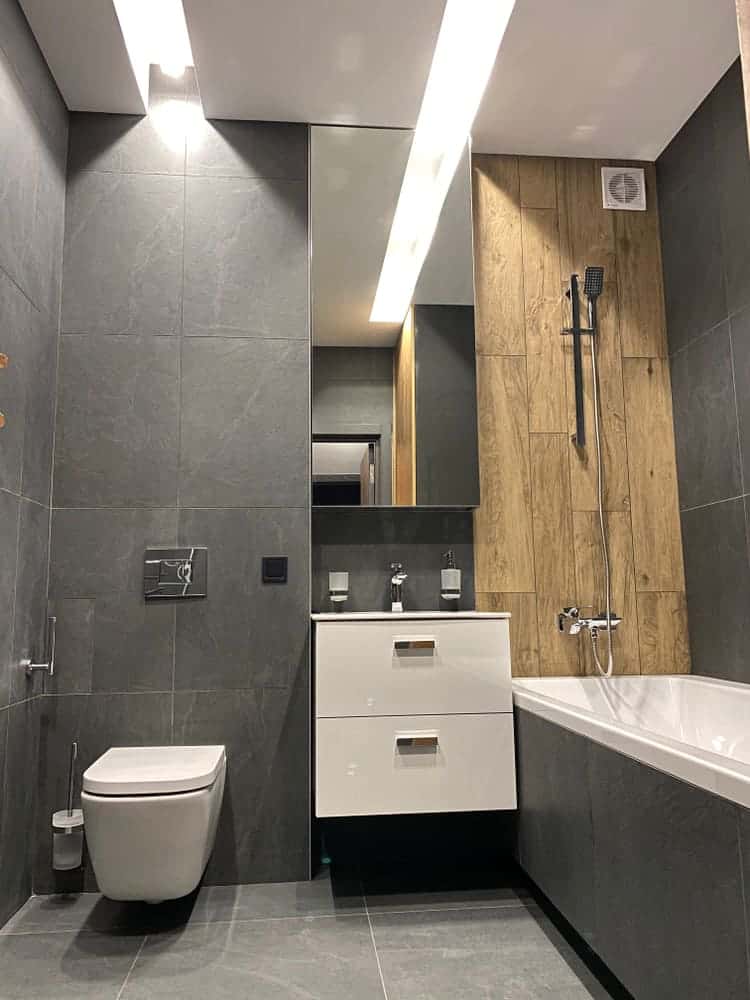
For a modern approach to texture, look for a tile with a uniform pattern. A safe choice is tile that looks and feels like wood. At first glance, it will look like you’ve mounted wood planks to the wall, similar to how wood flooring looks. However, upon closer inspection, you’ll realize the “wood” is actually tile. This is perfect for achieving a wood look in a high moisture environment.
Bolder shower tile ideas feature tile with a geometric or scalloped pattern. These are on-trend right now and the modern approach to texture. The tile is actually three dimensional at times, which can add a unique perspective to your bathroom walls. Be careful with this tile; use it on all of the walls, and your bathroom might develop some odd optical illusions.
Bathroom Wall Tile FAQs
There are other alternatives, but they may not look as nice or be as affordable. Tile gives you an endless number of options when it comes to material, color, size, texture, and placement. But if you hate tile, you could consider using acrylic or PVC panels, stainless steel, stone resin, or wood. You’ll need to be careful; not all stainless steel or wood is appropriate for use in a bathroom.
You can, but it’ll take a lot of time, and there’s a high risk of error. There’s a lot of skill that goes into getting the tile mounted and positioned just right on the wall. If you don’t have the experience, it’s best to leave this project to the professionals.
Typically, shower floors have smaller tiles to give you more grout lines and grip. Stick with a four-inch square or small tile. Shower wall tiles can range from four-inch square up to 30 inches. Larger tiles have less grout, are easier to keep clean, and look modern. Tile that’s too small can make your bathroom look smaller, but go too large and the tile looks too big for the space. Keep in mind the tile you’re buying; natural stone looks better when it’s bigger because you can showcase the natural veins.
10 Backyard Paver Ideas to Upgrade Your Patio
How do you convert your backyard into a stylish outdoor living area without losing its natural charm? Stone pavers can be wonderful alternatives to plain concrete slabs or messy rock mulch.
Backyard patio pavers are far from one size fits all. From flagstone to brick and everything in between, there are countless varieties of natural rock available to choose from for your own backyard projects. And that’s not to mention the many great manmade paver materials on the market!
Keep reading for the top backyard paver ideas to inspire your future patio design or garden walkway.
1. Flagstone Pavers
Flagstone is a great option when it comes to backyard pavers. Not only are they visually stunning, but they are strong, durable, and can withstand harsh weather. Their natural beauty and texture add depth and character to any backyard design.
Flagstones come in a wide range of sizes and variations, allowing you to create a personalized pattern that will fit your outdoor space perfectly. These pavers are also low maintenance, ensuring that you spend less time caring for your backyard and more time enjoying it!


2. Bluestone Pavers
Bluestone is a durable material, able to withstand harsh weather conditions and heavy foot traffic. The natural hues of blue, gray, and green blend together to create a unique and eye-catching look that will elevate your backyard to the next level. With bluestone pavers, you can create a patio, walkway, or other outdoor feature that is both functional and aesthetically pleasing.


3. Cobblestone Pavers
If you’re looking for a way to add some rustic charm to your backyard, cobblestone pavers may be just the ticket. These natural stone pavers have been used for centuries in Europe and are becoming increasingly popular in the United States.
They are durable and can withstand heavy foot traffic. Whether you’re creating a pathway or a patio, cobblestone pavers will create a warm and inviting atmosphere.


4. Limestone Pavers
Limestone is a sedimentary rock that has been used for centuries in architecture and construction. It is known for its earthy tones and subtle texture, which add character and charm to any outdoor space.
Limestone backyard pavers are a popular choice for their low maintenance, slip-resistant, and weather-resistant properties. The subtle natural variations in each piece create a unique and organic look that is both elegant and sophisticated.


5. Slate Pavers
If you’re searching for a long-lasting and stylish flooring solution for your backyard, slate pavers may be just the thing. The naturally occurring rock is renowned for its distinctive color variations, and its durability makes it a top choice for outdoor spaces.
The wide array of textures available – from honed to cleft – affords flexibility in design, and slate’s impermeability renders it resistant to stains and weather damage.


6. Interlocking Pavers
These versatile and durable pavers come in a variety of colors and textures, allowing you to customize your patio or walkway to suit your personal style.
Interlocking pavers provide a safe and slip-resistant surface for guests to walk on. The interlocking design of these pavers ensures that they stay securely in place, even in harsh weather conditions.


7. Concrete Pavers
With a wide range of textures, colors, and patterns available, you can create a unique and customized look with concrete pavers that perfectly complements your landscape. They are incredibly durable and long-lasting.


8. Round Pavers
Rather than the traditional square or rectangle shapes, the circular pavers offer a fun and intricate design that catches the eye.
By strategically placing the pavers and utilizing a variety of sizes and colors, you can create a truly one-of-a-kind backyard that reflects your personal style.


9. Pebble Paver
Pebble pavers add a natural and rustic touch to any backyard while offering a practical solution for creating a convenient and beautiful outdoor living area.
Pebbles come in various sizes and colors, allowing you to create a unique and personalized design for your backyard. Whether you prefer a gravel pathway or a full pebble patio, these backyard pavers will create a beautiful and functional space that you can enjoy all year round.

10. Travertine Pavers
Travertine backyard pavers are are a form of limestone and are available in a range of colors from ivory to red. Travertine pavers are durable and can withstand harsh weather conditions, making them a popular choice for poolside flooring.
Paired with the right landscaping, these pavers can add a touch of elegance and sophistication to your backyard pool. Plus, their non-slip surface makes them safe to walk on.


Backyard Paver FAQs
While it’s possible to grout pavers like you would bathroom tiles or a backsplash, most homeowners fill the gaps in their patio with sand. Coarse sand locks the pavers in place and creates a finished look that lasts for years.
Polymeric sand is a more permanent solution. It is made of regular sand and a water-activated bonding agent. Once activated, the polymeric sand hardens for a stronger, erosion-resistant bond.
Landscape fabric is effective underneath large areas of exposed pea gravel or rock mulch. When it comes to installing paver stones, however, landscaping fabric is often more trouble than it’s worth. It can interfere with proper drainage and is hard to remove once it starts to break down.
Permeable pavers allow water to seep through to the soil below. This is a crucial part of any healthy ecosystem.
Some pavers are made from porous materials that allow water to pass through the pavers themselves. But most permeable paver patio designs incorporate gaps between the stones that let rainwater flow through and prevent damaging washouts.
10 Amazing Indoor Herb Garden Ideas
“Fresh herbs really belong anywhere you put them.”- Alex Guarnaschelli
Whether you’re a beginner learning how to boil water or prepare eggs or an expert with many recipes under your belt, fresh herbs will make your cooking better. There’s no denying that fresh herbs give your food an intense flavor that blooms in the food for an explosive medley in your mouth.
Growing herbs indoors is the easiest way to start incorporating fresh herbs into your cooking. You just need to figure out the best way to grow those herbs in your kitchen. These indoor herb garden ideas will help you take your dishes to the next level.
1. Simple and Budget-Friendly DIY Herb Garden
You don’t have to spend a lot of money or build an elaborate setup to have fresh herbs growing in your kitchen. All you need to do is create a simple DIY herb garden. You could use some old glass jars and fill them with dirt and add your herbs. You could use jars of different sizes to match plants that may vary in size. For a uniform look, you could collect your jars over time so they all match.


Another option is to save several cans and use them as your planters. If you have more coffee mugs than you know what to do with, why not use them for your herbs?
Whatever you decide to use, consider labeling your herbs. You should also consider decorating your DIY planters to mask their original purpose and turn them into decor. You could wrap them in fabric, paint them, or slide a fancy sock over each one. Use fancy sticker labels that you write each herb’s name on and then stick to your planter. Or buy small plant stakes that you can write the herb’s name on and stick in the soil.
2. Creative Hanging Herb Garden for Small Spaces
If you don’t have a lot of counter or wall space, you’ll have fewer options in where you can set your plants down, so it’s time to get creative. A hanging herb garden eliminates the need for a flat surface. You can put your herb planter anywhere as long as there’s a ceiling.


Why not have flavorful herbs within arm’s reach by hanging a planter next to your stove or workspace? You could have a solid board with notches that you hook your pots onto. They stay in place by counterbalancing against the board. Or you could have multiple baskets that connect by chains or rope.
If you have empty wall space, you could mount several bars or a rack. Then hang individual pots from it. Try to match the style and materials to the rest of your kitchen’s style and decor.
3. Innovative Hydroponics and Aquaponics for Herb Gardening
Not all plants need potting soil to grow. If you aren’t crazy about the idea of having dirt in your kitchen, why not try hydroponics? There are several kits that will make it easy to start growing your own herbs in water. However, this isn’t your only option.


You can easily build your own hydroponic DIY indoor herb garden. You’ll create a mason jar herb garden where the jars are full of water, with small baskets in the top that hold the plants. Skip the herb seeds for this one. This growing method is best for clippings or when you’re growing from the stalk of an old plant, such as chives.
There are some things to watch out for with your water garden. You want the roots to grow into the water, but you’ll need to watch for root rot. This is when the roots see too much water. Another problem is when you don’t maintain the right water level, and the plant dries out. Algae is another common problem that develops with this type of gardening. It occurs when your water sits stagnant for long periods of time.
4. Kitchen Herb Garden as Decorative Accents
Your indoor garden can be more than just a place to grow perennial herbs. You can turn it into the decor. The natural greenery will enhance the look of your kitchen and give it a natural warmth. Look for a place that you can arrange your herb garden to create a decorative accent while also being a good spot for your plants to grow.


Choose a planter that will complement the rest of your kitchen design. A rustic kitchen could have a vintage tin planter. A farmhouse kitchen would look cute with a shallow basket holding a few porcelain or ceramic jars.
For those with a modern kitchen, you could choose a sleek glass or black planter with a square shape and crisp corners. Earthy or bohemian kitchens will look right at home with terra cotta pots. The idea is to create a garden that’s both decorative and functional for growing herbs.
5. High-Tech Modern Herb Planter for the Tech-Savvy Gardener
If you love technology and innovation, consider buying a modern herb planter. These are more than just pots. They are a complete growing system. What makes them stand out is that many come with a grow light. This lets you enjoy the hobby of indoor gardening, no matter what kind of light your kitchen has.


Look for herb garden ideas that will work with the design of your kitchen. You could have a small modern planter that sits on the counter and grows a handful of small herbs. Or you could have a full-sized planter that sits on the floor and grows many herbs and plants.
There are other modern planters that take the guide work out of caring for your herbs. They have a double-walled design that suspends the plant above the water level. Then if you over water the plant, you won’t drown it. If you forget to water it for a while, the plants can still reach the reservoir and pull from the excess water.
6. Diverse Planter Ideas for Unique Herb Gardens
Your options are limitless when it comes to creating your kitchen garden. Sure, you could have your standard windowsill planter where you plant herbs in several small pots and line them up on a shelf. Or you could have a single trough-style planter that you place several herbs inside of.


If you’re handy, you could build your own planter to fit the exact size of the space you have available. Use some spare wood you have lying around and attach a few pressure clamps. Then you can adjust their size to hold a pot suspended in place.
Another cute idea is finding a vintage milk bottle carrier to place mason or other glass jars inside. You can then move the carrier about with the handle. This makes it easy to move your herbs about the kitchen or house to get the ideal amount of light.
Look for ways you can customize your garden. Maybe there’s a sign on it with your name or an inspirational saying that speaks to you. Don’t forget to add the herb labels as the finishing touch.
7. Create a Thriving Herb Oasis in Containers
If you decide to put your herbs in pots, make sure you set them up for success by planting them correctly. You’ll want to use the right type of soil or potting mix. Not all herbs enjoy rich dirt. Some prefer a more arid and sandy composition.


You’ll also want to have proper drainage for your herb plants. You can achieve this with a hole in the bottom of the pot. If this isn’t possible, create a layer of rocks on the bottom. This will create drainage space under the soil for the water to drain away from the roots. However, it doesn’t completely remove the water, so if you forget to water your herbs, the roots can still reach the excess moisture.
Place your potted herbs in an area where they will get as much natural light as possible. This will help them to grow with plenty of leaves.
8. Maximizing Space with Vertical Herb Garden Designs
The beauty of herbs is they don’t need a lot of space. These aren’t like the plants outside in your landscaping or garden; you only need small herb plants to have plenty of fresh seasoning for your cooking. If you lack square footage, then the only solution is to create a vertical garden.


These indoor gardens use the often unused vertical space in your kitchen to grow your plants. You could put this garden idea to practice in your kitchen by hanging a vertical planter on your wall. If you don’t have the wall space, there are tower planters that can hold multiple herb plants on various levels.
To make your vertical planter a success, place the plants that like drier soil on the top and plants that prefer more water on the bottom. Then place the plants that enjoy the sunlight towards the light and those who prefer indirect light on the other side.
9. Wall-Mounted Herb Garden for a Modern Twist
The traditional method for growing herbs and other plants is in pots or planters. However, herb pots aren’t your only option. Instead, you could grow your favorite herbs in a wall hanging. Some planters have multiple spaces for growing several herbs. They are sometimes made from cloth or fabric but can also be wood or plastic.


Mount the wall hanging planter on a blank space on your wall. Then dedicate each compartment to an herb plant. You could have parsley, lemon balm, and basil, to name a few. This keeps all of your plants contained in one easily maintained planter. The separate compartments also ensure that one plant doesn’t infringe on any of the others.
Another option for your wall hanging is to mount bars on your wall. They might look similar to a towel rod. Then hang small pots on hooks from the bar. Ikea has kitchen organizational kits that make this idea easy to implement in your kitchen.
10. Grow a Windowsill Herb Garden
Just like all other plants, your herbs will enjoy the sunshine. If you want your indoor plants to flourish, consider building a windowsill herb garden. The easiest way to do this is by building a single trough for planting different herbs in. This gives you one pot to maintain and water. The downside of this garden is that you risk one plant taking water and nutrients from another.


Your other option is to build a shelf on which you can place several pots. This gives you the freedom to move the plants around as needed to find the perfect growing spot for each one. You can also easily bring the pot with the herb you want to cook with over to your workspace. This eliminates making several trips back and forth as you’re cooking.
If your kitchen faces the wrong direction, your window may not get enough light. You could compromise by putting your herb garden in a different windowsill that does get the right amount of light.
Indoor Herb Garden FAQs
The best herbs to grow indoors are basil, oregano, parsley, and rosemary. These are perennial herbs that you can get from your local hardware store or garden center. You could even grow many of them from a clipping taken from a more mature plant.
You can grow sage, thyme, rosemary, marjoram, and oregano together. This makes sense since they are all Mediterranean herbs that you see used together when cooking. Basil and parsley grow well together because they prefer similar growing conditions. Mint should always be by itself.
The most important things to consider are proper watering and sunlight. Create adequate drainage so that the roots don’t rot. Then water them just enough to make them happy. Place the herbs in an area of your kitchen that gets plenty of natural sunlight. Then, learn how to harvest your herbs correctly so that you don’t damage the plant when taking your clippings.
10 Backyard Playground Ideas
“You could hear the wind in the leaves, and on that wind traveled the screams of the kids on the playground in the distance, the little kids figuring out how to be alive, how to navigate a world that was not built for them by navigating a playground that was.” – John Green
Outdoor play is a vital part of the childhood experience and what better place to experience it than in your own backyard?
Children who spend ample time playing outdoors gain multiple physical, social, emotional, and intellectual benefits. Therefore, if you have a private backyard of any size, designing a fun backyard playground is a must.
Scroll through our gallery to see dozens of fun DIY backyard playground ideas suitable for kids of all ages. Whether you start with a premade playset or design a DIY backyard play area from scratch, you’ll be on your way to having the best kid-friendly yard on the block.
1. Swing Sets for Timeless Fun
Swing sets offer a blend of fun and physical activity. Incorporating them into your backyard can create a focal point for children’s play.
Choose from wooden or metal sets to match your backyard’s aesthetic and consider adding features like tire swings for added fun.


2. Creative and Cozy Playhouses
If given a choice, many a kid would rather have a playhouse than a swing set. A playhouse is a mini-retreat for an imaginative child; a perfect place for reading books alone or hosting tea parties with friends.
A playhouse can also be integrated into a play structure, either at ground level or elevated with a sandbox tucked beneath. Backyard ideas for play house design can mimic the exterior of your main home.
Or you can go another direction entirely. Design a charming cottage for a creative little girl, or make a small red barn—a perfect touch behind a farmhouse.


A tree house is another great type of backyard playground shelter. Watch this video for tips on locating the perfect tree to hold your treehouse:
3. DIY Playset Projects on a Budget
Building a playset yourself can be cost-effective and customizable. Use materials like repurposed wood or recycled tires, and design it to fit your space and children’s interests.
Sturdy plastic slides, rock wall footholds, and other features are usually structurally sound well after wooden playset parts have worn out.
Browse social media marketplaces for PVC pipe and other material that can safely be repurposed into a swing set frame or teepee poles.
Hang a tire swing from a sturdy tree for an easy, affordable DIY swing. If you have a friend whose kid has outgrown their outdoor playset, ask if you can disassemble it and reuse some of the parts.
Adding personal touches like themed paint jobs can make it unique.


4. Dynamic and Versatile Playsets
Invest in playsets that grow with your child. Look for modular designs that allow for additions like climbing walls or rope ladders.
These adaptable structures can evolve over time to keep up with your child’s developing skills and interests.


5. Building Sandbox Playgrounds
A sandbox is the stuff kid dreams are made of. Who doesn’t have happy memories of digging for hours, creating roads, tunnels, and construction sites? While many playset kits come with an integrated sandbox, it’s easy and inexpensive to build your own.
Note that a sturdy lid is a must for any backyard playground sandbox. It will keep cats and wild animals from urinating or defecating into the sand between play sessions. It will also help keep the sand and outdoor play toys clean.


6. Exciting Backyard Slides
I’m sure your child would agree: a backyard swing set isn’t complete without a fun slide or two. A slide is a great addition to any playset as it encourages climbing. Getting to the top and repeating it helps build physical coordination—an important benefit of backyard play.
Playset slides come in many configurations. Get a short toddler slide if your children are very young.
Tall slides can be a climbing hazard for very small children, but tall, twisting, tunnel slides are ideal for big kids. Make sure you have a soft pad of artificial grass or a thick layer of wood chips beneath for a soft landing.


7. Modern Saucer Swings
Saucer swings are another vital feature when shopping for a playset or designing a DIY swing set. For safety reasons, look for swing set chains that are adjustable for height. A saucer swing set for young children should include at least one swing that has a backrest and safety strap.
These swings are great for both solo and group play, encouraging social interaction. They can be hung from trees or existing swing set frames and are ideal for lounging or active swinging.


8. Energetic Trampoline Fun
Trampolines have long been great ways for active kids to burn off excess energy.
Whether you have a full-sized, freestanding trampoline or a small bouncer pad for toddlers, try to include one in your backyard playground.
Prevent injuries from spoiling the fun by making sure your trampoline has a proper net enclosure. On a small toddler trampoline, a padded bar to hold on to is usually enough.

9. Safe Play with Artificial Grass
Artificial grass in play areas ensures a soft, cushioned surface, reducing the risk of injuries. It’s low maintenance and stays green year-round, making your playground look inviting.
Plus, it’s great for areas where natural grass might struggle to grow.

10. Mulch for Playground Safety
Mulch is not just for aesthetic appeal; it provides a safe landing for kids. It’s an affordable option that’s easy to install and maintain.
Opt for rubber or wood mulch to cushion falls and define play areas distinctly from the rest of your garden.

Backyard Playground FAQs
A playground’s surface is an important safety issue to consider. Its main purpose is to protect little ones from serious injuries while enjoying their play area. The materials most commonly used for backyard playground surfaces are:
- Wood mulch
- Rubber mulch
- Pea gravel
- Sand
- Living grass
- Artificial turf
- Rubber tiles
Most play equipment can be expected to last around eight to ten years. You should frequently inspect your backyard play area, searching for cracks, loose bolts, and broken objects. A poorly maintained playground structure may only last for five years. Wooden mulch will need refreshing every year or two.
10 Bathroom Flooring Ideas
“If no one ever took risks, Michaelangelo would have painted the Sistine floor.” – Neil Simon
What does your bathroom floor look like? If it’s a plain neutral-colored tile, then you are missing out on a prime opportunity for a custom flooring design. Bathroom tile is more than just a floor covering in your bathroom. It is a design element that can transform the look of your bathroom.
These bathroom flooring ideas will help you get inspired for your bathroom remodel. Start from the ground up with your bathroom makeover.
1. Hexagon Bathroom Tiles
Hexagon tiles bring a unique geometry to bathroom spaces, breaking away from traditional square or rectangular shapes. This design is ideal for adding visual interest without overwhelming the space. Hexagon tiles can range from small mosaics to larger formats, allowing for versatility in design. They work exceptionally well in both monochromatic schemes for a subtle look or in varied colors to create a focal point.


2. Patterned Bathroom Tiles
Patterned tiles are a bold choice, ideal for homeowners who want to make a statement. These tiles come in various designs, from intricate vintage motifs to modern geometric patterns. They are often used as an accent in a specific area, such as the shower or as a border, to add character. Patterned tiles can be the centerpiece of a bathroom’s design, dictating the choice of fixtures and accessories.


3. Multi-Colored Floor Tiles
Multi-colored tiles offer a vibrant and lively option for bathroom flooring. They can be used to create a mosaic effect, add a pop of color, or establish a color theme for the bathroom. Choosing harmonious colors can create a cohesive look, while contrasting shades can introduce an element of surprise. These tiles are excellent for family bathrooms or spaces needing a playful touch.

4. Concrete Look Bathroom Tiles
Concrete look tiles bring an industrial and contemporary edge to bathroom design. Their muted, neutral tones provide a sleek and modern appearance, fitting well with minimalist or industrial aesthetics. These tiles are also practical, offering the concrete look without the maintenance requirements of actual concrete. They pair well with metallic fixtures and natural wood accents.


5. White Marble Tiles
White marble tiles exude luxury and sophistication. Their natural veining adds texture and depth, making each tile unique. This classic choice reflects light, helping to make smaller bathrooms feel more spacious. White marble pairs beautifully with both chrome and brass fixtures and can be used to create a timeless, elegant bathroom interior.


6. Classic Ceramic Floor Tiles
Ceramic tiles are a versatile and durable option for bathroom flooring. They come in a wide range of colors, patterns, and finishes, making them suitable for any design aesthetic. Their resistance to moisture and ease of cleaning make them a practical choice for high-traffic bathrooms. Classic ceramic tiles can be laid in various patterns to add visual interest.


7. Non-Slip Floor Tiles
Safety and style meet in non-slip floor tiles. These tiles are designed with texture or matte finishes to provide extra grip in wet conditions. Ideal for family or elderly users, they reduce the risk of slips and falls. Non-slip tiles don’t compromise on aesthetics; they come in a range of colors and patterns, ensuring safety without sacrificing design.

8. Pebble Shower Floors
Pebble shower floors offer a spa-like experience, bringing a natural, organic element to the bathroom. Their textured surface not only massages the feet but also provides a natural non-slip quality. Pebbles can vary in size, color, and finish, allowing for customization to fit any bathroom theme, from tropical to Zen-inspired spaces.

9. Pastel Tiles
Pastel tiles lend a soft, calming vibe to a bathroom. These subtle hues, such as soft pinks, light blues, and mint greens, are perfect for creating a serene, spa-like atmosphere. They work well with natural light and can be complemented with neutral tones or used as a soft backdrop to bolder accents. Pastel tiles are ideal for achieving a gentle, yet stylish look.

10. Vinyl Flooring
Vinyl flooring is a practical, budget-friendly option with a wide range of design possibilities. It can mimic the look of wood, stone, or ceramic, providing a cost-effective alternative to these materials. Vinyl is water-resistant, durable, and comfortable underfoot, making it suitable for busy family bathrooms. It’s easy to install and maintain, perfect for quick renovations.


Bathroom Flooring FAQs
The most popular flooring option for bathrooms is tile. Porcelain and ceramic tiles are sturdy, durable, and waterproof. You can find tile in any color, shape, size, and pattern. When installed correctly and given proper care, tile floors can last many decades.
The easiest flooring to install is vinyl sheeting. However, it tends to look a bit cheap. The next easiest is vinyl plank flooring. It’s nicer because it has a more upscale look and can last for longer.
As long as you aren’t letting water pool, you should be fine to use laminate flooring in the bathroom. It’s durable enough to withstand dripping while you towel off after a shower. It’s also strong enough to withstand heavy traffic, dropped hot tools, and personal care products. It also resists staining. However, some laminate floor manufacturers do not recommend use of their products in the bathroom for fear of water damage.
Contents
