You’re rushing to get ready in the morning, and you need to quickly check the time. A wall clock is a must for this. One quick glance, and you’re on your way again. Wall clocks are more than just functional, though. They can add to the decor and be an elegant accent. The best wall clocks have a stylish design and reliably tell the time.
Find your next analog or digital wall clock with our carefully curated list of the best wall clocks.
Read also: 29 Wall Covering Ideas
[view_toc]
Top Picks
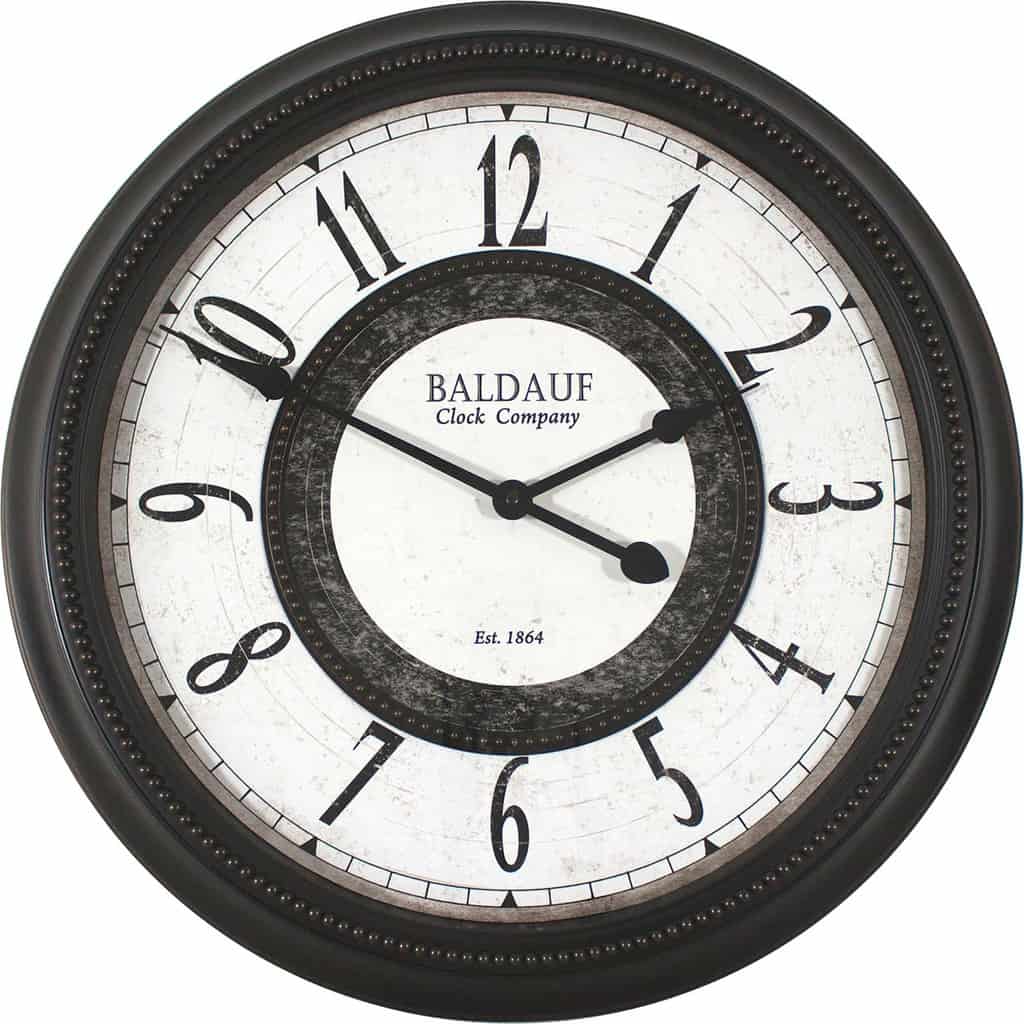
1. Sorbus Round Centurian Roman Analog Clock

Specs:
Dimensions: 16 or 24 inches
Type: Analog
Operating Mechanism: Quartz
Silent: No
The classic design of this metal wall clock makes it popular among interior designers and homeowners. The large Roman numerals help to make the clock easy to read while also being expertly designed. The black powder-coated finish gives the clock a polished look without being too rustic. The gold clock hands add a touch of elegance and luxury to what would otherwise be a rustic or industrial clock. A gentle ticking sound lets you know the clock is keeping time while providing you with a natural white noise sound. Despite the substantial look of this clock, it’s lightweight and easy to hang. While the clock comes in sizes, neither are too large, so you can hang it by itself or use it with other wall decor.
Unfortunately, hanging hardware doesn’t come with the clock, so you’ll need to purchase it separately. It also runs on a battery, so you’ll need to periodically change it to keep the clock running.
[buy_now title=”Check Price” link=”https://www.amazon.com/dp/B07XG1VBS8/?tag=trendey-20″]
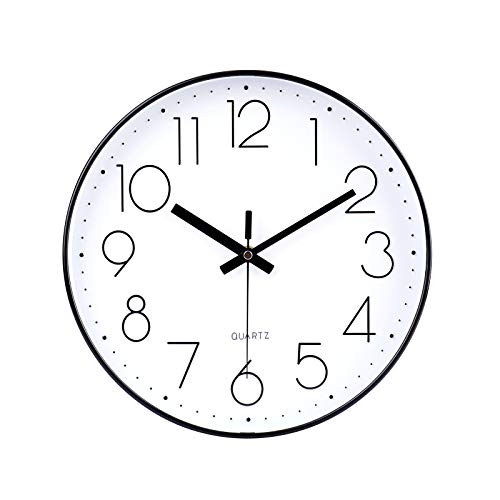
2. Jomparis Modern Wall Clock
Specs:
Dimensions: 12 or 14 inches
Type: Analog
Operating Mechanism: Quartz
Silent: Yes
This modern wall clock channels the classic design created by Arne Jacobsen. It features a bright white background with black Arabic numerals, clock hands, and frame. The clean design makes it one of the best modern wall clocks because it’s versatile and functional. You could hang this classic wall clock in a home office, kid’s room, laundry room, or even the kitchen. If the white looks plain for your tastes, you could a more colorful face option, including cerulean, grey, kelly green, navy, yellow, teal, silver, or peacock. There’s also an elegant option with a white background and rose gold numerals, hands, and frame. The quartz movement mechanism ensures you’ll always have the precise time at a glance.
Unfortunately, this clock is made from plastic, making it less durable than other options. It can also give the clock a bit of a cheap look. Some of the color options have low contrast, making them hard to read.
[buy_now title=”Check Price” link=”https://www.amazon.com/dp/B07QFVYQC5/?tag=trendey-20″]
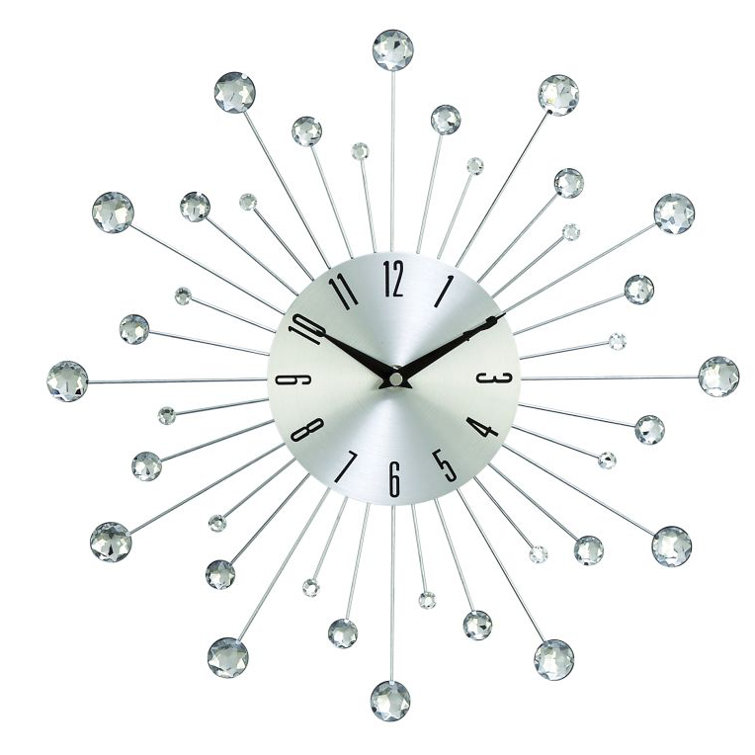
3. Cavanaugh Wall Clock
Specs:
Dimensions: 15 inches
Type: Analog
Operating Mechanism: Quartz
Silent: No
This glam wall clock features a design that was first made famous by George Nelson, a mid-century modern furniture designer. It features a large central disk that has the numerals and hands. Then radiating from this center disk, there are crystal accents radiating from it. Choose from silver, copper, and gold for the color of the metal, while all three have an iron construction. The starburst design adds a touch of decor to your walls. At just over a foot in diameter, you can easily hang this in smaller spaces. The crystal accents paired with the metal finish make this clock perfect for a glam style of interior design. Hang it with matching metal picture frames or a crystal chandelier.
The downside of this clock is that the clock face is highly reflective. This can create a glare on the face, making it difficult or even impossible to read the time.
[buy_now title=”Check Price” link=”https://www.wayfair.com/decor-pillows/pdp/mercer41-cavanaugh-wall-clock-w005374735.html”]
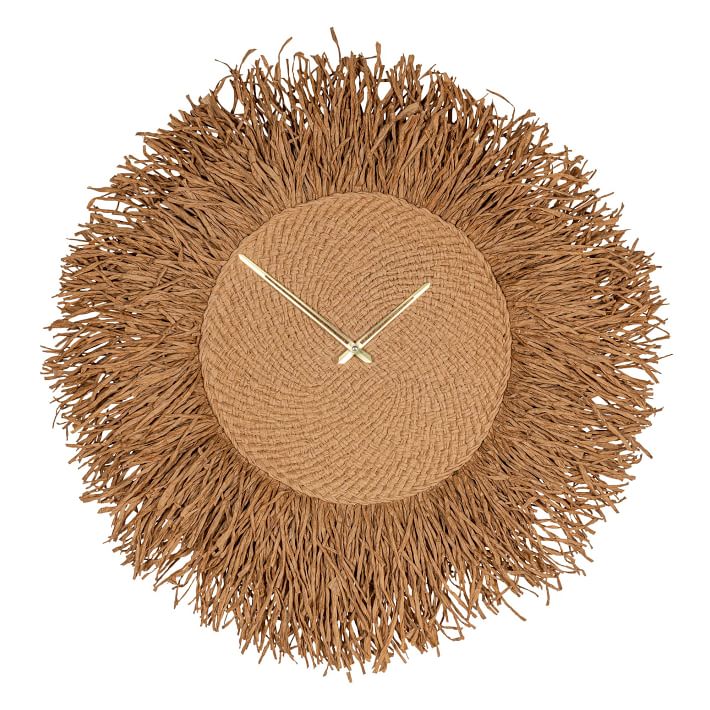
4. Sea Grass Wall Clock
Specs:
Dimensions: 31 inches
Type: Analog
Operating Mechanism: Quartz
Silent: No
This decorative wall clock doesn’t look like a clock, making it perfect for adding wall decor without making it obvious you are using a clock. The face is a tightly woven mat made of sea grass. Around the outside is a loose crown of see grass. Everything is mounted on a wood base with two conveniently placed loops for hanging it. The hands are slim line and gold to give the clock a touch of elegance. This clock is perfect for a bohemian, wanderlust, or coastal feel. The natural materials used in this clock will add texture and a touch of nature to your home. In addition, the neutral color of this clock helps it to easily blend in with any color palette.
The biggest problem with this clock is that it lacks numbers, making it harder to read than other clocks on this list. Sea grass is also a natural material that’s less durable than others.
[buy_now title=”Check Price” link=”https://www.westelm.com/products/sea-grass-wall-clock-d10925/”]
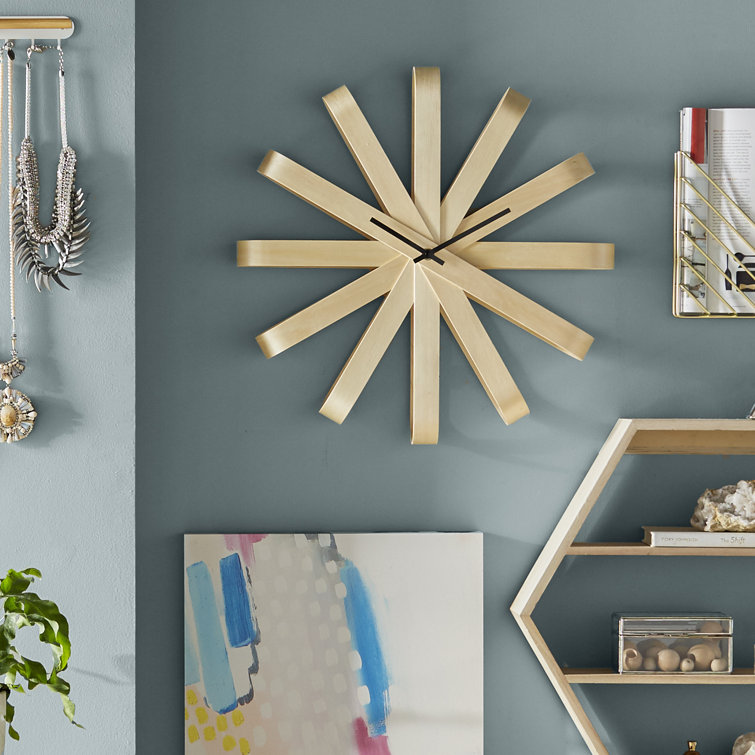
5. Perez Wall Clock

Specs:
Dimensions: 20 inches
Type: Analog
Operating Mechanism: Quartz
Silent: Yes
Howard Miller famously designed a clock that looked very similar to this one. This clock elevates the look of the original design and gives it a luxurious feel. The open design of the clock features an outer circle frame, a small center face, and two crossbars. The oversized hands extend almost to the outer edge of the clock. The simplistic design and gold finish make this clock perfect for almost any room in your home. It will blend perfectly with contemporary, luxurious, modern, and minimalist designs. The single hang point of the clock is above the frame of the clock, giving it a unique look. The silent operation of this clock means you won’t be distracted or bothered by it.
Because there are no markers for the numbers, it’s hard to tell the time with this clock. The gold finish can also be easily scratched. It also doesn’t hold the correct time well because the hands can easily become loose.
[buy_now title=”Check Price” link=”https://www.wayfair.com/decor-pillows/pdp/everly-quinn-perez-wall-clock-w003400644.html”]
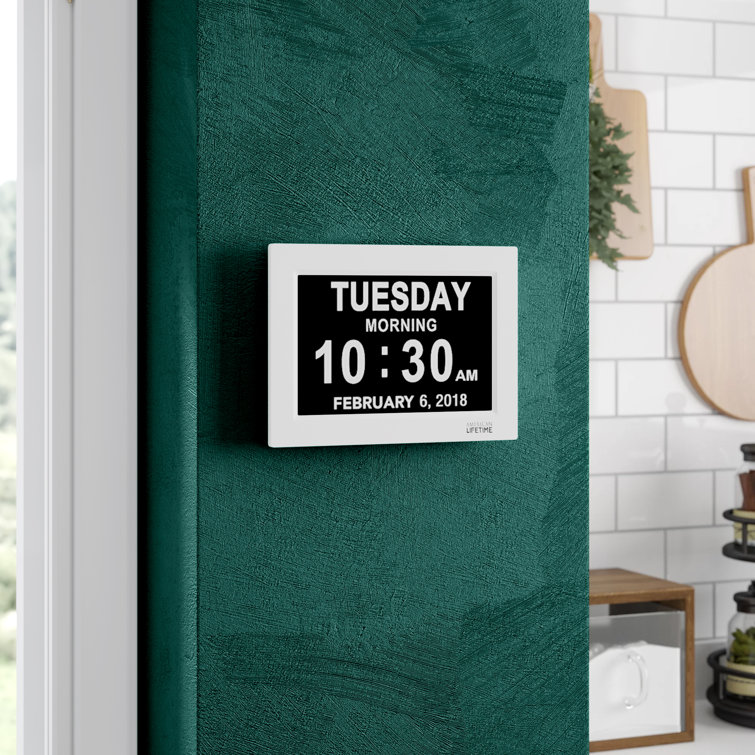
6. Akeelah Wall Clock
Specs:
Dimensions: 8.5 x 7 inches
Type: Digital
Operating Mechanism: Electric
Silent: Yes
This digital wall clock gives you more than just the time. It can also tell you the day of the week, the date, and if it’s morning, afternoon, or evening. There are five colors to choose from for the frame, black, brushed black, white, cream marble, and wood. This lets you choose the frame color that will best complement the rest of your interior design style. Unlike other wall clocks on this list, you can use this clock as an alarm clock. This clock is electric, so you’ll never have to worry about changing batteries. The body of the clock is made from plastic, which helps to keep the clock lightweight.
It would be nice if this wall clock had other features that you typically find on digital clocks. It could tell you the external or indoor temperature, weather, atmospheric pressure, or moon phase. It’s also small, making it less than ideal for larger rooms.
[buy_now title=”Check Price” link=”https://www.wayfair.com/decor-pillows/pdp/ebern-designs-akeelah-wall-clock-w000896288.html”]
7. Ribbonwood Wall Clock
Specs:
Dimensions: 20 inches
Type: Analog
Operating Mechanism: Quartz
Silent: Yes
This analog clock channels the retro designs of mid-century modern designers. It’s made from bent beech wood with a natural light finish. The hands are simple yet sleek in straight-line designs. There are no numbers on the face, but each fold of the wood ribbon represents an hour. This clock is perfect for a modern or Scandinavian interior design style where it will blend with other light wood features and furniture. The workmanship that goes into the building of this wall clock is impressive, with a high degree of expert hands-on workmanship. It’s finished with a quartz mechanism for accuracy and consistency.
Let’s face it, the bent wood design is nice, but also makes it more difficult to read the time. You have to know what number each wood ribbon represents. This can make the clock tedious to use. It also may not complement your home’s interior design if you have wood with red undertones or is dark.
[buy_now title=”Check Price” link=”https://www.wayfair.com/decor-pillows/pdp/umbra-ribbonwood-wall-clock-umb2739.html”]
8. Ethoridge Wall Clock
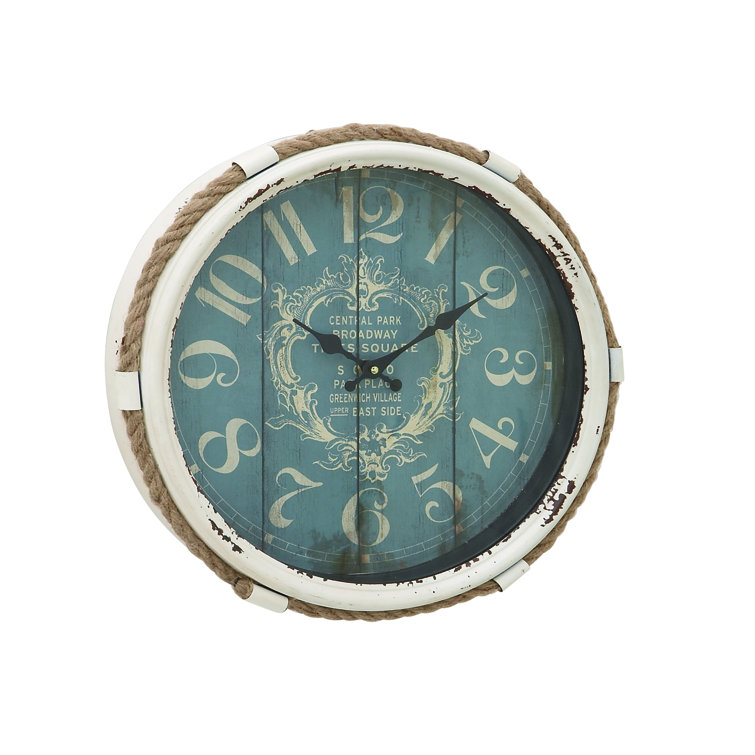
Specs:
Dimensions: 17 inches
Type: Analog
Operating Mechanism: Quartz
Silent: Yes
This analog wall clock is of average size, but that makes it versatile for hanging almost anywhere in your home. The nautical line gives the clock a coastal touch, making it a perfect wall clock for hanging in your bathroom, kitchen, or living room. There are plenty of rustic touches with wear and tear, giving it a weathered look. There are two designs to choose from. The first has a white face with a decorative barometer and natural colored rope. The other has a light blue face and bright white rope accenting. Both feature weathered metal brackets that secure the rope to the clock.
Unfortunately, this clock is very heavy. This makes it challenging to hang, and you’ll want to have a reinforced hook that’s anchored in a stud. Fail to secure it, and you risk it falling off the wall and the glass face shattering. Additionally, the barometer is non-functional.
[buy_now title=”Check Price” link=”https://www.wayfair.com/decor-pillows/pdp/breakwater-bay-ethoridge-wall-clock-w006011497.html”]
9. Allen + Roth Analog Round Wall Clock
Specs:
Dimensions: 30 inches
Type: Analog
Operating Mechanism: Mechanical
Silent: No
This large wall clock has a farmhouse-style with a distressed metal frame and white-washed wood pallet clock face. The Arabic numerals are large and constrast nicely against the light wood. A nice touch is how deep this clock is, helping it to stand out from the wall. The hour and second hands are slender to keep the clock from looking too clunky. While the clock may look like its wood, the clock’s body is actually made from plastic. This keeps the clock’s overall weight lighter than if it was made from wood.
If you are looking for a silent wall clock, this isn’t it. Some people find the ticking noise annoying, while others appreciate that they can hear the clock working. It’s also not actually made from wood, just paper that’s printed to look like wood. This makes it feel less authentic and can look fake to some people.
[buy_now title=”Check Price” link=”https://www.lowes.com/pd/Analog-Round-Indoor-Wall-Clock/1000402219″]
10. Balliol Wall Clock
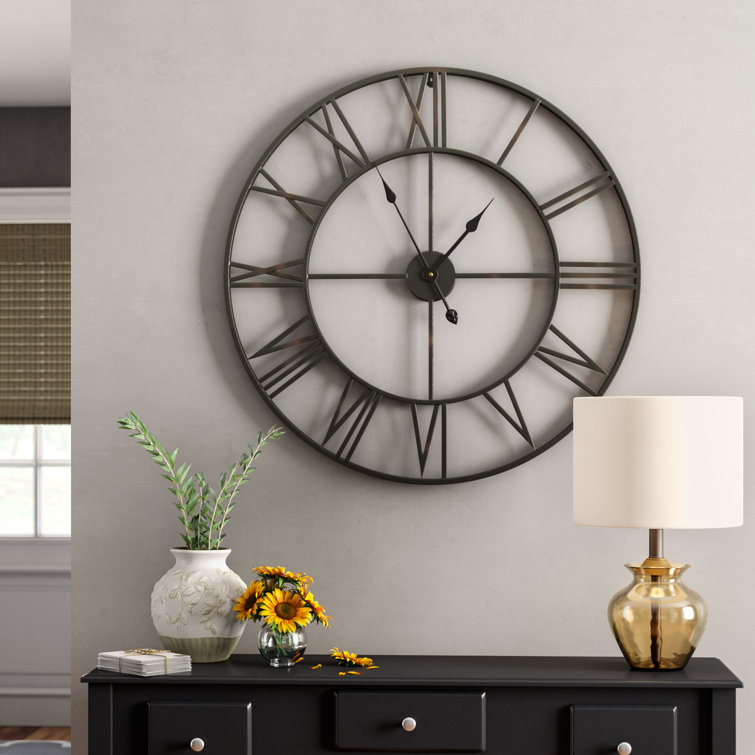
Specs:
Dimensions: 30 inches
Type: Analog
Operating Mechanism: Mechanical
Silent: Yes
This oversized wall clock is perfect for acting as your focal point in a dining or living room. Its large Roman numerals encircle the analog face with two long hands that rotate silently around. The iron construction makes the clock feel hefty and substantial. A nice accent is the touches of red. The front of the face is black, but the sides and back are red, which highlights the clock and helps it to stand out on the wall. There are also touches of rust throughout, giving the clock an authentic rustic feel. This simplistic clock accentuates an industrial, contemporary, country, or farmhouse design. However, the rustic accents make it not ideal for a modern or minimalist style.
One drawback of this clock is that it’s a bit underpowered. It only requires one AA battery, which can require frequent replacement. In addition, the mechanical operating mechanism makes this clock less accurate than others and can get stuck.
[buy_now title=”Check Price” link=”https://www.wayfair.com/decor-pillows/pdp/17-stories-balliol-wall-clock-w001057514.html”]
How to Choose a Perfect Wall Clock?
Size
Measure the available space on the wall where you plan to hang your wall clock. This will help you determine what size clock is best. Leave empty space around the clock to act as a margin or buffer. This creates some breathing room and prevents your wall from looking cluttered or crowded. On the other hand, don’t go too small with your clock. This will make the wall look bare, and the clock will awkwardly float ungrounded on the wall. Some table clocks will say they can also be hung. This may not be your best option. They tend to be too small for wall decor.
Style
The style of the clock is how it communicates the time to you. There are two types to choose from analog and digital clocks. Analog clocks are the traditional type with numbers one through twelve placed in a circle and two hands that move around the circle to indicate the time. A digital clock displays the numbers on a screen with the current hour and minutes indicated.
Design
The design of the clock depends on the interior decor style you’ve chosen for your home. For example, industrial, farmhouse, French Country, minimalist, modern, craftsman, or vintage. Look at the material used, the finish, and the design of the numbers. Matching the style of your clock to the room helps to create a cohesive design for the room. Consider the size, numbers, shape, material, and finish when looking at the design. For example, 3D numbers may look cool but may not fit the style of your room.
Material
Wall clocks come in wood, metal, plastic, and acrylic. Plastic is the most budget-friendly but not as durable. You have more variety when it comes to color options. Wood is a durable and versatile material. It could be any type of wood and designed to be anything from farmhouse to traditional elegance. Acrylic clocks are typically translucent and have a modern look. Metal is another versatile material that can be industrial to minimalist and rustic to glamorous.
Mechanism
There are three types of mechanisms in wall clocks: mechanical, quartz, and atomic clocks. Mechanical clocks are the least accurate because they require periodic winding. Quartz movement clocks are more accurate because they have a crystal oscillator and are battery-powered. Atomic clocks have the most accurate time because they are self-adjusted through the vibrations of the atomic systems. Tomic wall clocks require the least amount of maintenance; they even automatically adjust for Daylight Savings Time. A less commonly seen mechanism is pendulum wall clocks. Traditionally, all wall clocks were pendulum clocks with a harmonic oscillator that swings back and forth.
Conclusion
Our top pick for the best wall clock is the Sorbus Round Centurian Roman Analog Clock. Its simple design and average size make it perfect for use by itself or a part of a gallery wall. The roman numerals give it a touch of style. For those who are budget-conscious, the Jomparis Modern Wall Clock is easy to read with a clean, modern design. Both clock use quartz mechanisms for accuracy and longevity.