26 Easy DIY Garden Ideas on a Budget
“A single rose can be my garden… a single friend, my world.” – Leo Buscaglia
Building a garden in your backyard can be a rewarding experience. There’s nothing more satisfying than heading out into your backyard, picking your vegetables, and preparing a fresh meal with ingredients from your garden.
You don’t need to have an extensive farm; you just need a small garden with a few different types of vegetables. So set aside a weekend and get your garden started.
Whether you have a small or large space available, these DIY garden ideas will help you get started on your DIY garden.
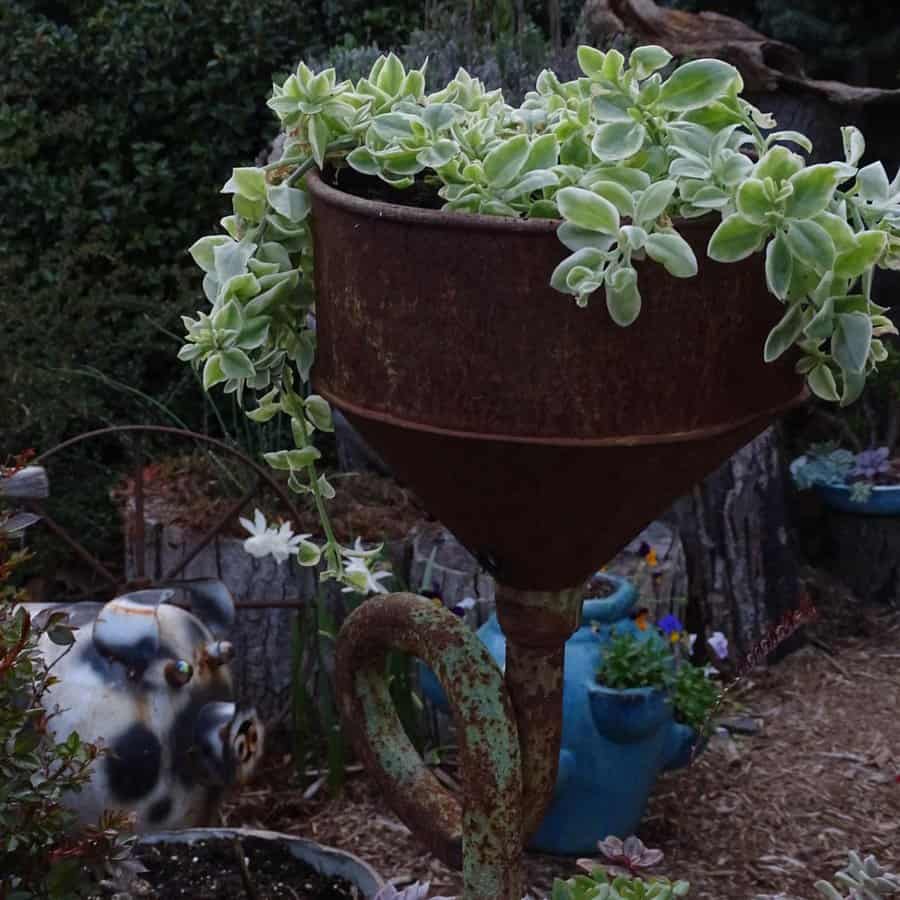
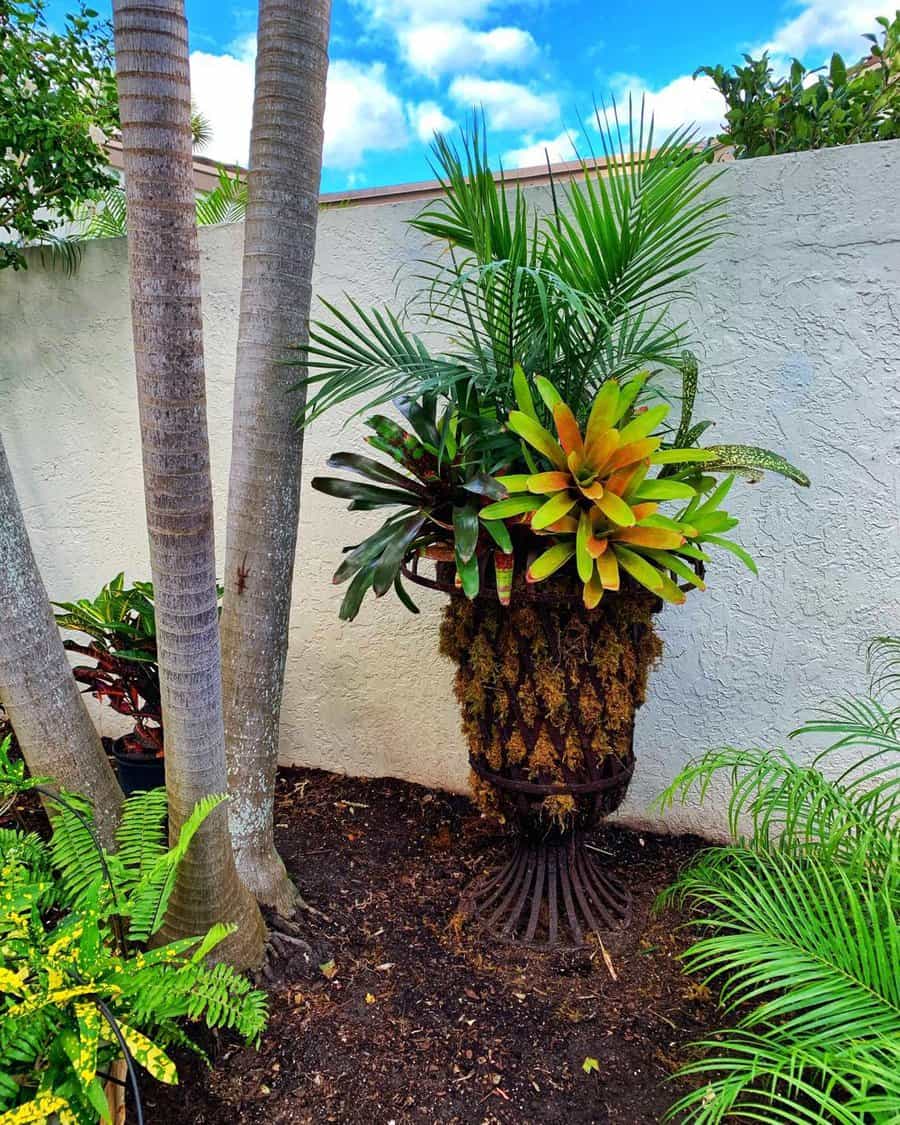
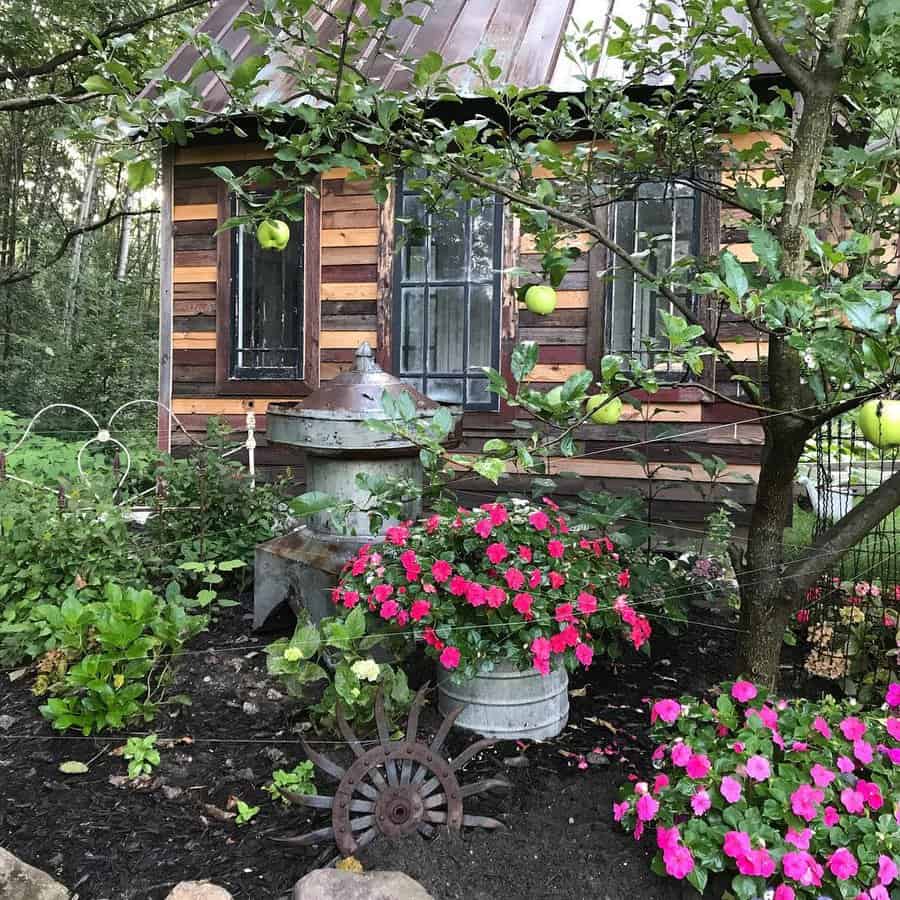
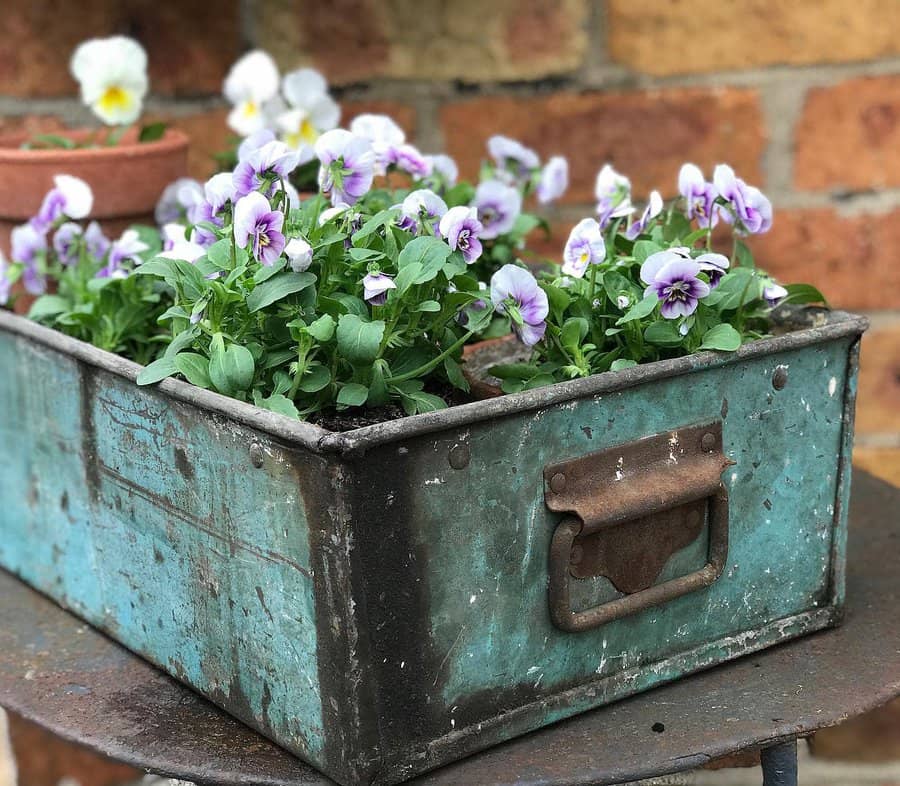
1. Repurpose Rusty Items for Planting
For budget-friendly garden projects that blend creativity with resourcefulness, repurpose rusty items into charming plant displays. An old chair can become a striking statement piece with a fresh coat of paint, while collections of repurposed cans or stone sculptures add unique character to your garden.
Explore unconventional plant containers by turning kitchenware like old mop buckets or cut milk jugs into quirky pots for your plants. Embrace the beauty of repurposed goods to create a cost-effective and enchanting garden that showcases your green thumb and artistic flair.


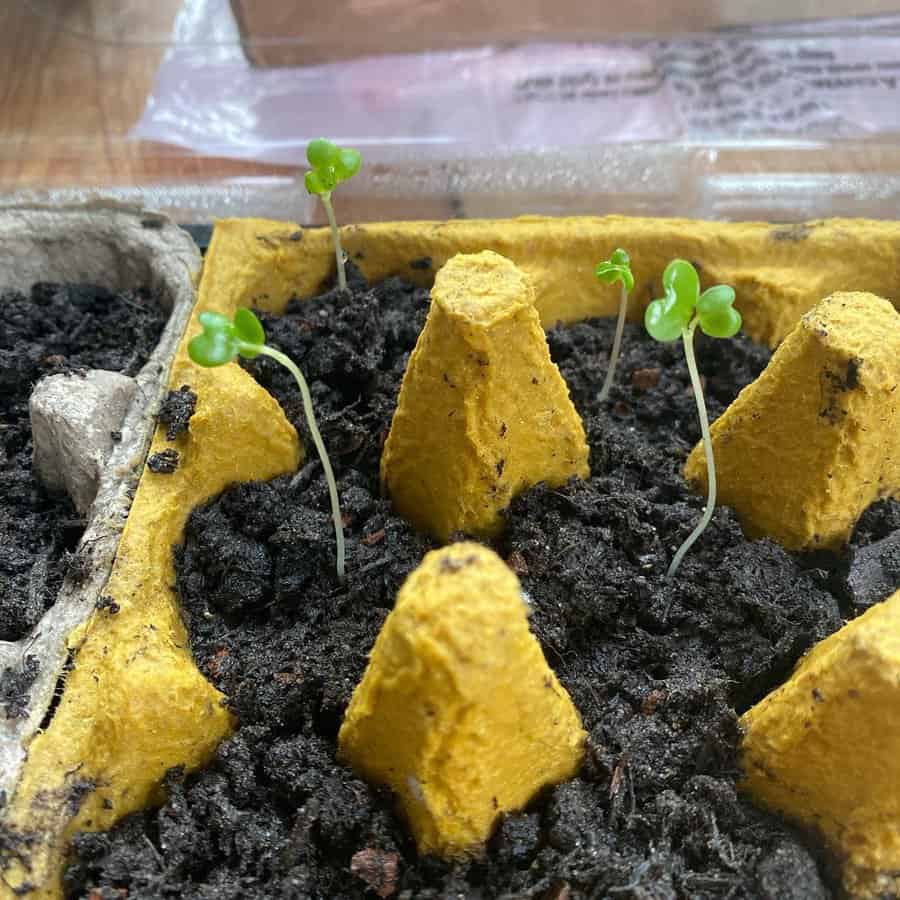
2. Create Container Gardens with Egg Trays
Kickstart your garden by using egg trays to create budget-friendly seedling containers. Cut out individual egg-shaped compartments, providing excellent drainage for your budding plants.
For a touch of eco-friendliness, repurpose old bottles or cans into charming planters. These creative ideas not only maximize limited space but also stretch your budget while infusing your garden with a unique and resourceful aesthetic. Consider grouping these containers on a wooden shelf or a repurposed pallet for an organized and visually appealing garden display.

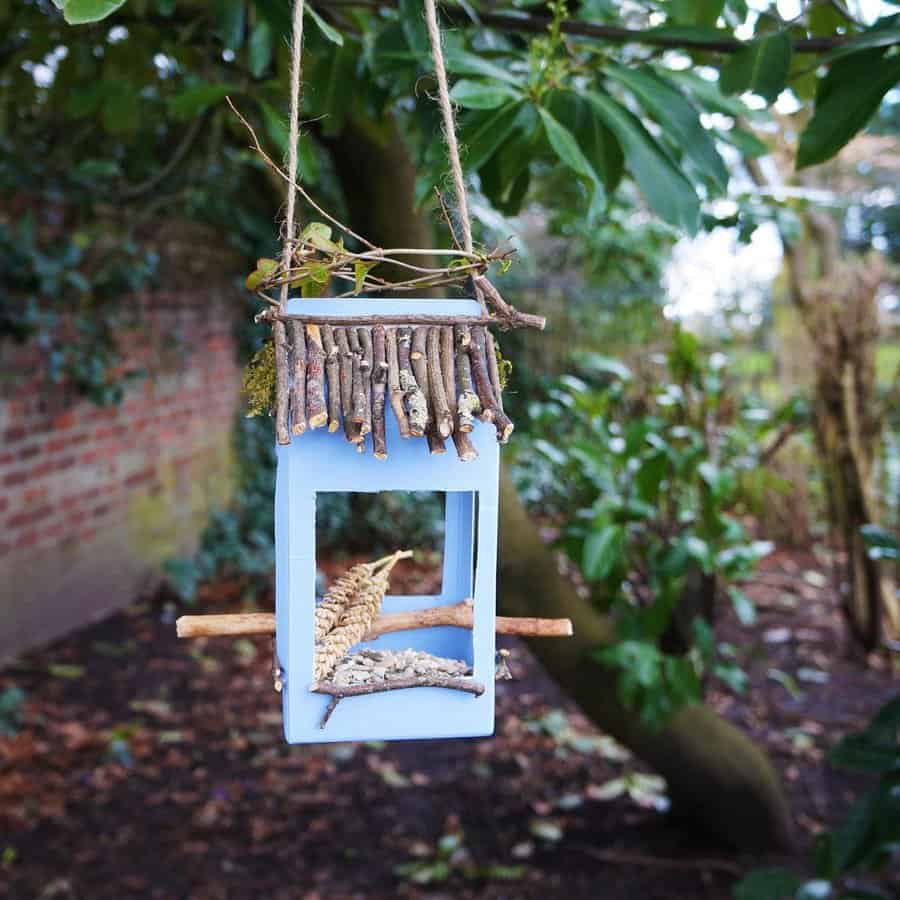
3. Craft a Budget-Friendly Bird Feeder
Maximize your small outdoor space by crafting a budget-friendly DIY bird feeder. Whether you have a balcony or a tiny garden, transform it into a wildlife haven with simple supplies like cardboard boxes or twigs, glue, and scissors. This project not only enhances your garden’s aesthetics but also nourishes local wildlife, bringing a touch of nature right to your doorstep.
To complement this bird feeder, consider adding potted plants or colorful flowers to create an inviting oasis for both you and your feathered friends.


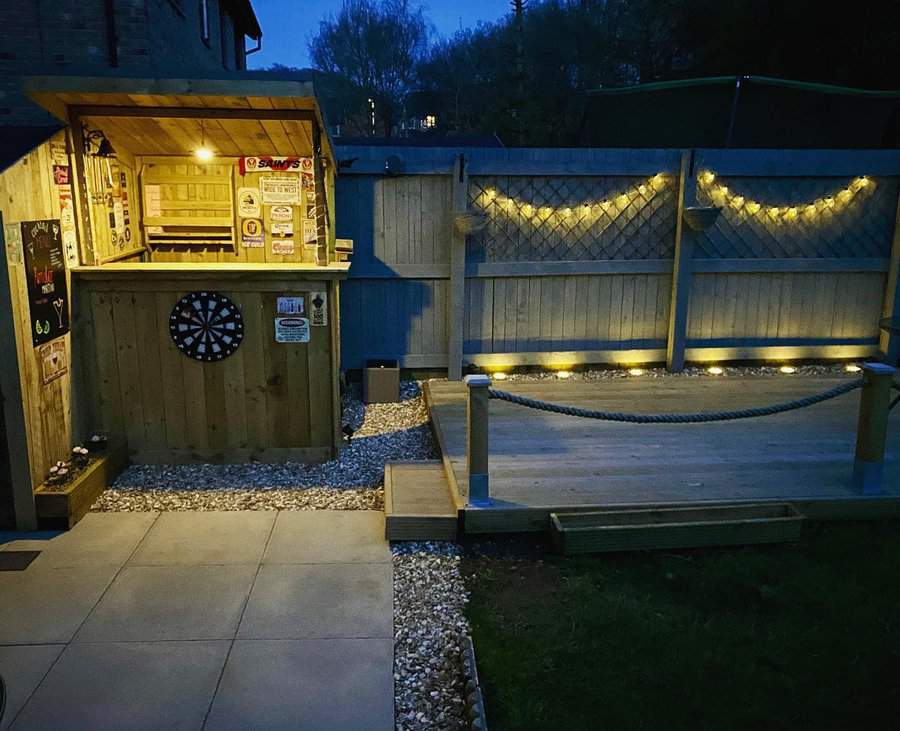
4. Build an Outdoor Garden Bar
Enhance your outdoor gatherings with a charming DIY garden bar, a surprisingly simple project with a big impact. With basic DIY skills and readily available materials, you can craft an inviting al fresco hangout for friends and family.
Elevate the atmosphere by adding string lights or vintage wall art, transforming your garden into a memorable gathering spot. Don’t hesitate—start creating your perfect outdoor space today! To complement the garden bar, consider adding comfortable seating, potted plants, and an outdoor speaker system for a complete entertainment experience.

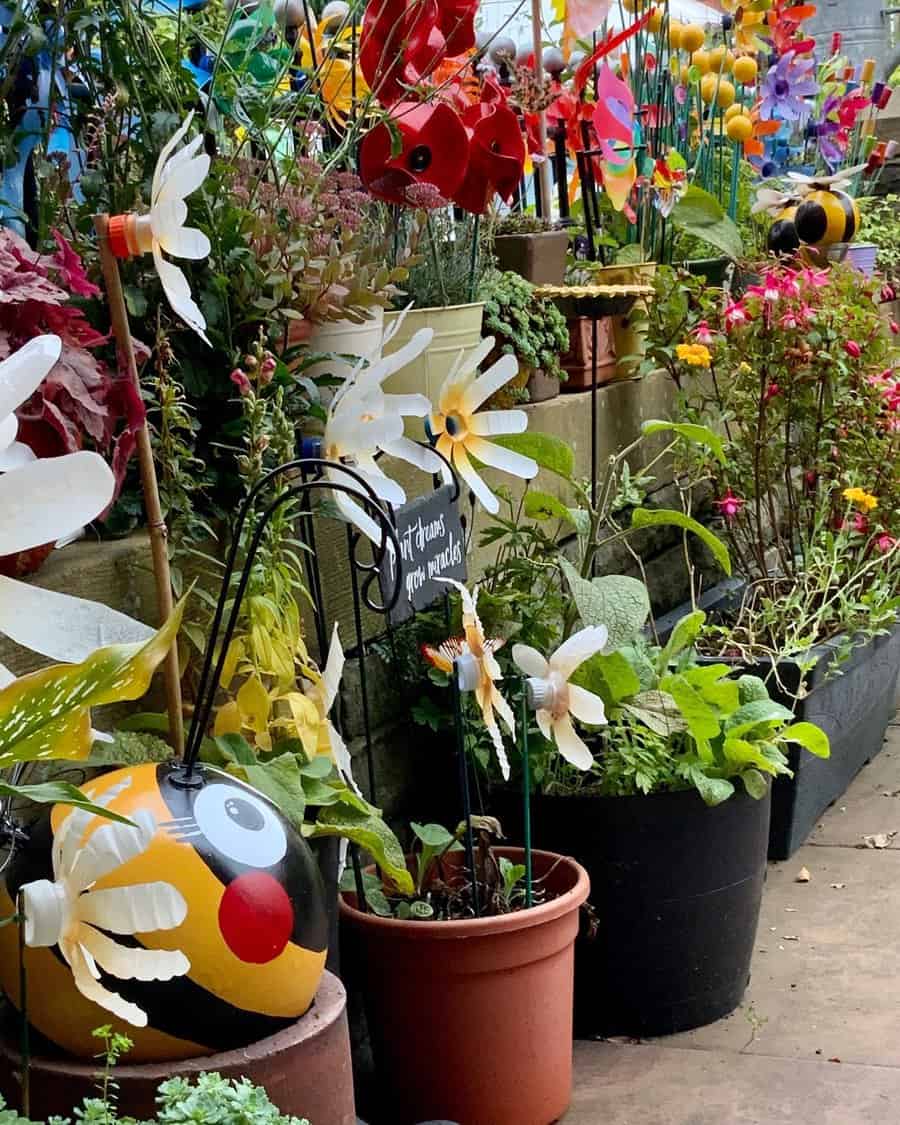
5. Craft Recycled Material Flowers
Crafting flowers from recycled materials such as craft paper, bottle caps, and fabric scraps is a budget-friendly way to add charm to your garden. For a pop of color, paint small terracotta flower pots and use them as planters to achieve a vibrant garden-like atmosphere in your outdoor spaces.
Embracing creative recycling allows you to enjoy unique foliage and blooms while keeping costs in check. With a touch of creativity and resourcefulness, you can set up an affordable garden, perfect for enjoying summer evenings in the beauty of nature. Consider adding complementary elements like mulch, pathway stones, and garden borders to enhance the overall look of your budget-friendly garden.

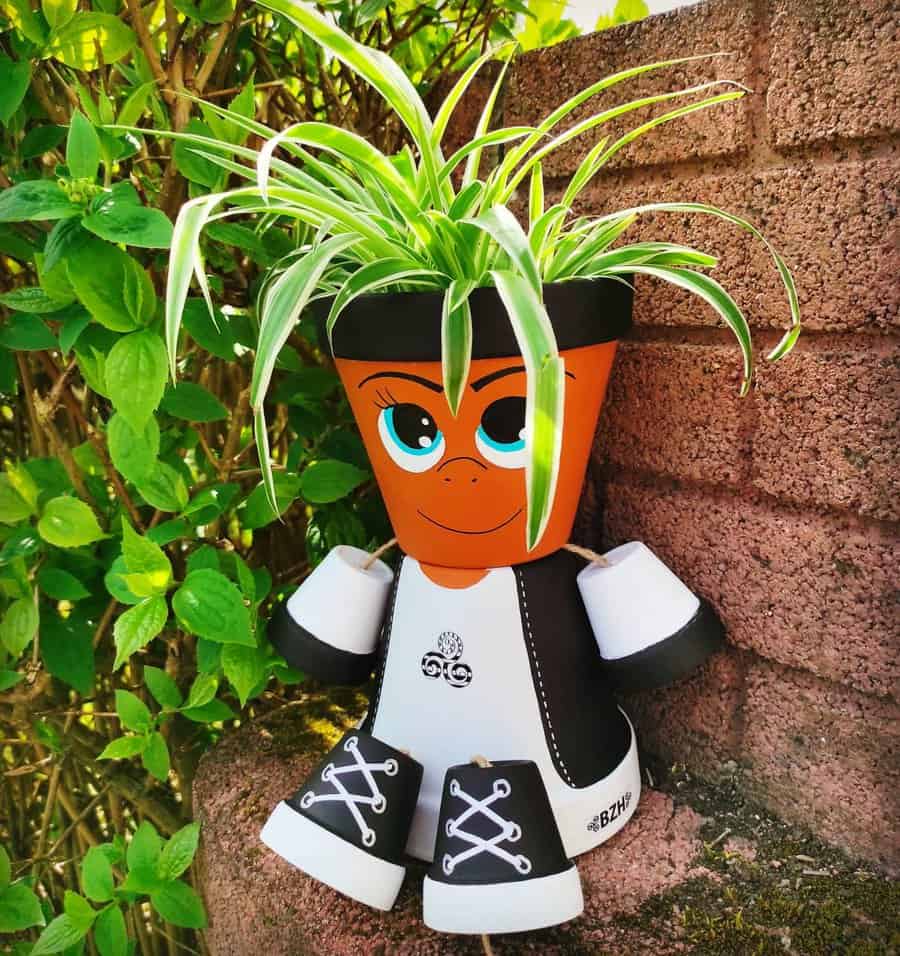
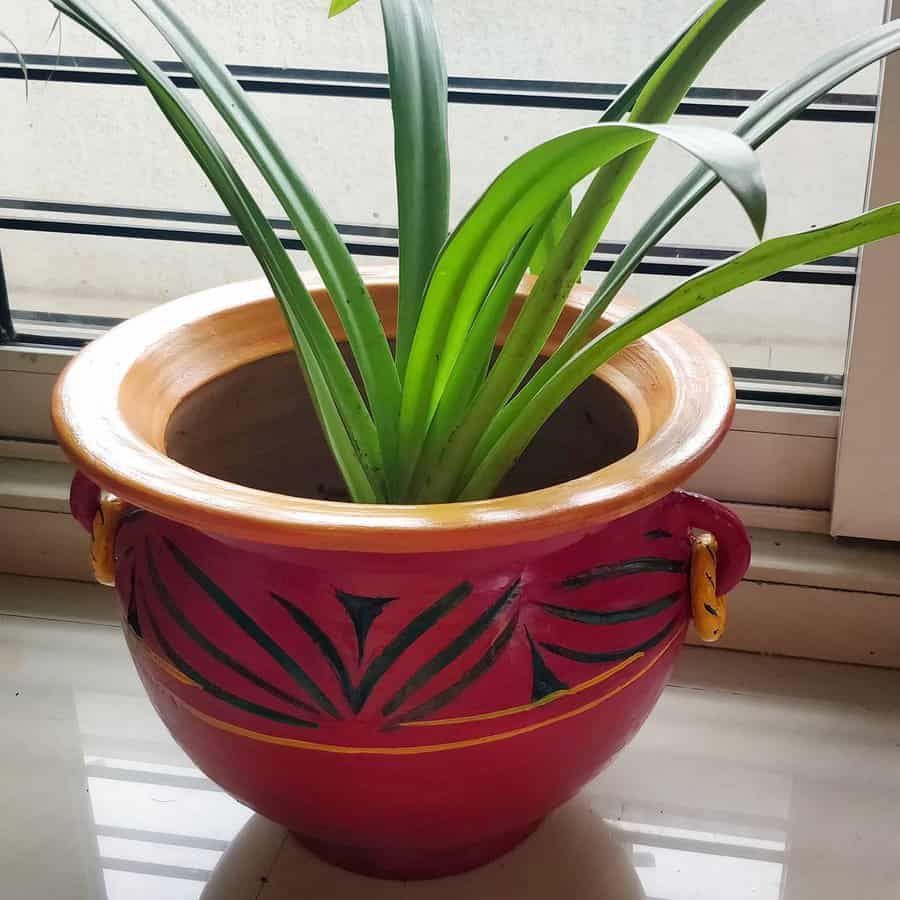
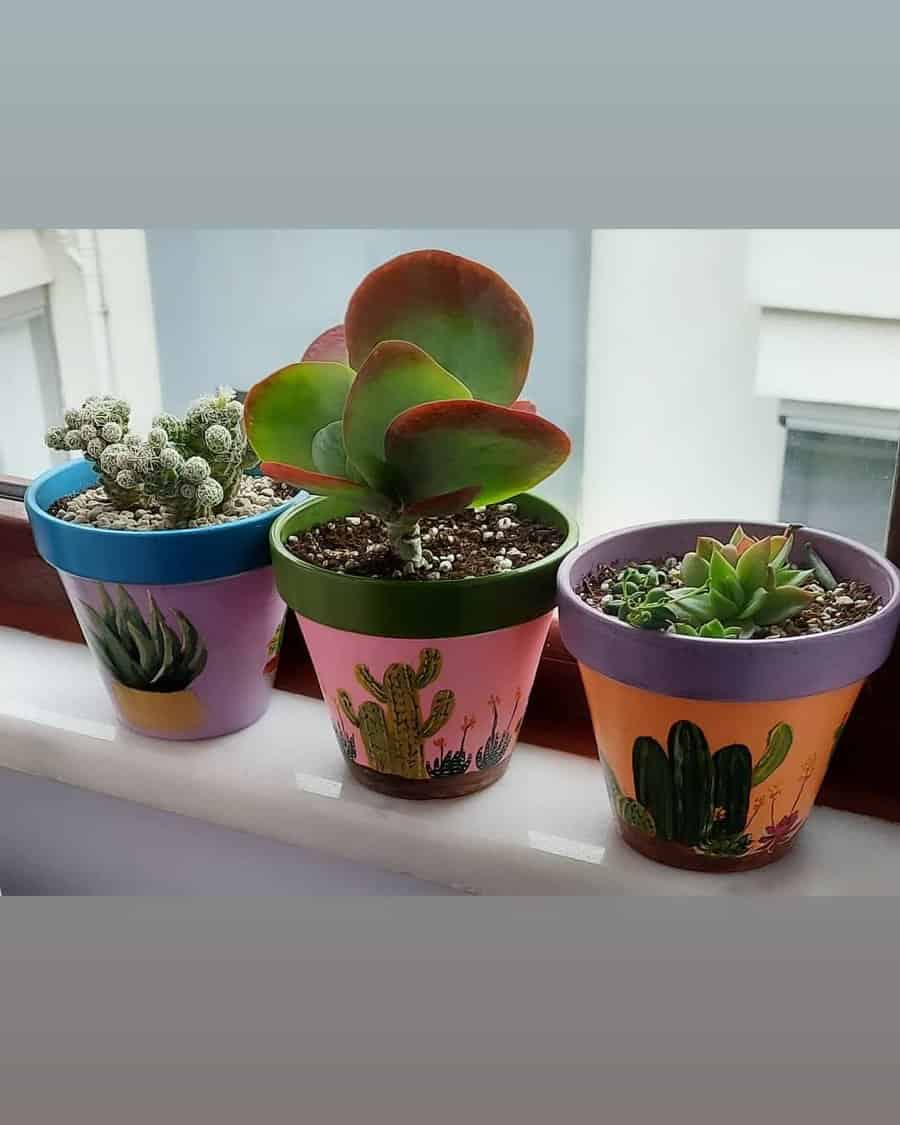
6. Painted Pots for Stylish Planting
Transform ordinary plant pots into stylish, personalized pieces of art by adding your creative touch with paint and doodles. Customize each pot to match your garden’s theme or your personal style, giving your greenery a charming and unique home.
This budget-friendly DIY project not only adds a touch of personality to your garden but also creates a cohesive and visually appealing look when you group these painted pots together. To complement your painted pots, consider choosing plant varieties that harmonize with the colors and designs you’ve used, creating a harmonious and eye-catching garden display.


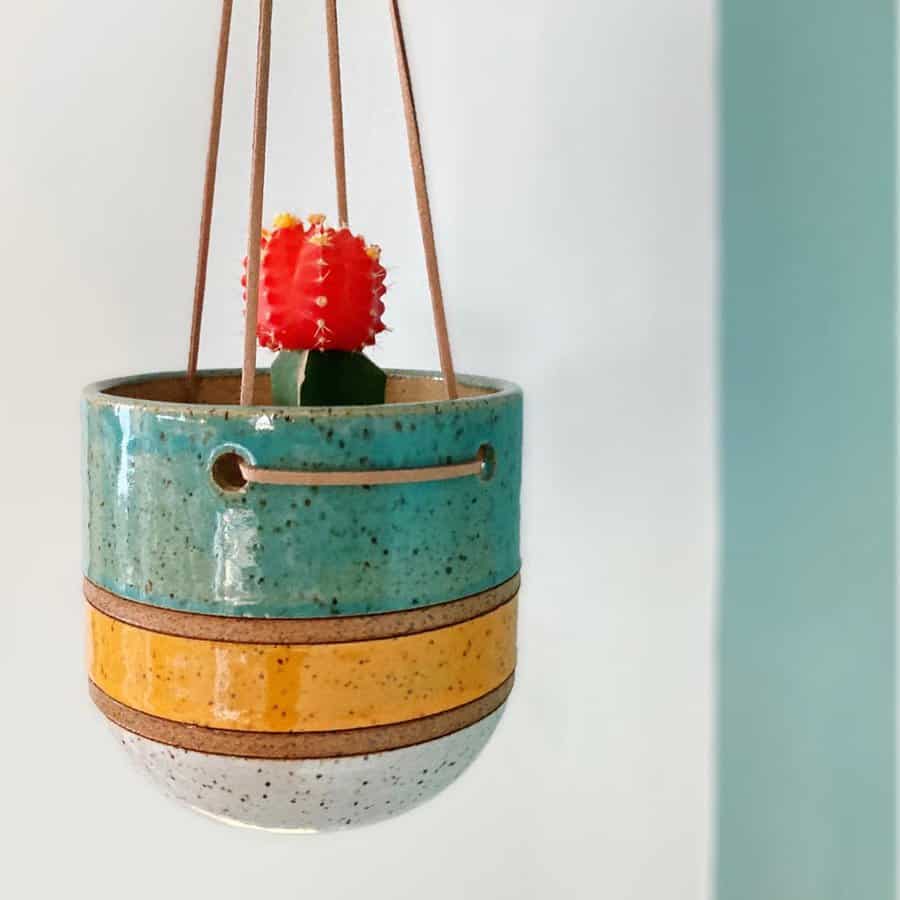
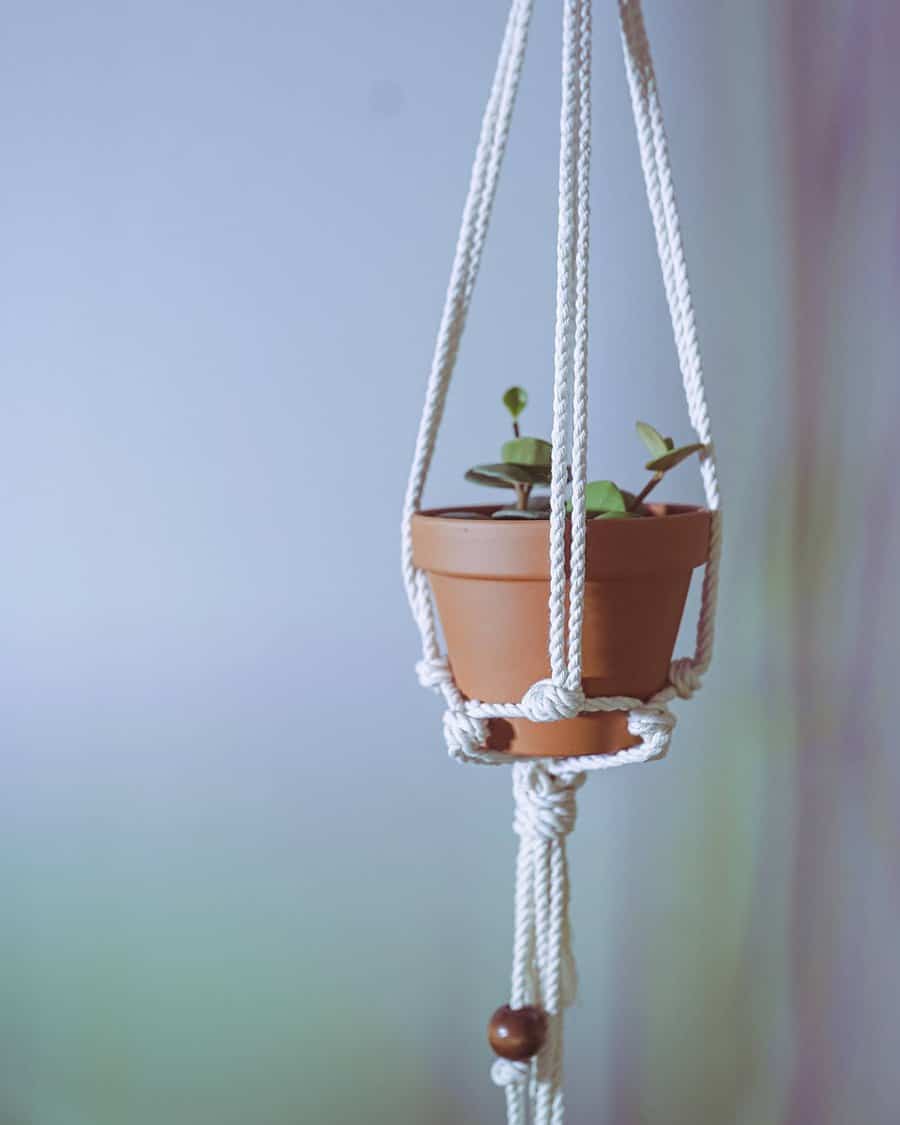
7. Craft Macrame Plant Hangers
Add a touch of creativity and boho-inspired charm to your garden without breaking the bank by crafting your own macrame plant hangers. These hangers are customizable in size, making them perfect for pots of all dimensions. Hang them outdoors to replace traditional planters or bring them inside for a whimsical, stylish display.
Incorporating macrame plant hangers is an easy and cost-effective way to enhance your garden’s aesthetics. To complement these hangers, consider using a variety of plant types and colors to create a lush and inviting garden space.


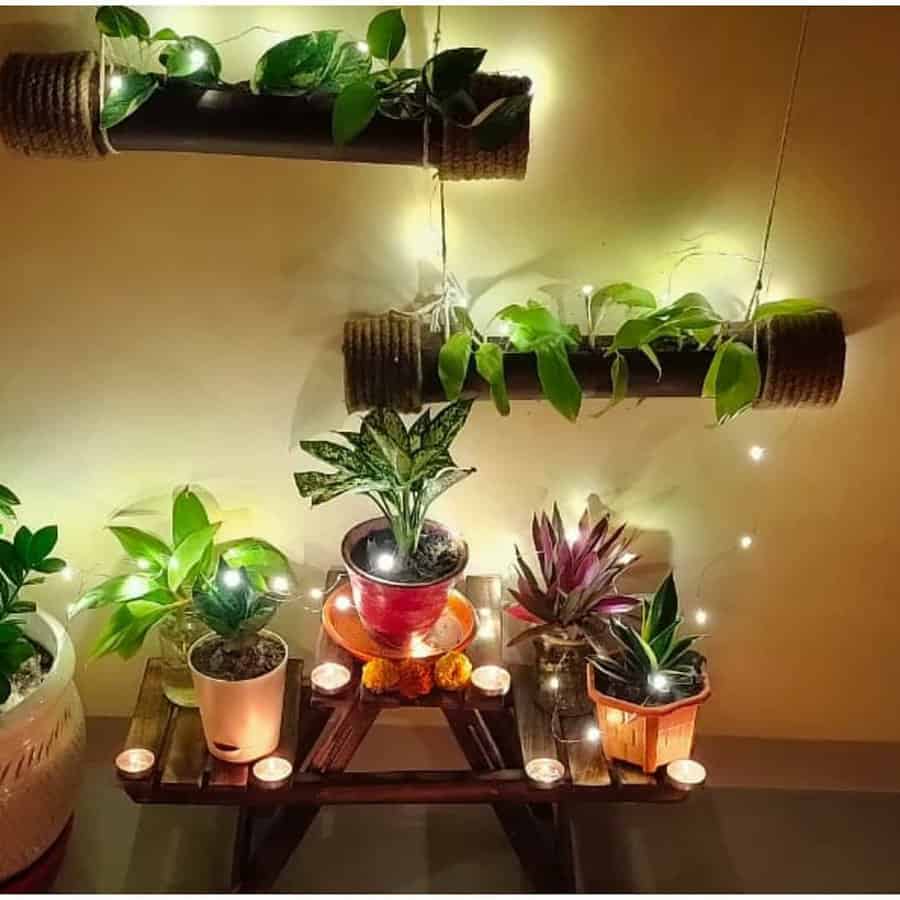
8. Create Hanging Bamboo Planters
For an effortlessly picturesque budget garden, consider crafting your own hanging bamboo planters for trailing plants. Utilize thin and flexible branches from an old bamboo tree and readily available string, twine, or recycled wool to create your unique design.
Once you’ve constructed your basket-shaped planter, fill it with your favorite plants and flowers, enhancing the beauty of your garden space. To complement this DIY project, choose trailing plants with vibrant colors or cascading foliage to create an eye-catching display that adds character to your garden.

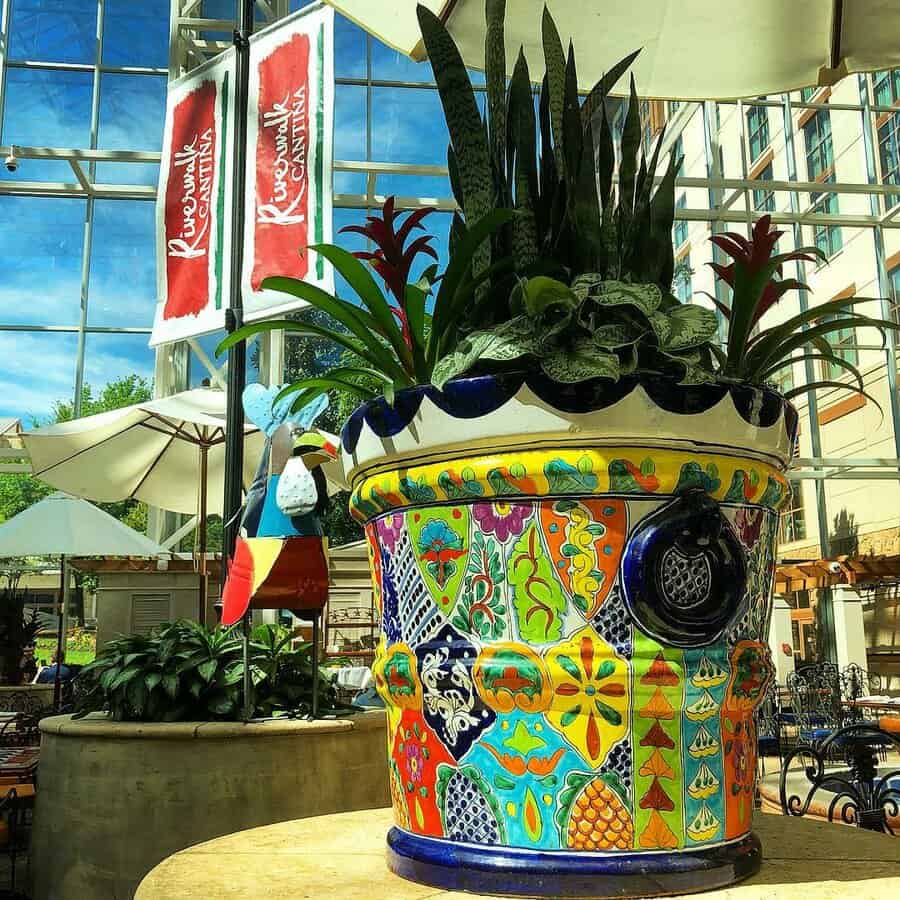
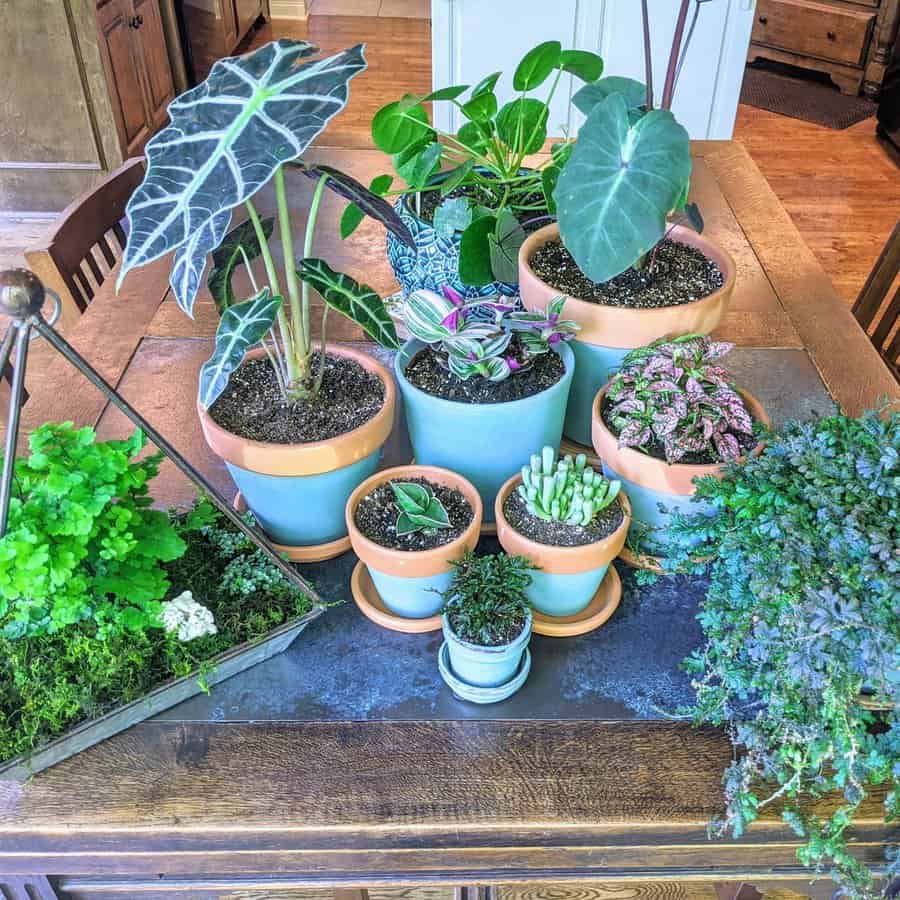
9. Coordinate Your Garden Pots
Don’t settle for a bland budget garden! Get creative by coordinating your terra cotta pots with a vibrant color palette that includes pinks, blues, and violets. Whether you’re enhancing an existing landscape or starting from scratch, these colorful pots can serve as captivating centerpieces for your garden makeover.
To maximize impact and personality, mix pots of different sizes and textures. These affordable decor pieces have the power to transform an ordinary outdoor area into a visually stunning garden retreat. Complement this design by adding colorful garden furniture or decorative garden stakes for a cohesive and inviting garden space.

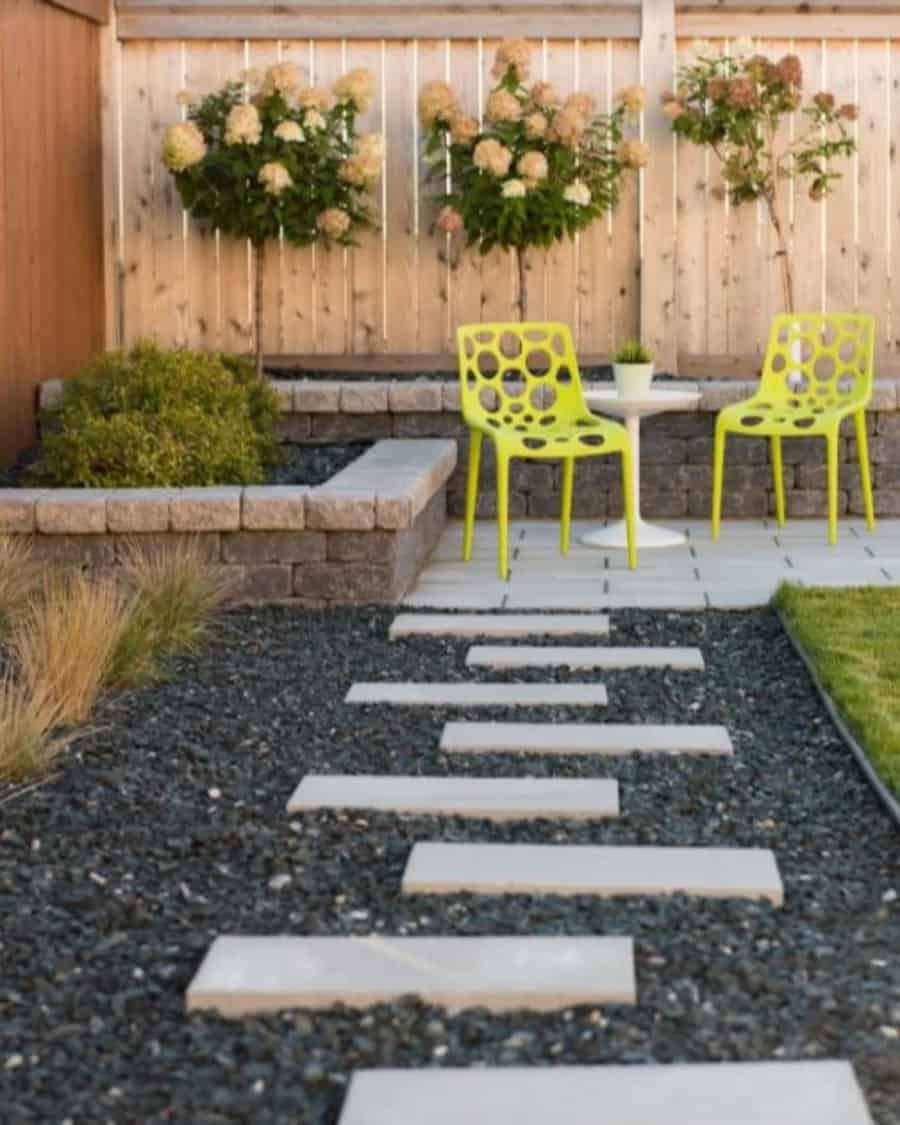
10. Design a Stone Path Landscape
One budget-friendly DIY garden idea is to incorporate a charming stone path into your landscape. This can be achieved by laying down stones or pavers to create a walkway that adds both functionality and aesthetics to your garden space. To complement this design, consider planting small trees or shrubs around the path to create a cozy atmosphere.
Additionally, adding mulch can give your garden a rustic and inviting feel. For a touch of elegance, adorn your patio area with window boxes and hanging plants, transforming it into a tranquil oasis. With thoughtful planning and a willingness to experiment, you can achieve a truly stunning garden space without breaking the bank.

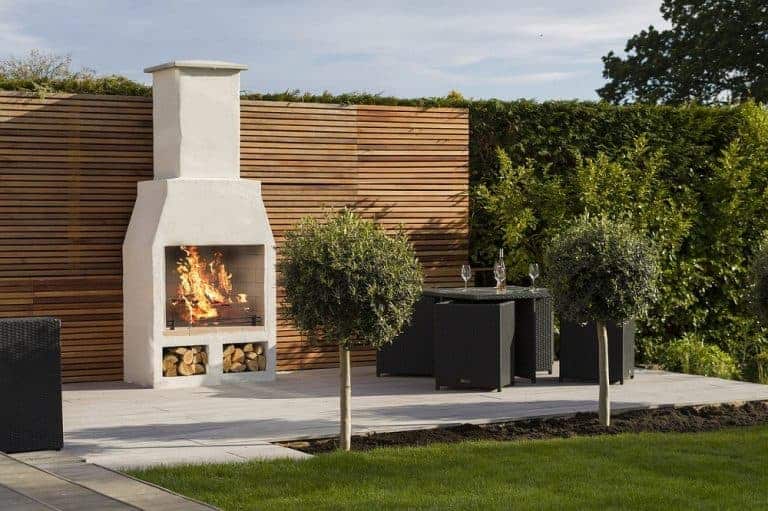
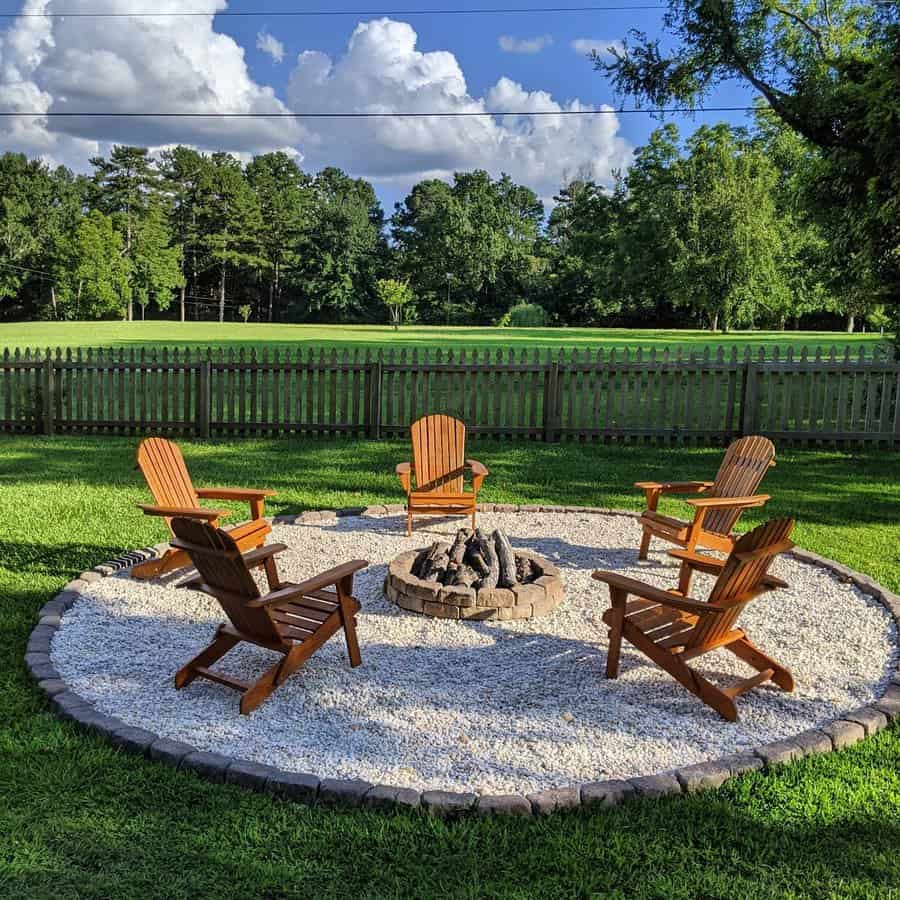
11. DIY Brick Fire Pit Setup
Crafting a budget-friendly garden can be incredibly rewarding. Begin by planning an inviting outdoor space with a brick fire pit as the centerpiece, surrounded by comfortable patio chairs. To set the mood, hang string lights or place lanterns around the area.
Enhance the garden’s atmosphere with strategically placed potted plants and small shrubs. Mix and match various types of tables and chairs to infuse personality into your outdoor oasis. Your budget garden will become a delightful retreat where you can relax and connect with nature. To complement the brick fire pit setup, consider adding cozy outdoor cushions, blankets, and a small table for snacks or drinks, ensuring your garden is both inviting and functional for gatherings and relaxation.

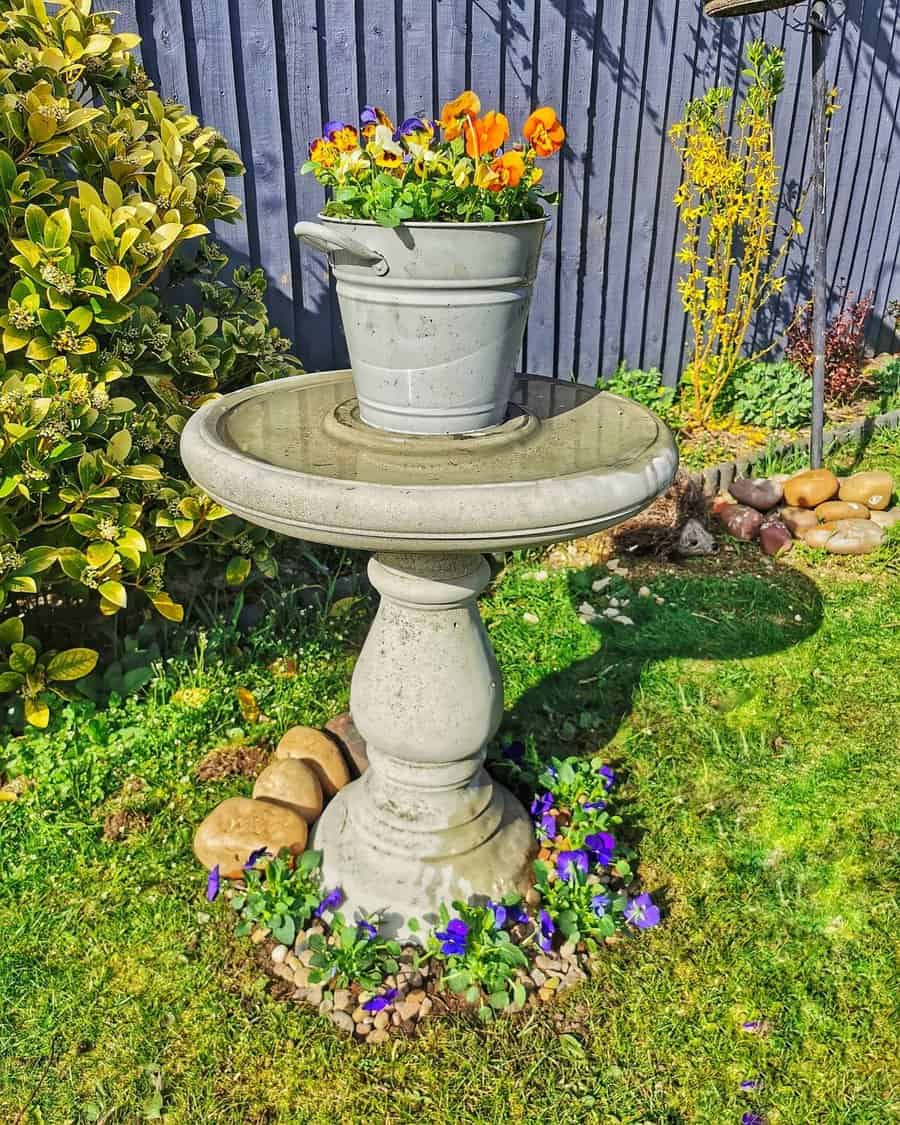
12. Install a Budget-Friendly Water Fountain
Add a touch of serenity to your garden by installing a budget-friendly water fountain. You can create a beautiful and tranquil space by choosing the right location for your fountain. Place it near a bird feeder to attract birds and make your garden come alive with their presence.
To further elevate the ambiance, consider planting colorful wildflowers around the fountain and strategically placing decorative stones for added visual appeal. By blending natural elements with your DIY fountain, you’ll not only be delighted with the outcome but also enjoy the influx of wildlife it brings to your garden.


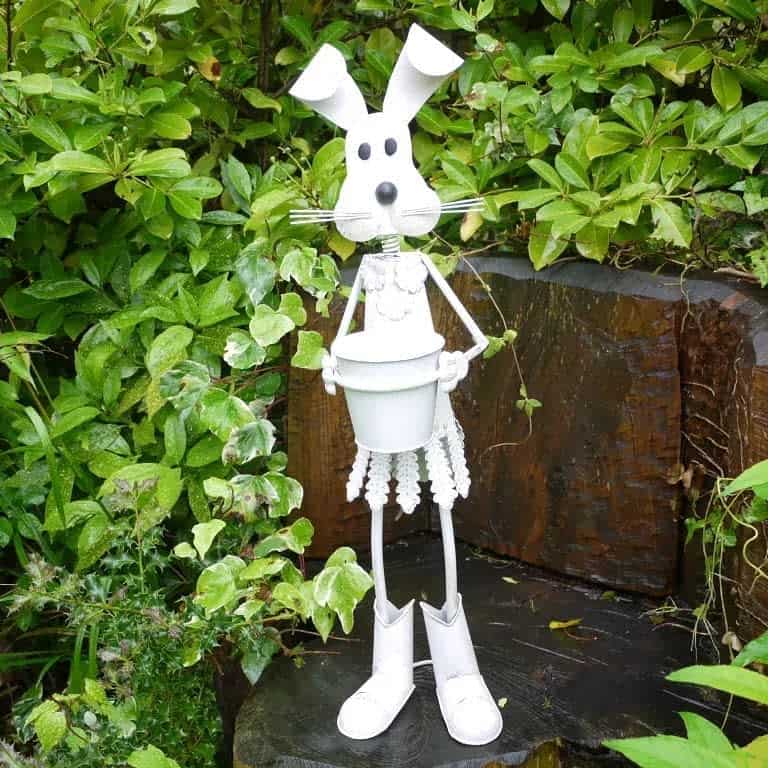
13. Craft Tin Garden Sculptures
Revamp your garden without overspending by crafting your own tin garden sculptures. Give your garden a distinctive touch by repurposing tin materials to create unique sculptures, such as charming rabbit figurines made from soda cans and wire.
These handmade sculptures not only add artistic flair and character to your garden but also provide a budget-friendly way to personalize your outdoor space. Embrace your creativity and enjoy the satisfaction of crafting something one-of-a-kind for your garden without straining your finances.

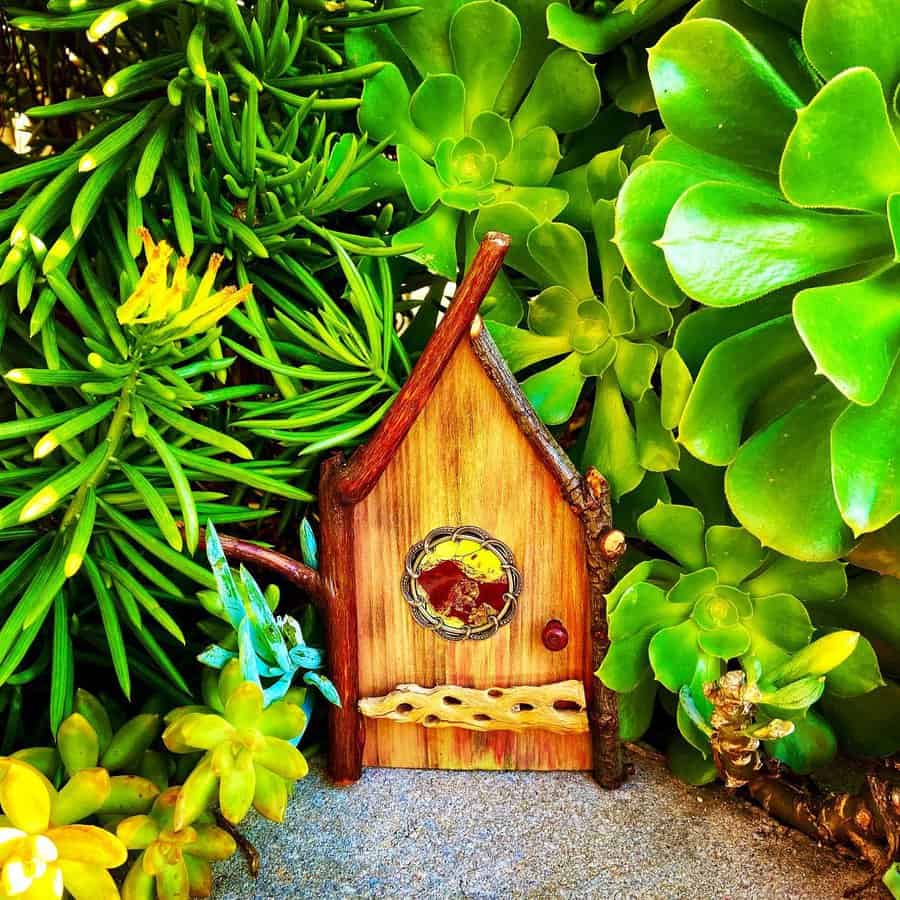
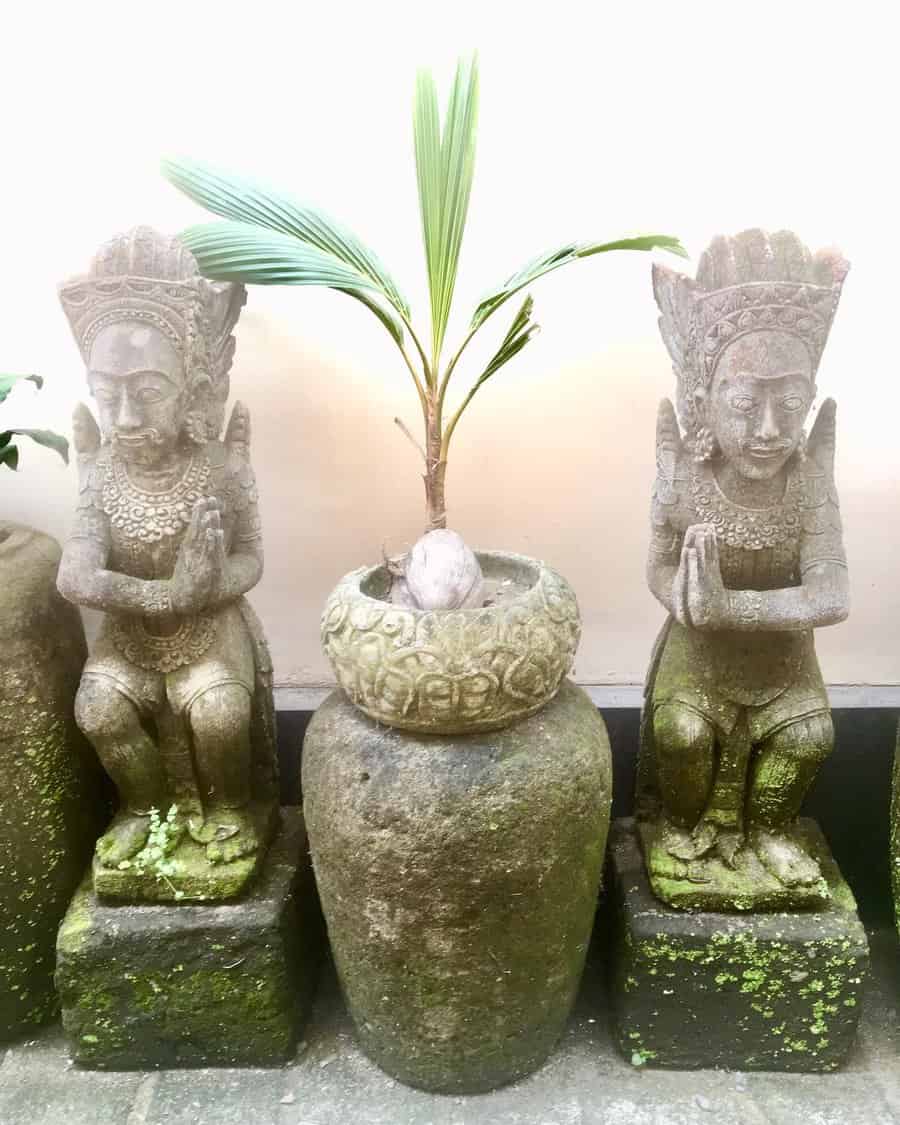
14. Revive Vintage Garden Statues
Creating a dreamy garden on a budget is entirely possible by incorporating vintage garden statues into your design. Explore flea markets, antique stores, or thrift shops to discover unique and budget-friendly pieces that infuse your garden with an antique, timeless ambiance. Mix and match these vintage finds to infuse your outdoor space with character and sophistication without exceeding your budget. Remember, a budget-friendly garden can be both inspiring and whimsical when you find the perfect vintage elements to complement your vision.

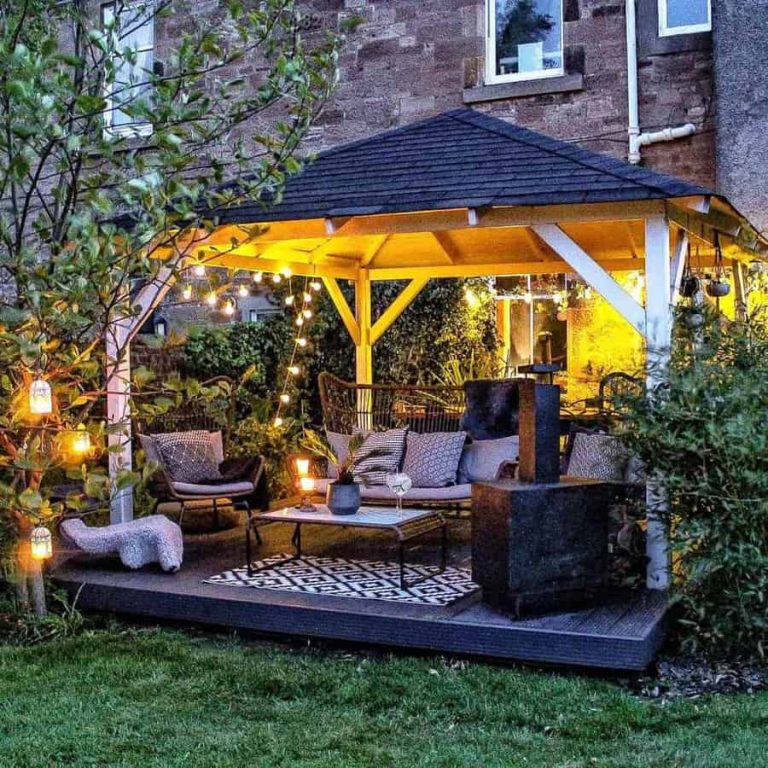
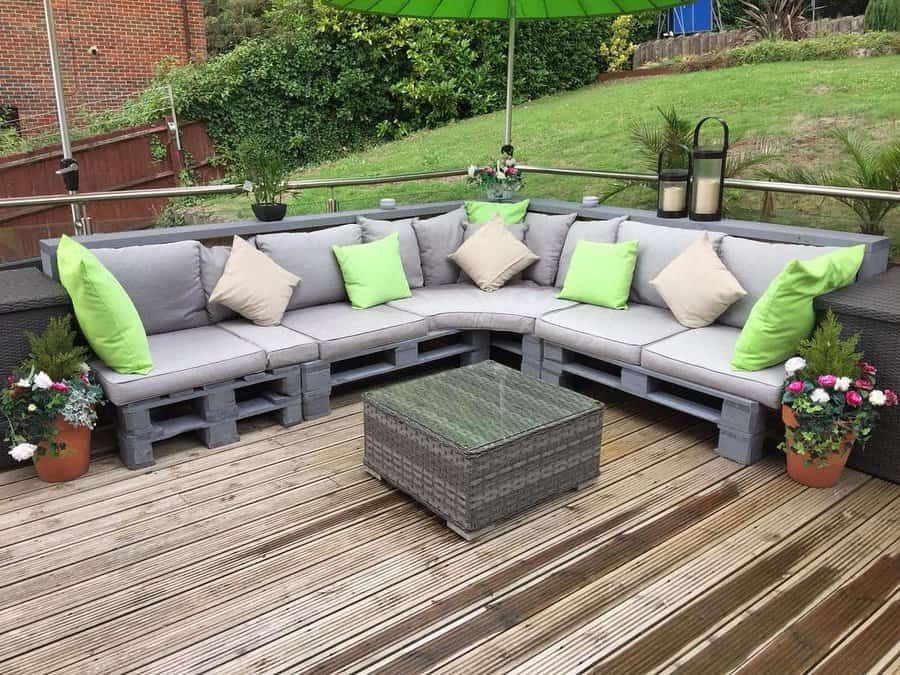
15. Make Lounge Seating with Pallets
Enhance your budget garden by crafting stylish lounge seating using wooden pallets as a base, and then layering on comfortable pillows and cushions for ultimate comfort. This DIY project not only adds a touch of style to your outdoor space but also offers an economical way to maximize your garden’s functionality.
Your newly created seating area becomes the perfect spot for enjoying breakfast in the summer or hosting backyard dinner parties with friends. To complement the pallet lounge seating, add a small coffee table, potted plants, and outdoor lighting for a cozy and inviting atmosphere, making your garden the go-to place for relaxation and social gatherings.

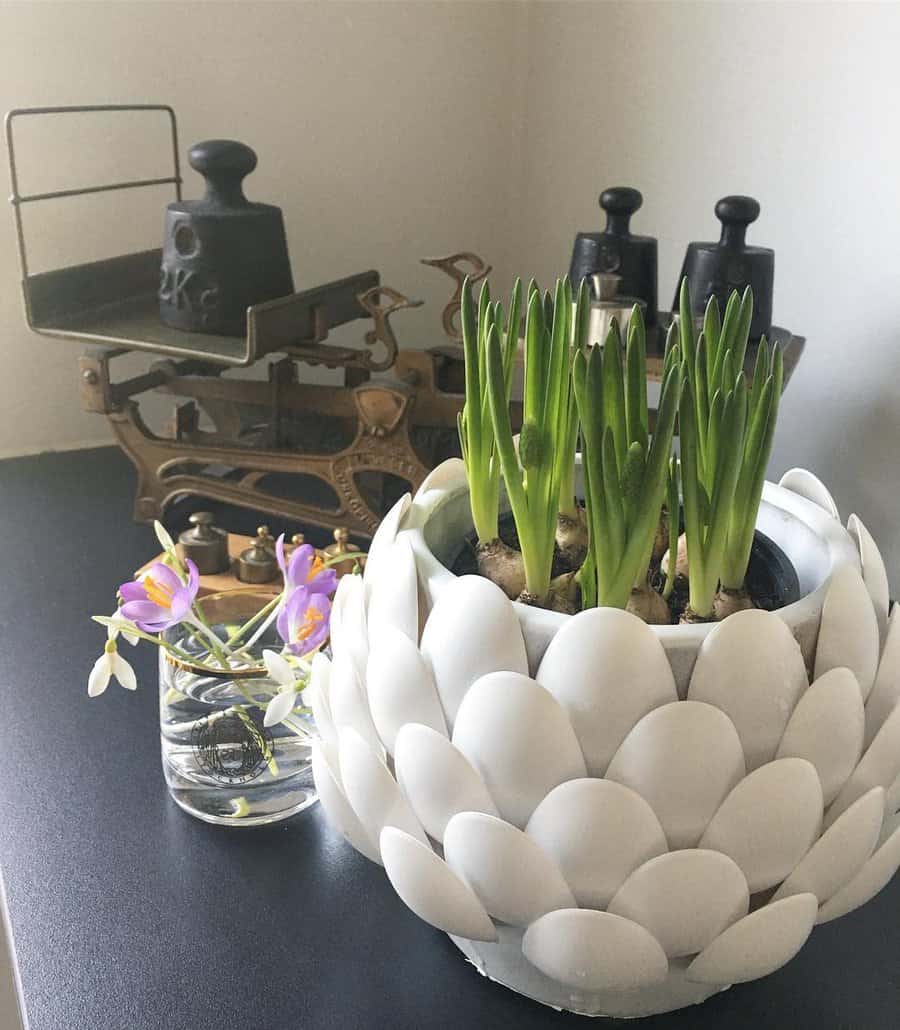
16. Create a Unique Plastic Spoon Vase
Unleash your creativity in budget gardening by crafting a unique vase using disposable plastic spoons, clips, glue, and string. This DIY project showcases the endless possibilities for creative crafts in budget gardens.
Consider repurposing old ceramic glassware, boxes, or furniture found at flea markets to add character to your garden space. By letting your imagination run wild, you can transform ordinary items into delightful garden accents. To complement the plastic spoon vase, place it amidst a cluster of potted plants or use it as a centerpiece for your outdoor table, adding a whimsical and eco-friendly touch to your garden design.

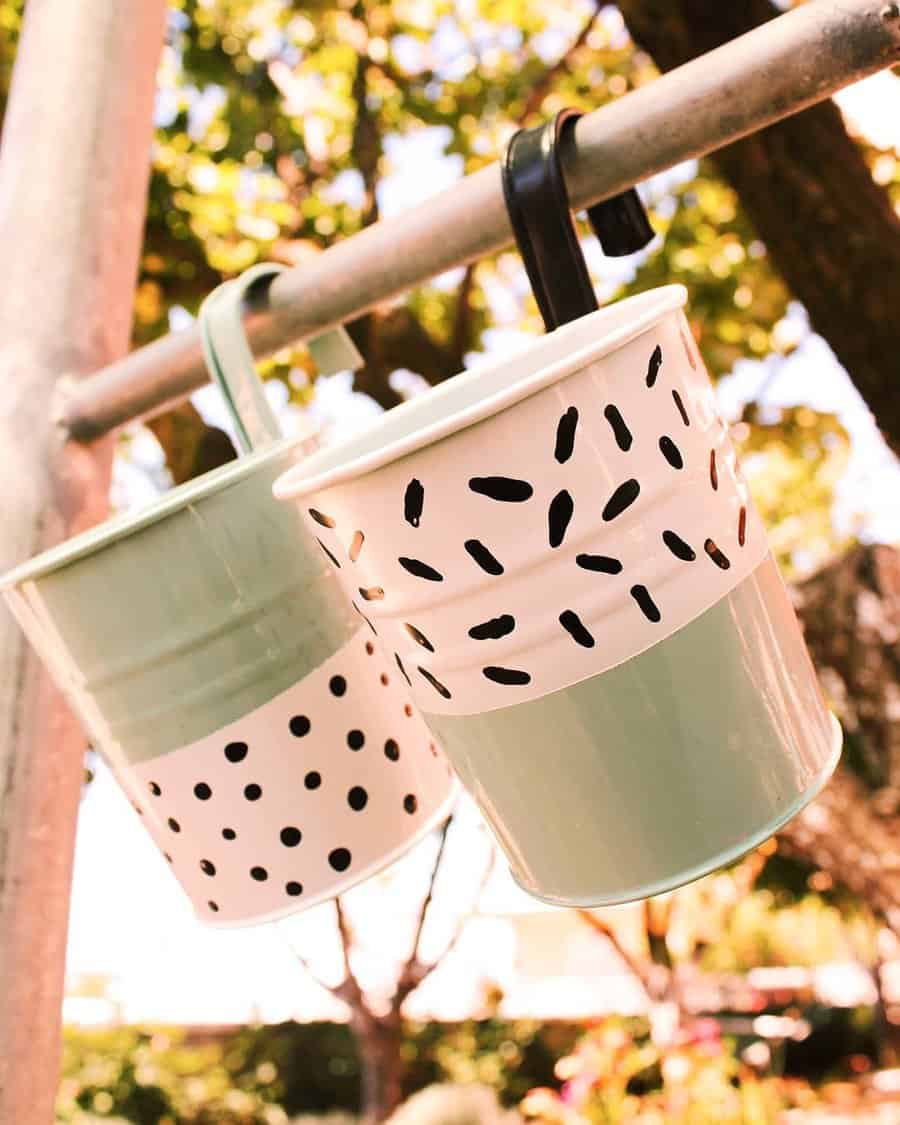
17. Add Hooks to Hang Potted Plants
A budget garden can be both beautiful and enchanting with the addition of hanging potted plants. Craft your own unique tin pots with hooks, add a string of fairy lights, and experiment with DIY paint designs to instantly transform your outdoor space. This creative project is not only enjoyable but also budget-friendly.
Personalize your DIY tin pots with hand-painted designs or fill them with vibrant blooms for a burst of color. In the evening, the fairy lights will cast enchanting shadows, creating a magical atmosphere in your garden. To complement the hanging potted plants, consider adding a cozy seating area nearby and incorporating other decorative elements such as outdoor rugs and wind chimes, making your budget garden a delightful retreat.

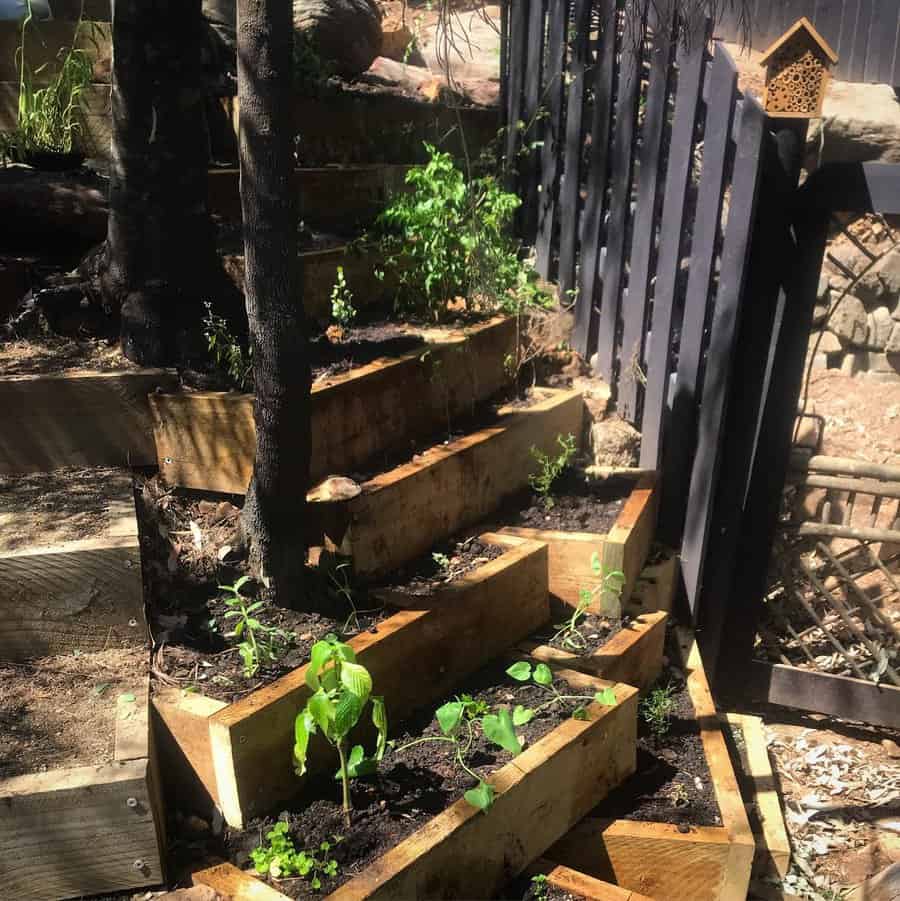
18. Repurpose Box Containers for Plants
Budget gardening can be both inventive and affordable. Opt for container gardening to maximize limited outdoor space, and consider repurposed box containers as an opportunity for creating a unique garden.
Utilize materials like repurposed cardboard boxes or wooden crates to unlock endless design possibilities for your budget-friendly garden. With a dash of creativity, you can easily craft an attractive garden by repurposing boxes. Whether you find an old box in your garage or source one online, repurposing it for container gardening allows you to personalize your garden economically, adding a touch of character without straining your budget.


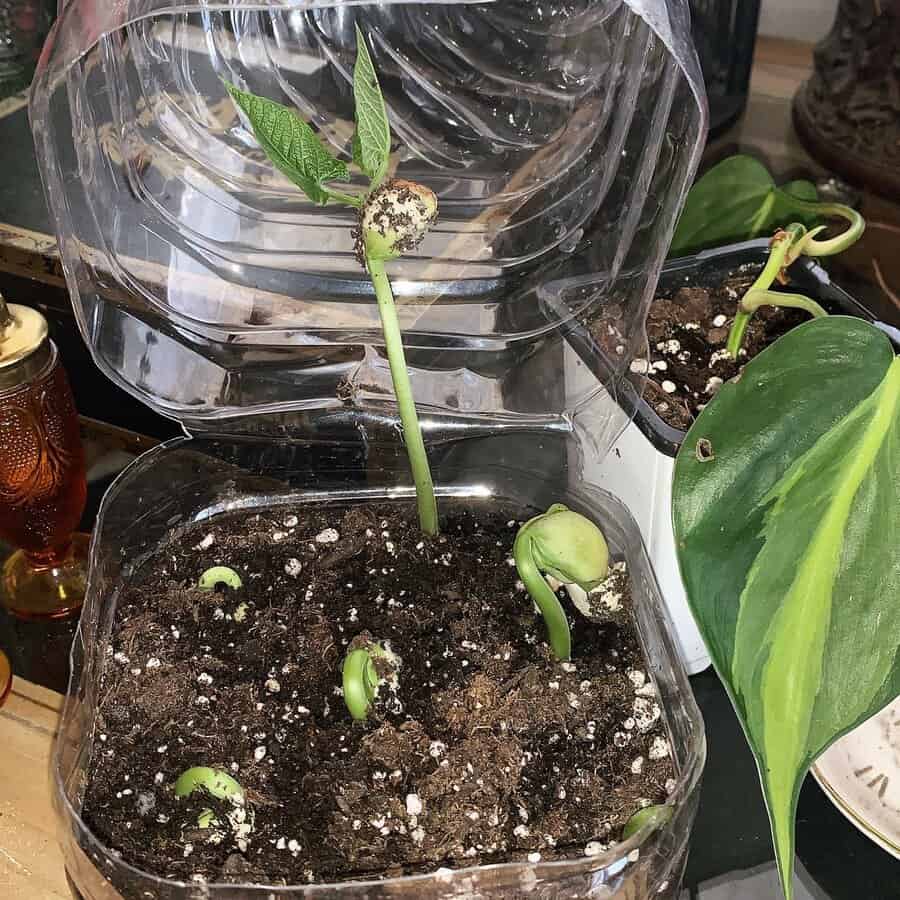
19. Utilize Large Water Jugs for Gardening
Unlock your garden’s potential on a budget by repurposing large plastic or glass containers into sizable plant pots. Fill these containers with soil from your local nursery to create an affordable and versatile gardening solution. Consider planting beans, peas, or colorful flowers and herbs to make the most of your newfound garden space. With a touch of creativity, you can transform these containers into thriving pockets of greenery, resulting in a vibrant garden that blooms beautifully during the summer months.

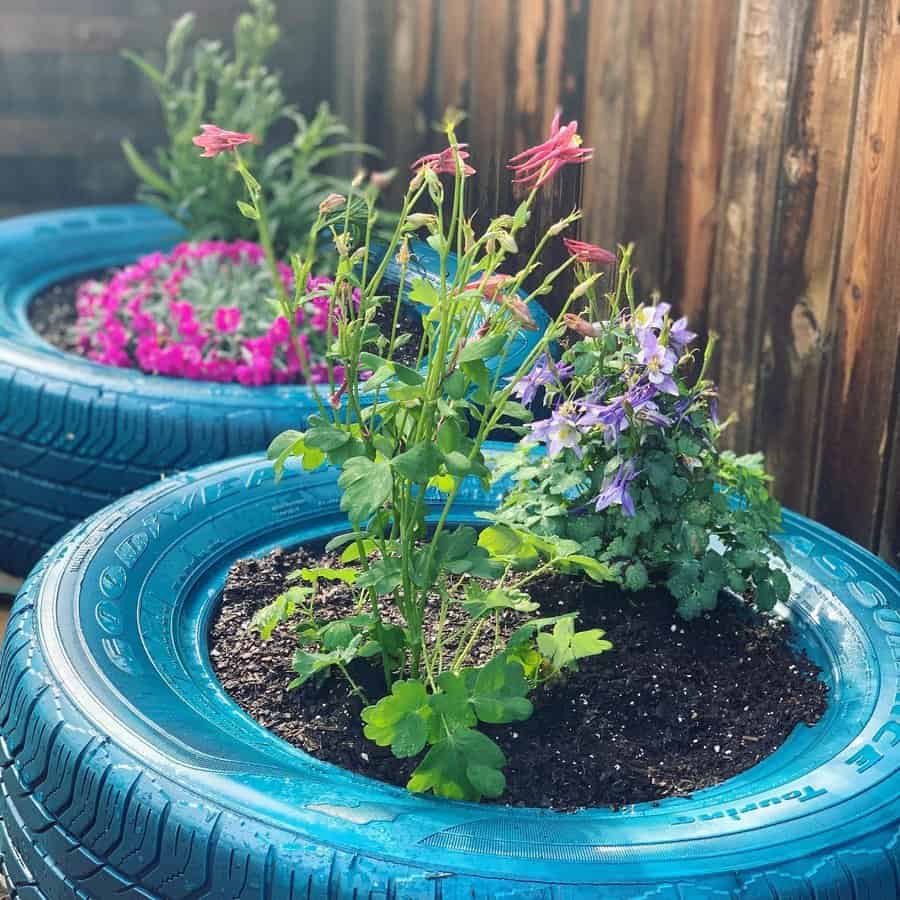
20. Transform Old Tires for Rustic Decor
Don’t let budget constraints hold back your gardening dreams. Get creative by repurposing old tires into charming rustic planters. Paint these tires in your choice of colors to match your garden’s theme and use them as unique flower pots. Their excellent drainage properties make them a practical choice, while adding a fun and eco-friendly touch to your outdoor space. Whether in your front yard or backyard, upcycled tire planters can transform an ordinary budget garden into a standout showcase of creativity and sustainability.

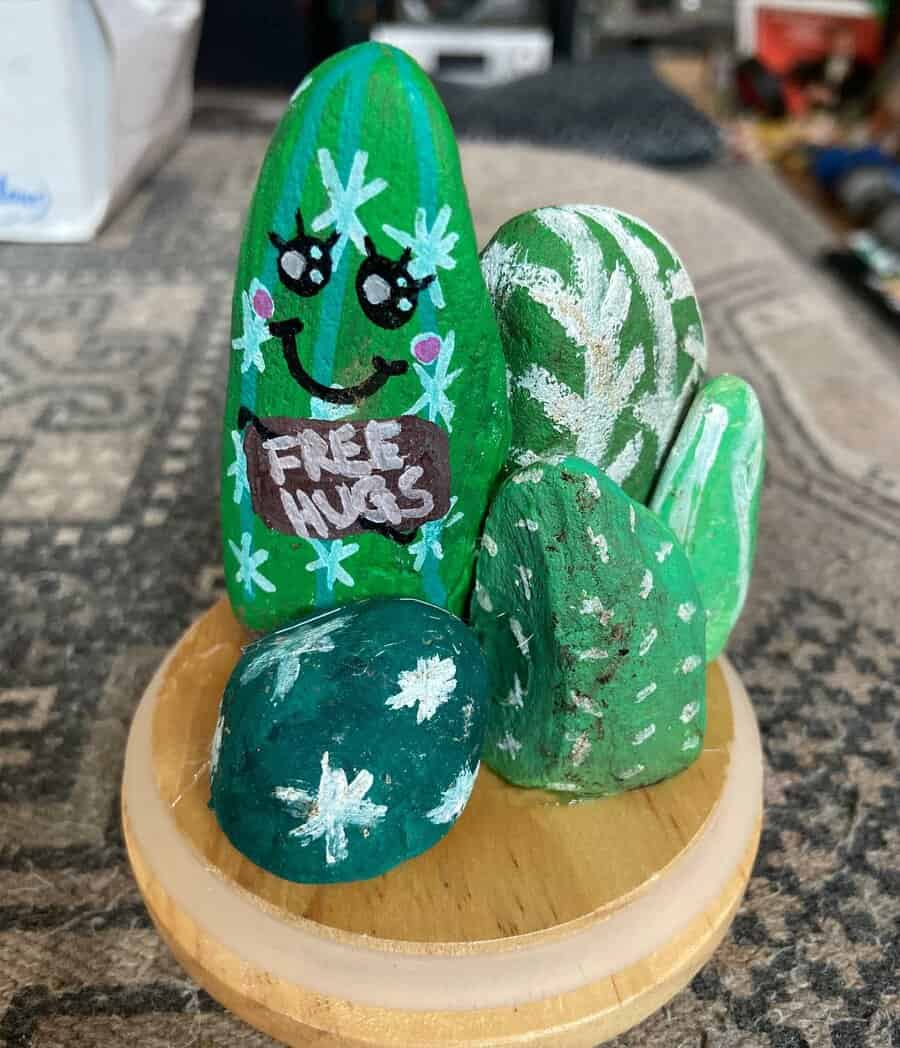
21. Painted Rocks for Garden Art
Creating a budget-friendly garden provides an excellent opportunity for creativity and family involvement. Whether you’re growing veggies, flowers, or potted plants, there’s no need to overspend. Incorporate painted rocks as charming garden decor; it’s a simple and cost-effective method to introduce vibrant colors and a playful touch to your outdoor space.
Engage your children in the process by encouraging them to paint their own rock designs, fostering a sense of ownership and fun. With a dash of imagination and some colorful rocks, your budget garden will shine brightly in the sunlight, bringing joy to both adults and kids alike.

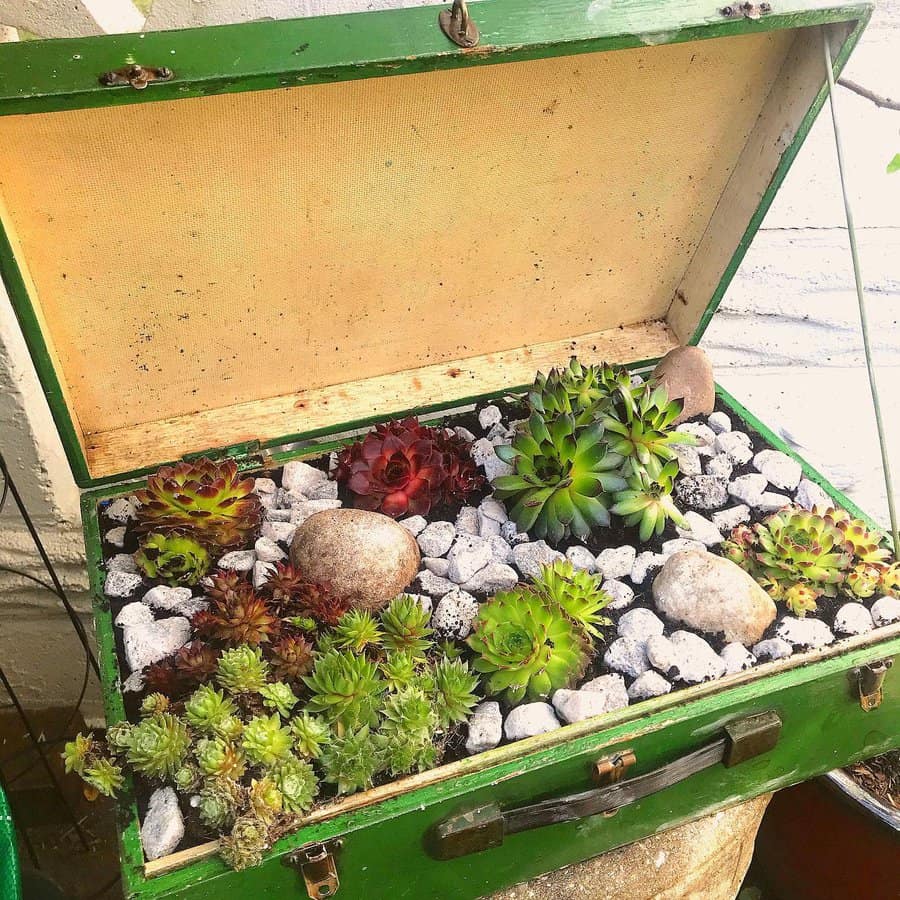
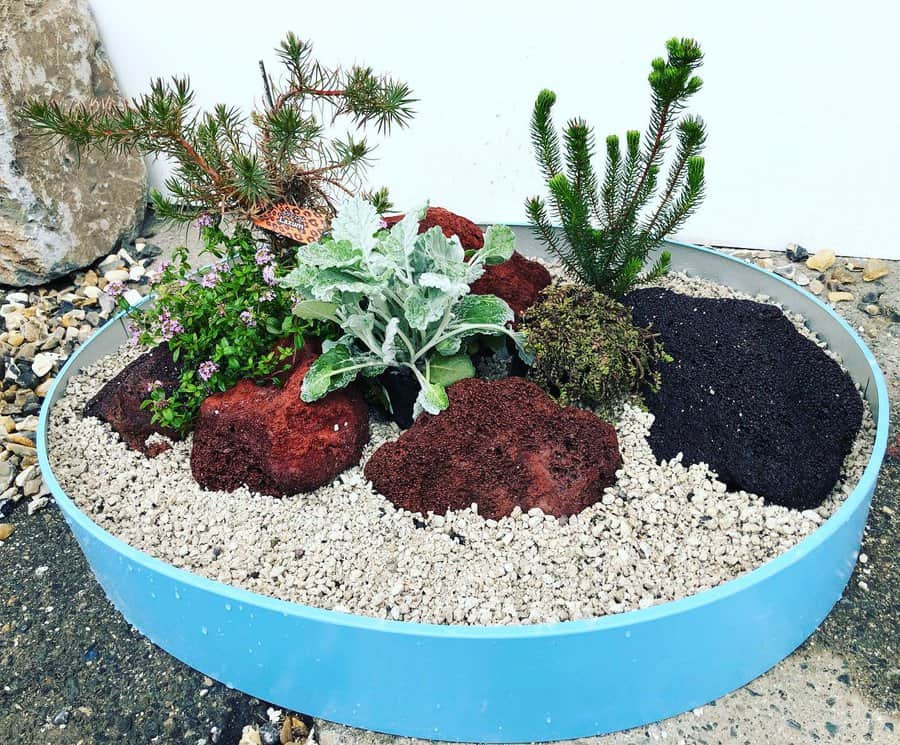
22. Assemble a Succulent Tray Garden
Transforming your garden into a budget-friendly, yet aesthetically pleasing haven is easily achievable with a succulent tray garden. Incorporate succulent cuttings into a variety of containers with varying shapes and depths to craft a captivating and conversation-worthy garden feature. To maintain these charming plants, simply water them when the leaves appear slightly wrinkled and the soil looks dry. In no time, your budget garden will thrive with the allure of succulent beauty.

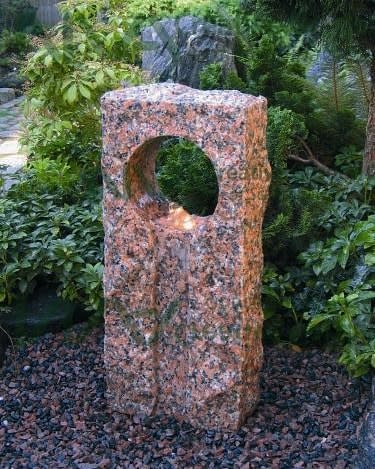
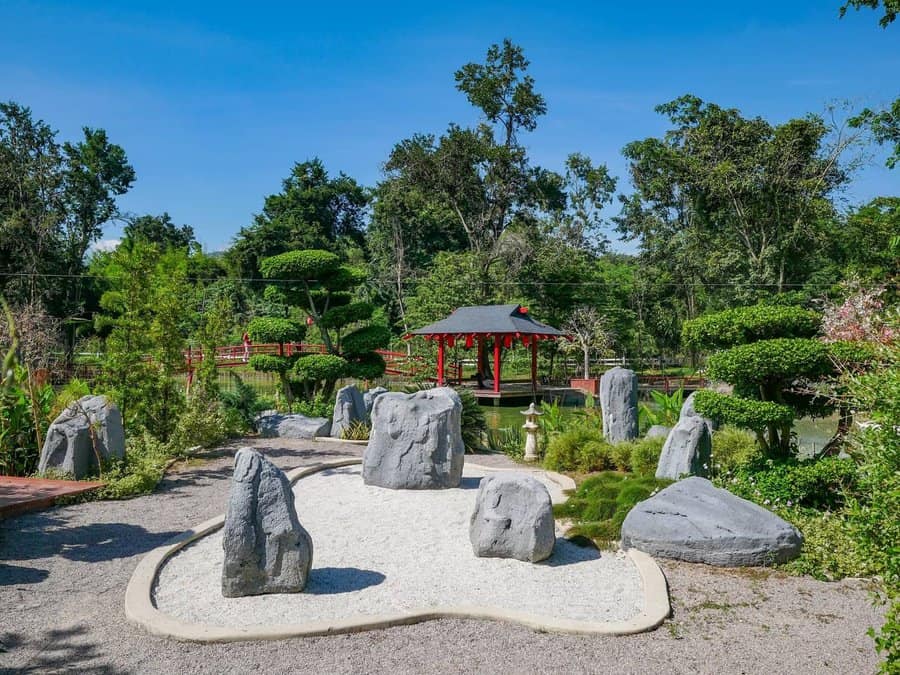
23. Build an Attractive Rock Garden
Crafting an appealing rock garden is an excellent choice for budget-conscious gardeners. Collect large stones, embracing their natural crevices and cracks that add character. Secure them in place with smaller pebbles to both complement the rocks and provide interesting texture.
A rock garden is an affordable way to breathe life into your backyard, offering a distinctive and captivating focal point that won’t break the bank.

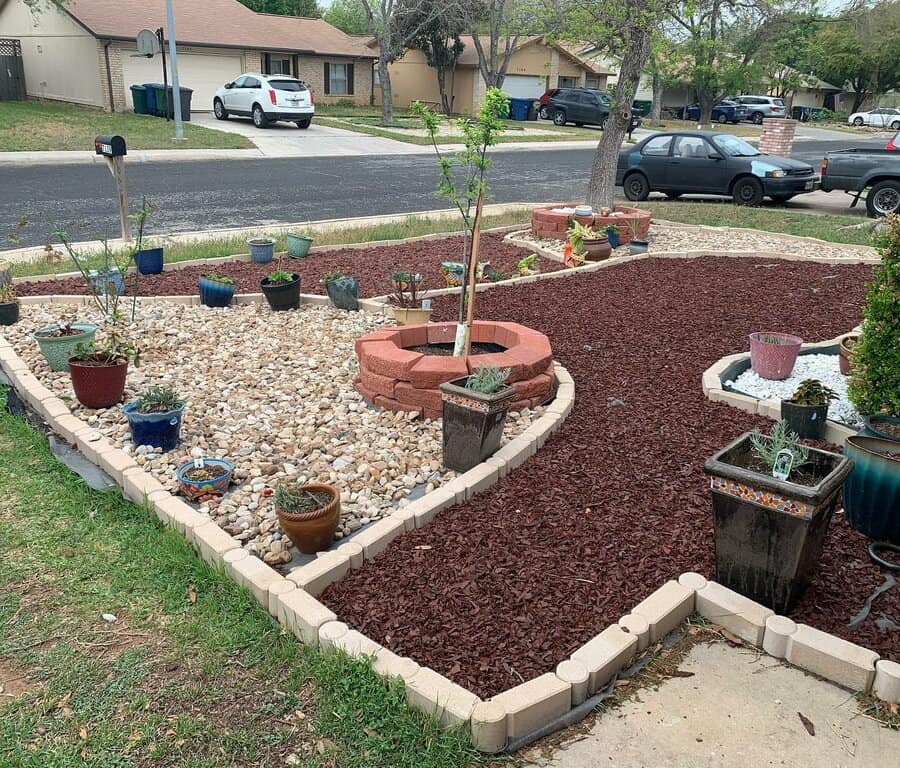
24. Landscape with Pebbles on a Budget
Creating an inviting garden on a budget is now within your reach. Incorporate pebbles for a charming walkway or repurpose bricks to build terrace walls. These affordable landscaping ideas can inject color and vibrancy into your garden space without breaking the bank. Transform your backyard into a budget-friendly oasis by carefully selecting materials and unleashing your creative flair.

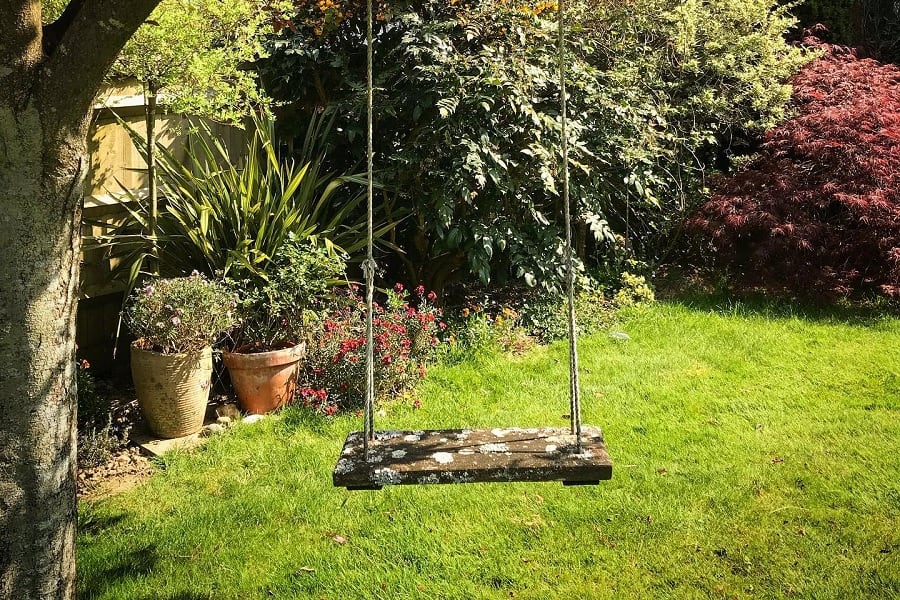
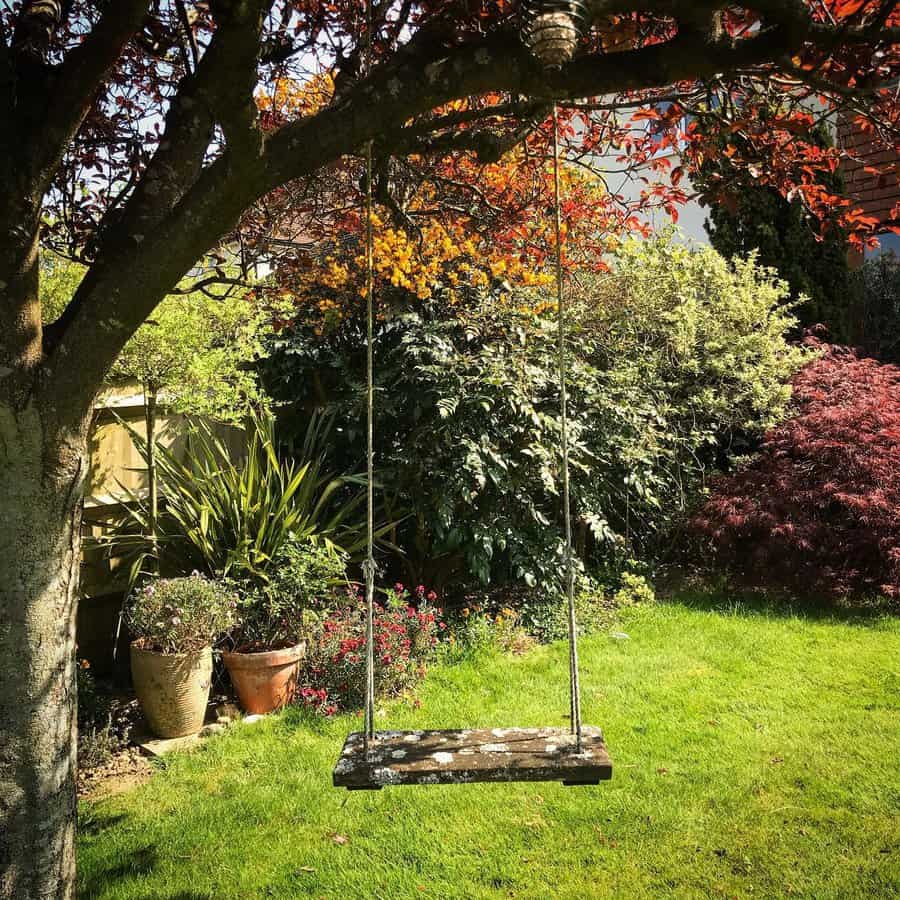
25. DIY Tree Swing from an Old Plank
Turning your outdoor space into a budget-friendly oasis is easier than you think. With creativity and a bit of time, you can create a charming garden without draining your wallet. Consider repurposing an old plank into a delightful tree swing for added backyard entertainment. Whether you’re looking to expand seating or introduce shade curtains, there are numerous cost-effective ways to enhance your garden’s allure.

26. Install an Egg Chair for Outdoor Relaxation
Don’t let a tight budget deter you from enjoying the finer things in your garden. An egg chair can bring a touch of luxury to your outdoor oasis without breaking the bank. Whether suspended in a cozy corner or hovering above your garden blooms, this stylish furniture piece elevates the overall ambiance, creating a serene and elegant outdoor retreat.

DIY Garden FAQs
The best time of year to start a garden in the United States is during the spring months. This is the perfect time to plant summer vegetables and annuals. The flowers will bloom through the spring, and the vegetables will be ready for harvest throughout summer and into fall. The exact time that you start your garden will depend on your specific location.
To prepare your garden for planting, add organic matter. The easiest and best way to do this is with compost or aged manure. Mix these into the soil for a nutrient-rich matter for planting. This will give your plants everything they need to thrive.
If you want to make a big impact, start small. You can make your budget go further when you have a smaller garden to work with. Add a small fence around your garden or update the current fence. Hang some string lights around or over your garden to enjoy it in the evening or at night. Add some chairs or a bench to give you a place to sit and enjoy your garden.
10 Backyard Paver Ideas to Upgrade Your Patio
How do you convert your backyard into a stylish outdoor living area without losing its natural charm? Stone pavers can be wonderful alternatives to plain concrete slabs or messy rock mulch.
Backyard patio pavers are far from one size fits all. From flagstone to brick and everything in between, there are countless varieties of natural rock available to choose from for your own backyard projects. And that’s not to mention the many great manmade paver materials on the market!
Keep reading for the top backyard paver ideas to inspire your future patio design or garden walkway.
1. Flagstone Pavers
Flagstone is a great option when it comes to backyard pavers. Not only are they visually stunning, but they are strong, durable, and can withstand harsh weather. Their natural beauty and texture add depth and character to any backyard design.
Flagstones come in a wide range of sizes and variations, allowing you to create a personalized pattern that will fit your outdoor space perfectly. These pavers are also low maintenance, ensuring that you spend less time caring for your backyard and more time enjoying it!


2. Bluestone Pavers
Bluestone is a durable material, able to withstand harsh weather conditions and heavy foot traffic. The natural hues of blue, gray, and green blend together to create a unique and eye-catching look that will elevate your backyard to the next level. With bluestone pavers, you can create a patio, walkway, or other outdoor feature that is both functional and aesthetically pleasing.


3. Cobblestone Pavers
If you’re looking for a way to add some rustic charm to your backyard, cobblestone pavers may be just the ticket. These natural stone pavers have been used for centuries in Europe and are becoming increasingly popular in the United States.
They are durable and can withstand heavy foot traffic. Whether you’re creating a pathway or a patio, cobblestone pavers will create a warm and inviting atmosphere.


4. Limestone Pavers
Limestone is a sedimentary rock that has been used for centuries in architecture and construction. It is known for its earthy tones and subtle texture, which add character and charm to any outdoor space.
Limestone backyard pavers are a popular choice for their low maintenance, slip-resistant, and weather-resistant properties. The subtle natural variations in each piece create a unique and organic look that is both elegant and sophisticated.


5. Slate Pavers
If you’re searching for a long-lasting and stylish flooring solution for your backyard, slate pavers may be just the thing. The naturally occurring rock is renowned for its distinctive color variations, and its durability makes it a top choice for outdoor spaces.
The wide array of textures available – from honed to cleft – affords flexibility in design, and slate’s impermeability renders it resistant to stains and weather damage.


6. Interlocking Pavers
These versatile and durable pavers come in a variety of colors and textures, allowing you to customize your patio or walkway to suit your personal style.
Interlocking pavers provide a safe and slip-resistant surface for guests to walk on. The interlocking design of these pavers ensures that they stay securely in place, even in harsh weather conditions.


7. Concrete Pavers
With a wide range of textures, colors, and patterns available, you can create a unique and customized look with concrete pavers that perfectly complements your landscape. They are incredibly durable and long-lasting.


8. Round Pavers
Rather than the traditional square or rectangle shapes, the circular pavers offer a fun and intricate design that catches the eye.
By strategically placing the pavers and utilizing a variety of sizes and colors, you can create a truly one-of-a-kind backyard that reflects your personal style.


9. Pebble Paver
Pebble pavers add a natural and rustic touch to any backyard while offering a practical solution for creating a convenient and beautiful outdoor living area.
Pebbles come in various sizes and colors, allowing you to create a unique and personalized design for your backyard. Whether you prefer a gravel pathway or a full pebble patio, these backyard pavers will create a beautiful and functional space that you can enjoy all year round.

10. Travertine Pavers
Travertine backyard pavers are are a form of limestone and are available in a range of colors from ivory to red. Travertine pavers are durable and can withstand harsh weather conditions, making them a popular choice for poolside flooring.
Paired with the right landscaping, these pavers can add a touch of elegance and sophistication to your backyard pool. Plus, their non-slip surface makes them safe to walk on.


Backyard Paver FAQs
While it’s possible to grout pavers like you would bathroom tiles or a backsplash, most homeowners fill the gaps in their patio with sand. Coarse sand locks the pavers in place and creates a finished look that lasts for years.
Polymeric sand is a more permanent solution. It is made of regular sand and a water-activated bonding agent. Once activated, the polymeric sand hardens for a stronger, erosion-resistant bond.
Landscape fabric is effective underneath large areas of exposed pea gravel or rock mulch. When it comes to installing paver stones, however, landscaping fabric is often more trouble than it’s worth. It can interfere with proper drainage and is hard to remove once it starts to break down.
Permeable pavers allow water to seep through to the soil below. This is a crucial part of any healthy ecosystem.
Some pavers are made from porous materials that allow water to pass through the pavers themselves. But most permeable paver patio designs incorporate gaps between the stones that let rainwater flow through and prevent damaging washouts.
10 Amazing Indoor Herb Garden Ideas
“Fresh herbs really belong anywhere you put them.”- Alex Guarnaschelli
Whether you’re a beginner learning how to boil water or prepare eggs or an expert with many recipes under your belt, fresh herbs will make your cooking better. There’s no denying that fresh herbs give your food an intense flavor that blooms in the food for an explosive medley in your mouth.
Growing herbs indoors is the easiest way to start incorporating fresh herbs into your cooking. You just need to figure out the best way to grow those herbs in your kitchen. These indoor herb garden ideas will help you take your dishes to the next level.
1. Simple and Budget-Friendly DIY Herb Garden
You don’t have to spend a lot of money or build an elaborate setup to have fresh herbs growing in your kitchen. All you need to do is create a simple DIY herb garden. You could use some old glass jars and fill them with dirt and add your herbs. You could use jars of different sizes to match plants that may vary in size. For a uniform look, you could collect your jars over time so they all match.


Another option is to save several cans and use them as your planters. If you have more coffee mugs than you know what to do with, why not use them for your herbs?
Whatever you decide to use, consider labeling your herbs. You should also consider decorating your DIY planters to mask their original purpose and turn them into decor. You could wrap them in fabric, paint them, or slide a fancy sock over each one. Use fancy sticker labels that you write each herb’s name on and then stick to your planter. Or buy small plant stakes that you can write the herb’s name on and stick in the soil.
2. Creative Hanging Herb Garden for Small Spaces
If you don’t have a lot of counter or wall space, you’ll have fewer options in where you can set your plants down, so it’s time to get creative. A hanging herb garden eliminates the need for a flat surface. You can put your herb planter anywhere as long as there’s a ceiling.


Why not have flavorful herbs within arm’s reach by hanging a planter next to your stove or workspace? You could have a solid board with notches that you hook your pots onto. They stay in place by counterbalancing against the board. Or you could have multiple baskets that connect by chains or rope.
If you have empty wall space, you could mount several bars or a rack. Then hang individual pots from it. Try to match the style and materials to the rest of your kitchen’s style and decor.
3. Innovative Hydroponics and Aquaponics for Herb Gardening
Not all plants need potting soil to grow. If you aren’t crazy about the idea of having dirt in your kitchen, why not try hydroponics? There are several kits that will make it easy to start growing your own herbs in water. However, this isn’t your only option.


You can easily build your own hydroponic DIY indoor herb garden. You’ll create a mason jar herb garden where the jars are full of water, with small baskets in the top that hold the plants. Skip the herb seeds for this one. This growing method is best for clippings or when you’re growing from the stalk of an old plant, such as chives.
There are some things to watch out for with your water garden. You want the roots to grow into the water, but you’ll need to watch for root rot. This is when the roots see too much water. Another problem is when you don’t maintain the right water level, and the plant dries out. Algae is another common problem that develops with this type of gardening. It occurs when your water sits stagnant for long periods of time.
4. Kitchen Herb Garden as Decorative Accents
Your indoor garden can be more than just a place to grow perennial herbs. You can turn it into the decor. The natural greenery will enhance the look of your kitchen and give it a natural warmth. Look for a place that you can arrange your herb garden to create a decorative accent while also being a good spot for your plants to grow.


Choose a planter that will complement the rest of your kitchen design. A rustic kitchen could have a vintage tin planter. A farmhouse kitchen would look cute with a shallow basket holding a few porcelain or ceramic jars.
For those with a modern kitchen, you could choose a sleek glass or black planter with a square shape and crisp corners. Earthy or bohemian kitchens will look right at home with terra cotta pots. The idea is to create a garden that’s both decorative and functional for growing herbs.
5. High-Tech Modern Herb Planter for the Tech-Savvy Gardener
If you love technology and innovation, consider buying a modern herb planter. These are more than just pots. They are a complete growing system. What makes them stand out is that many come with a grow light. This lets you enjoy the hobby of indoor gardening, no matter what kind of light your kitchen has.


Look for herb garden ideas that will work with the design of your kitchen. You could have a small modern planter that sits on the counter and grows a handful of small herbs. Or you could have a full-sized planter that sits on the floor and grows many herbs and plants.
There are other modern planters that take the guide work out of caring for your herbs. They have a double-walled design that suspends the plant above the water level. Then if you over water the plant, you won’t drown it. If you forget to water it for a while, the plants can still reach the reservoir and pull from the excess water.
6. Diverse Planter Ideas for Unique Herb Gardens
Your options are limitless when it comes to creating your kitchen garden. Sure, you could have your standard windowsill planter where you plant herbs in several small pots and line them up on a shelf. Or you could have a single trough-style planter that you place several herbs inside of.


If you’re handy, you could build your own planter to fit the exact size of the space you have available. Use some spare wood you have lying around and attach a few pressure clamps. Then you can adjust their size to hold a pot suspended in place.
Another cute idea is finding a vintage milk bottle carrier to place mason or other glass jars inside. You can then move the carrier about with the handle. This makes it easy to move your herbs about the kitchen or house to get the ideal amount of light.
Look for ways you can customize your garden. Maybe there’s a sign on it with your name or an inspirational saying that speaks to you. Don’t forget to add the herb labels as the finishing touch.
7. Create a Thriving Herb Oasis in Containers
If you decide to put your herbs in pots, make sure you set them up for success by planting them correctly. You’ll want to use the right type of soil or potting mix. Not all herbs enjoy rich dirt. Some prefer a more arid and sandy composition.


You’ll also want to have proper drainage for your herb plants. You can achieve this with a hole in the bottom of the pot. If this isn’t possible, create a layer of rocks on the bottom. This will create drainage space under the soil for the water to drain away from the roots. However, it doesn’t completely remove the water, so if you forget to water your herbs, the roots can still reach the excess moisture.
Place your potted herbs in an area where they will get as much natural light as possible. This will help them to grow with plenty of leaves.
8. Maximizing Space with Vertical Herb Garden Designs
The beauty of herbs is they don’t need a lot of space. These aren’t like the plants outside in your landscaping or garden; you only need small herb plants to have plenty of fresh seasoning for your cooking. If you lack square footage, then the only solution is to create a vertical garden.


These indoor gardens use the often unused vertical space in your kitchen to grow your plants. You could put this garden idea to practice in your kitchen by hanging a vertical planter on your wall. If you don’t have the wall space, there are tower planters that can hold multiple herb plants on various levels.
To make your vertical planter a success, place the plants that like drier soil on the top and plants that prefer more water on the bottom. Then place the plants that enjoy the sunlight towards the light and those who prefer indirect light on the other side.
9. Wall-Mounted Herb Garden for a Modern Twist
The traditional method for growing herbs and other plants is in pots or planters. However, herb pots aren’t your only option. Instead, you could grow your favorite herbs in a wall hanging. Some planters have multiple spaces for growing several herbs. They are sometimes made from cloth or fabric but can also be wood or plastic.


Mount the wall hanging planter on a blank space on your wall. Then dedicate each compartment to an herb plant. You could have parsley, lemon balm, and basil, to name a few. This keeps all of your plants contained in one easily maintained planter. The separate compartments also ensure that one plant doesn’t infringe on any of the others.
Another option for your wall hanging is to mount bars on your wall. They might look similar to a towel rod. Then hang small pots on hooks from the bar. Ikea has kitchen organizational kits that make this idea easy to implement in your kitchen.
10. Grow a Windowsill Herb Garden
Just like all other plants, your herbs will enjoy the sunshine. If you want your indoor plants to flourish, consider building a windowsill herb garden. The easiest way to do this is by building a single trough for planting different herbs in. This gives you one pot to maintain and water. The downside of this garden is that you risk one plant taking water and nutrients from another.


Your other option is to build a shelf on which you can place several pots. This gives you the freedom to move the plants around as needed to find the perfect growing spot for each one. You can also easily bring the pot with the herb you want to cook with over to your workspace. This eliminates making several trips back and forth as you’re cooking.
If your kitchen faces the wrong direction, your window may not get enough light. You could compromise by putting your herb garden in a different windowsill that does get the right amount of light.
Indoor Herb Garden FAQs
The best herbs to grow indoors are basil, oregano, parsley, and rosemary. These are perennial herbs that you can get from your local hardware store or garden center. You could even grow many of them from a clipping taken from a more mature plant.
You can grow sage, thyme, rosemary, marjoram, and oregano together. This makes sense since they are all Mediterranean herbs that you see used together when cooking. Basil and parsley grow well together because they prefer similar growing conditions. Mint should always be by itself.
The most important things to consider are proper watering and sunlight. Create adequate drainage so that the roots don’t rot. Then water them just enough to make them happy. Place the herbs in an area of your kitchen that gets plenty of natural sunlight. Then, learn how to harvest your herbs correctly so that you don’t damage the plant when taking your clippings.
10 Backyard Playground Ideas
“You could hear the wind in the leaves, and on that wind traveled the screams of the kids on the playground in the distance, the little kids figuring out how to be alive, how to navigate a world that was not built for them by navigating a playground that was.” – John Green
Outdoor play is a vital part of the childhood experience and what better place to experience it than in your own backyard?
Children who spend ample time playing outdoors gain multiple physical, social, emotional, and intellectual benefits. Therefore, if you have a private backyard of any size, designing a fun backyard playground is a must.
Scroll through our gallery to see dozens of fun DIY backyard playground ideas suitable for kids of all ages. Whether you start with a premade playset or design a DIY backyard play area from scratch, you’ll be on your way to having the best kid-friendly yard on the block.
1. Swing Sets for Timeless Fun
Swing sets offer a blend of fun and physical activity. Incorporating them into your backyard can create a focal point for children’s play.
Choose from wooden or metal sets to match your backyard’s aesthetic and consider adding features like tire swings for added fun.


2. Creative and Cozy Playhouses
If given a choice, many a kid would rather have a playhouse than a swing set. A playhouse is a mini-retreat for an imaginative child; a perfect place for reading books alone or hosting tea parties with friends.
A playhouse can also be integrated into a play structure, either at ground level or elevated with a sandbox tucked beneath. Backyard ideas for play house design can mimic the exterior of your main home.
Or you can go another direction entirely. Design a charming cottage for a creative little girl, or make a small red barn—a perfect touch behind a farmhouse.


A tree house is another great type of backyard playground shelter. Watch this video for tips on locating the perfect tree to hold your treehouse:
3. DIY Playset Projects on a Budget
Building a playset yourself can be cost-effective and customizable. Use materials like repurposed wood or recycled tires, and design it to fit your space and children’s interests.
Sturdy plastic slides, rock wall footholds, and other features are usually structurally sound well after wooden playset parts have worn out.
Browse social media marketplaces for PVC pipe and other material that can safely be repurposed into a swing set frame or teepee poles.
Hang a tire swing from a sturdy tree for an easy, affordable DIY swing. If you have a friend whose kid has outgrown their outdoor playset, ask if you can disassemble it and reuse some of the parts.
Adding personal touches like themed paint jobs can make it unique.


4. Dynamic and Versatile Playsets
Invest in playsets that grow with your child. Look for modular designs that allow for additions like climbing walls or rope ladders.
These adaptable structures can evolve over time to keep up with your child’s developing skills and interests.


5. Building Sandbox Playgrounds
A sandbox is the stuff kid dreams are made of. Who doesn’t have happy memories of digging for hours, creating roads, tunnels, and construction sites? While many playset kits come with an integrated sandbox, it’s easy and inexpensive to build your own.
Note that a sturdy lid is a must for any backyard playground sandbox. It will keep cats and wild animals from urinating or defecating into the sand between play sessions. It will also help keep the sand and outdoor play toys clean.


6. Exciting Backyard Slides
I’m sure your child would agree: a backyard swing set isn’t complete without a fun slide or two. A slide is a great addition to any playset as it encourages climbing. Getting to the top and repeating it helps build physical coordination—an important benefit of backyard play.
Playset slides come in many configurations. Get a short toddler slide if your children are very young.
Tall slides can be a climbing hazard for very small children, but tall, twisting, tunnel slides are ideal for big kids. Make sure you have a soft pad of artificial grass or a thick layer of wood chips beneath for a soft landing.


7. Modern Saucer Swings
Saucer swings are another vital feature when shopping for a playset or designing a DIY swing set. For safety reasons, look for swing set chains that are adjustable for height. A saucer swing set for young children should include at least one swing that has a backrest and safety strap.
These swings are great for both solo and group play, encouraging social interaction. They can be hung from trees or existing swing set frames and are ideal for lounging or active swinging.


8. Energetic Trampoline Fun
Trampolines have long been great ways for active kids to burn off excess energy.
Whether you have a full-sized, freestanding trampoline or a small bouncer pad for toddlers, try to include one in your backyard playground.
Prevent injuries from spoiling the fun by making sure your trampoline has a proper net enclosure. On a small toddler trampoline, a padded bar to hold on to is usually enough.

9. Safe Play with Artificial Grass
Artificial grass in play areas ensures a soft, cushioned surface, reducing the risk of injuries. It’s low maintenance and stays green year-round, making your playground look inviting.
Plus, it’s great for areas where natural grass might struggle to grow.

10. Mulch for Playground Safety
Mulch is not just for aesthetic appeal; it provides a safe landing for kids. It’s an affordable option that’s easy to install and maintain.
Opt for rubber or wood mulch to cushion falls and define play areas distinctly from the rest of your garden.

Backyard Playground FAQs
A playground’s surface is an important safety issue to consider. Its main purpose is to protect little ones from serious injuries while enjoying their play area. The materials most commonly used for backyard playground surfaces are:
- Wood mulch
- Rubber mulch
- Pea gravel
- Sand
- Living grass
- Artificial turf
- Rubber tiles
Most play equipment can be expected to last around eight to ten years. You should frequently inspect your backyard play area, searching for cracks, loose bolts, and broken objects. A poorly maintained playground structure may only last for five years. Wooden mulch will need refreshing every year or two.
10 Bathroom Flooring Ideas
“If no one ever took risks, Michaelangelo would have painted the Sistine floor.” – Neil Simon
What does your bathroom floor look like? If it’s a plain neutral-colored tile, then you are missing out on a prime opportunity for a custom flooring design. Bathroom tile is more than just a floor covering in your bathroom. It is a design element that can transform the look of your bathroom.
These bathroom flooring ideas will help you get inspired for your bathroom remodel. Start from the ground up with your bathroom makeover.
1. Hexagon Bathroom Tiles
Hexagon tiles bring a unique geometry to bathroom spaces, breaking away from traditional square or rectangular shapes. This design is ideal for adding visual interest without overwhelming the space. Hexagon tiles can range from small mosaics to larger formats, allowing for versatility in design. They work exceptionally well in both monochromatic schemes for a subtle look or in varied colors to create a focal point.


2. Patterned Bathroom Tiles
Patterned tiles are a bold choice, ideal for homeowners who want to make a statement. These tiles come in various designs, from intricate vintage motifs to modern geometric patterns. They are often used as an accent in a specific area, such as the shower or as a border, to add character. Patterned tiles can be the centerpiece of a bathroom’s design, dictating the choice of fixtures and accessories.


3. Multi-Colored Floor Tiles
Multi-colored tiles offer a vibrant and lively option for bathroom flooring. They can be used to create a mosaic effect, add a pop of color, or establish a color theme for the bathroom. Choosing harmonious colors can create a cohesive look, while contrasting shades can introduce an element of surprise. These tiles are excellent for family bathrooms or spaces needing a playful touch.

4. Concrete Look Bathroom Tiles
Concrete look tiles bring an industrial and contemporary edge to bathroom design. Their muted, neutral tones provide a sleek and modern appearance, fitting well with minimalist or industrial aesthetics. These tiles are also practical, offering the concrete look without the maintenance requirements of actual concrete. They pair well with metallic fixtures and natural wood accents.


5. White Marble Tiles
White marble tiles exude luxury and sophistication. Their natural veining adds texture and depth, making each tile unique. This classic choice reflects light, helping to make smaller bathrooms feel more spacious. White marble pairs beautifully with both chrome and brass fixtures and can be used to create a timeless, elegant bathroom interior.


6. Classic Ceramic Floor Tiles
Ceramic tiles are a versatile and durable option for bathroom flooring. They come in a wide range of colors, patterns, and finishes, making them suitable for any design aesthetic. Their resistance to moisture and ease of cleaning make them a practical choice for high-traffic bathrooms. Classic ceramic tiles can be laid in various patterns to add visual interest.


7. Non-Slip Floor Tiles
Safety and style meet in non-slip floor tiles. These tiles are designed with texture or matte finishes to provide extra grip in wet conditions. Ideal for family or elderly users, they reduce the risk of slips and falls. Non-slip tiles don’t compromise on aesthetics; they come in a range of colors and patterns, ensuring safety without sacrificing design.

8. Pebble Shower Floors
Pebble shower floors offer a spa-like experience, bringing a natural, organic element to the bathroom. Their textured surface not only massages the feet but also provides a natural non-slip quality. Pebbles can vary in size, color, and finish, allowing for customization to fit any bathroom theme, from tropical to Zen-inspired spaces.

9. Pastel Tiles
Pastel tiles lend a soft, calming vibe to a bathroom. These subtle hues, such as soft pinks, light blues, and mint greens, are perfect for creating a serene, spa-like atmosphere. They work well with natural light and can be complemented with neutral tones or used as a soft backdrop to bolder accents. Pastel tiles are ideal for achieving a gentle, yet stylish look.

10. Vinyl Flooring
Vinyl flooring is a practical, budget-friendly option with a wide range of design possibilities. It can mimic the look of wood, stone, or ceramic, providing a cost-effective alternative to these materials. Vinyl is water-resistant, durable, and comfortable underfoot, making it suitable for busy family bathrooms. It’s easy to install and maintain, perfect for quick renovations.


Bathroom Flooring FAQs
The most popular flooring option for bathrooms is tile. Porcelain and ceramic tiles are sturdy, durable, and waterproof. You can find tile in any color, shape, size, and pattern. When installed correctly and given proper care, tile floors can last many decades.
The easiest flooring to install is vinyl sheeting. However, it tends to look a bit cheap. The next easiest is vinyl plank flooring. It’s nicer because it has a more upscale look and can last for longer.
As long as you aren’t letting water pool, you should be fine to use laminate flooring in the bathroom. It’s durable enough to withstand dripping while you towel off after a shower. It’s also strong enough to withstand heavy traffic, dropped hot tools, and personal care products. It also resists staining. However, some laminate floor manufacturers do not recommend use of their products in the bathroom for fear of water damage.
Contents
