There’s something undeniably charming about a brick fireplace. However, as time passes, it can start to feel outdated or mismatched with the rest of your home’s aesthetic.
Luckily, there’s a simple solution that doesn’t involve a total renovation—paint. With a bit of time, the right tools, and a touch of creativity, you can transform your old brick fireplace into a stunning focal point that can dramatically elevate your living space.
Whether you’re a seasoned DIY expert or this is your first home improvement project, we’ll walk you through the process, step-by-step, to help you achieve a professional-looking finish. So, let’s roll up our sleeves and breathe new life into that old fireplace!
Read also: How to Update a 1970s Stone Fireplace
[view_toc]
Step 1: Gather Necessary Materials and Tools
Here’s a list of the materials, tools, and equipment you’ll need for painting a brick fireplace:
Materials:
- Primer: Preferably a stain-blocking, oil-based primer to help cover any soot stains and prevent them from seeping through the paint.
- Paint: Latex paint or a paint specifically designed for masonry is best. Choose your desired color.
- Trisodium Phosphate (TSP): This is a heavy-duty cleaner you’ll use to clean the fireplace before painting.
Tools & Equipment:
- Paintbrushes: A combination of angled and straight brushes will help you cover all areas.
- Paint roller: A roller designed for rough surfaces will help you get even coverage on the brick.
- Painter’s tape: You’ll use this to protect areas around the fireplace that you don’t want to get paint on.
- Drop cloth or plastic sheeting: To protect your flooring and any nearby furniture.
- Cleaning brushes: Stiff-bristle brushes will help you clean the brick before painting.
- Safety gear: This includes gloves, goggles, and a mask to protect you while you’re cleaning and painting.
Remember, investing in high-quality tools and materials will pay off in the long run, as it will help you achieve a professional-looking finish. Before you begin the project, gather all your tools and materials so everything is at hand, making the process smoother and more efficient.
Step 2: Preparation
Begin by prepping the area around your fireplace. Use a drop cloth or plastic sheeting to cover your floors and any furniture nearby. Then, use painter’s tape to protect the walls around the fireplace and any metal or glass elements you don’t want to get paint on.
Step 3: Safety First
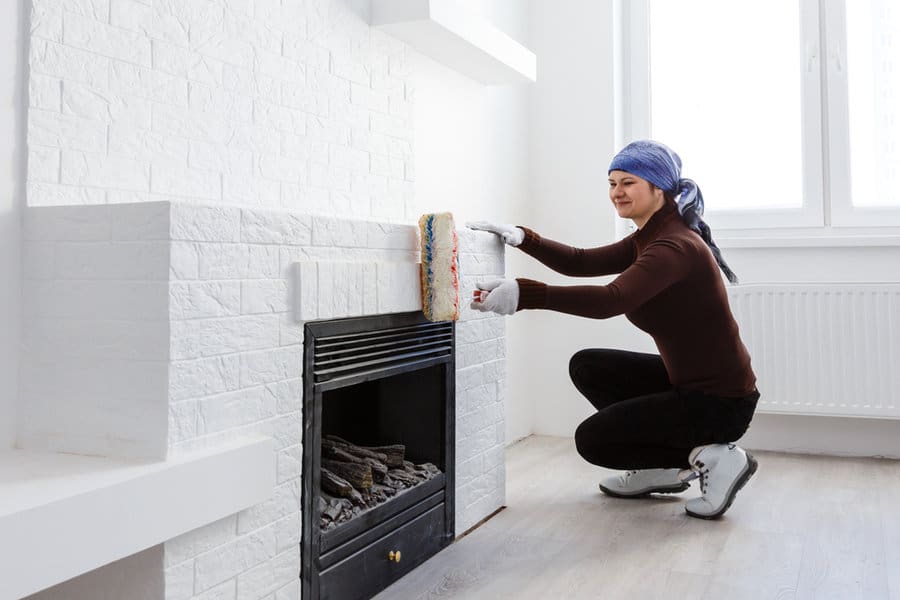
Put on your safety gear—gloves, goggles, and a mask. This will protect your skin, eyes, and respiratory system from dust and chemical exposure.
Step 4: Clean the Fireplace
Use a stiff-bristle brush to remove any loose debris or dust from the bricks. After that, prepare a cleaning solution with trisodium phosphate (TSP) according to the manufacturer’s instructions. Apply this solution to the bricks and scrub thoroughly. This will help the primer and paint adhere better to the surface. After cleaning, let the fireplace dry completely.
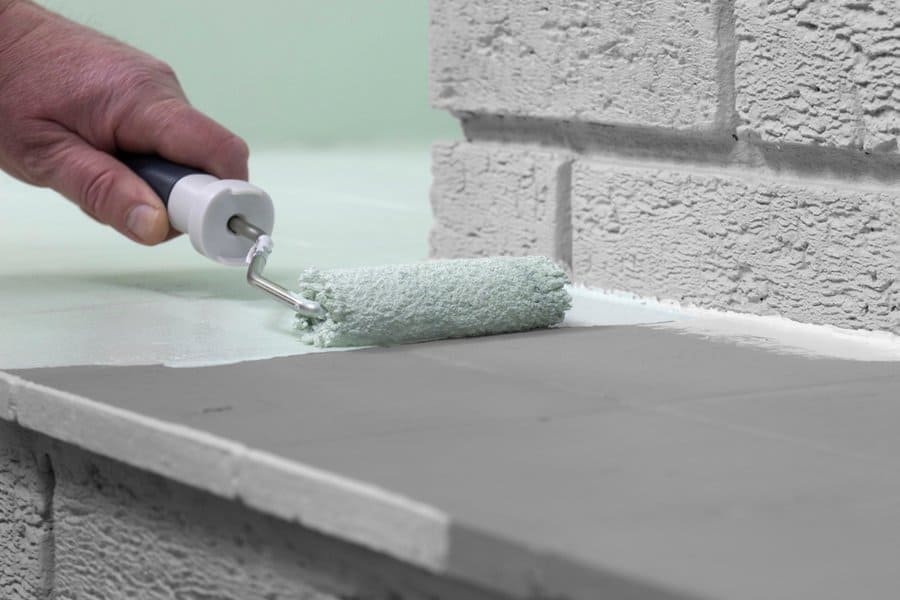
Step 5: Apply the Primer
Using your paintbrushes, apply a coat of your stain-blocking, oil-based primer to the entire surface of the brick fireplace. The angled brush can help you get into the deep crevices of the brick and mortar. This step might take time, but patience will pay off with a more professional-looking result. Allow the primer to dry as per the manufacturer’s instructions.
Step 6: Paint the Fireplace
Once the primer is completely dry, you can start painting. Use the paint roller for the larger areas and the paintbrushes for the corners and crevices. It’s best to start from the top and work your way down to prevent dripping on completed areas. You might need multiple coats to get even coverage and achieve your desired color. Make sure to let each coat dry before applying the next.
Step 7: Clean Up and Enjoy
After the paint is dry, remove the painter’s tape carefully. Clean your brushes and rollers, and remove the drop cloths or plastic sheeting. Step back and enjoy your newly transformed, painted brick fireplace!
This project might take a weekend or a few days to complete, depending on the size of your fireplace and the drying time between coats. But the result—a beautiful, updated fireplace that enhances your home’s aesthetic—is well worth the effort.
Read also: What Color to Paint Fireplace Surround?